9 Smart Fishing Kayak Storage Solutions for Home & Garage
Roughly 3.6 million Americans own a kayak, yet the majority store theirs directly on the ground, a habit that accelerates hull damage, creates tripping hazards, and wastes valuable floor space. Whether a sit-on-top fishing kayak weighs 55 pounds or a loaded tandem tips the scale past 100, improper storage shortens its lifespan and clutters the home. The good news: the 9 Smart Fishing Kayak Storage Solutions for Home & Garage covered in this guide solve every one of those problems without requiring a contractor or a large budget.
Disclosure: This post contains affiliate links. As an Amazon Associate, we earn from qualifying purchases, and at no extra cost to you.
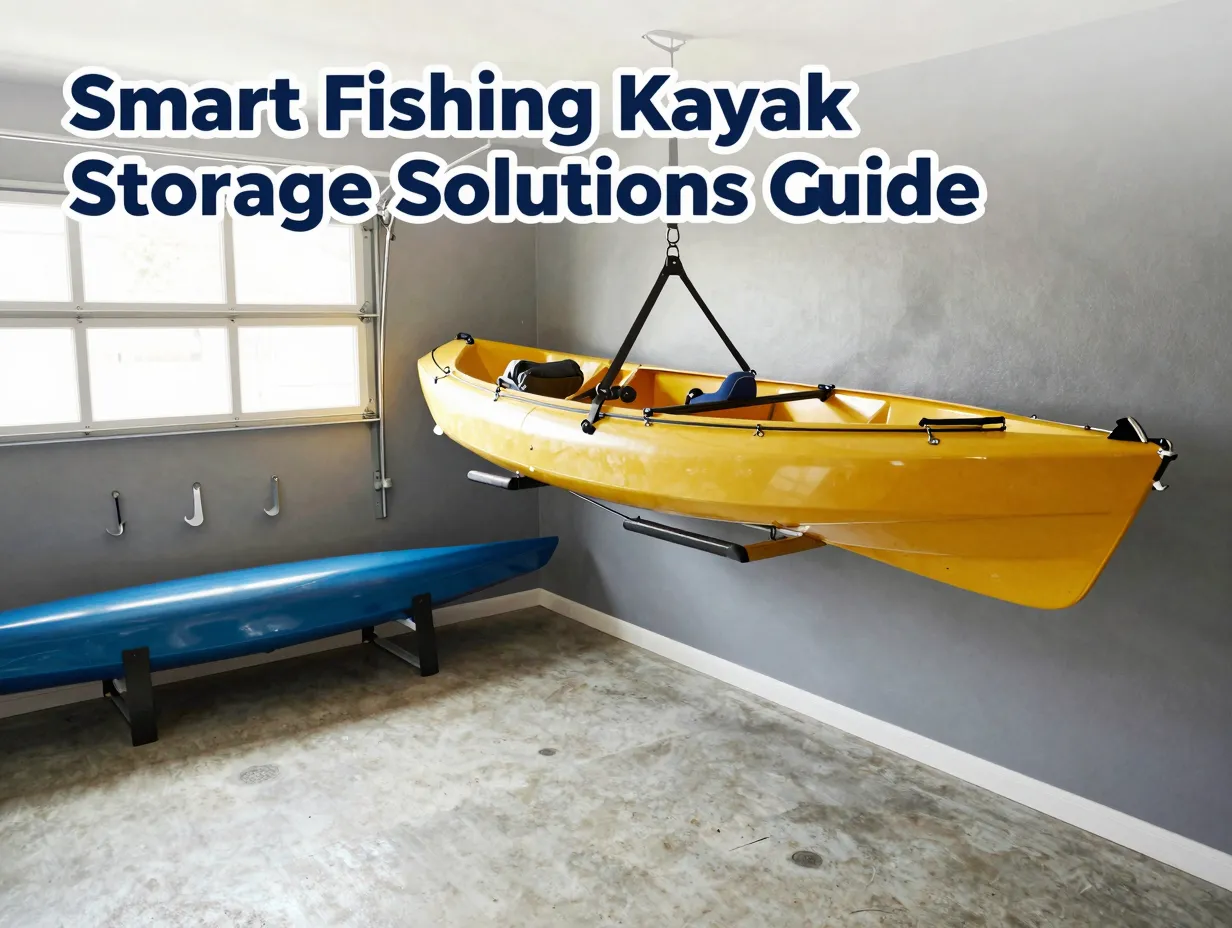
From ceiling hoists to freestanding racks, each solution below is practical, scalable, and designed for real homes with limited square footage. Read on to find the right fit for any garage, shed, basement, or outdoor space.
Key Takeaways
- Storing a kayak on its hull for extended periods causes permanent warping; wall mounts and ceiling systems prevent this.
- Vertical and ceiling-based storage solutions free up the most floor space in tight garages.
- Weatherproof covers and UV-resistant materials are essential for any outdoor storage option.
- Combining storage solutions, such as a ceiling hoist plus a wall-mounted rod rack, maximizes both safety and organization.
- The right storage system depends on kayak weight, ceiling height, available wall space, and budget.
Why Proper Fishing Kayak Storage Matters
A fishing kayak is a significant investment. Entry-level models start around $400, while high-performance sit-on-top fishing kayaks regularly exceed $3,000. Protecting that investment starts with how the boat is stored between trips.
Hull damage is the most common consequence of poor storage. Polyethylene hulls, which make up the majority of fishing kayaks, are thermoplastic, meaning they deform under sustained pressure or heat. A kayak left resting on a concrete garage floor in a warm summer garage can develop a permanent flat spot within a single season.
Beyond the kayak itself, disorganized storage creates safety risks. A kayak lying across a garage floor blocks vehicles, creates a fall hazard, and makes accessing gear inefficient. Proper storage systems eliminate these problems while also protecting paddles, rods, and accessories.
“The best storage system is the one that makes it easy to get on the water quickly, and just as easy to put everything away properly afterward.”
Common Storage Mistakes to Avoid
- Resting the kayak hull-down on a hard, flat surface for weeks at a time
- Storing in direct sunlight without UV protection
- Hanging by the grab handles, which stresses the hull at narrow contact points
- Leaving straps or ropes in contact with the hull under tension for extended periods
- Ignoring weight limits on wall brackets or ceiling anchors
The 9 Smart Fishing Kayak Storage Solutions for Home & Garage
The following nine solutions are ranked from the most space-efficient to the most accessible, covering a wide range of budgets, spaces, and kayak types.
1. Ceiling-Mounted Pulley Hoist System
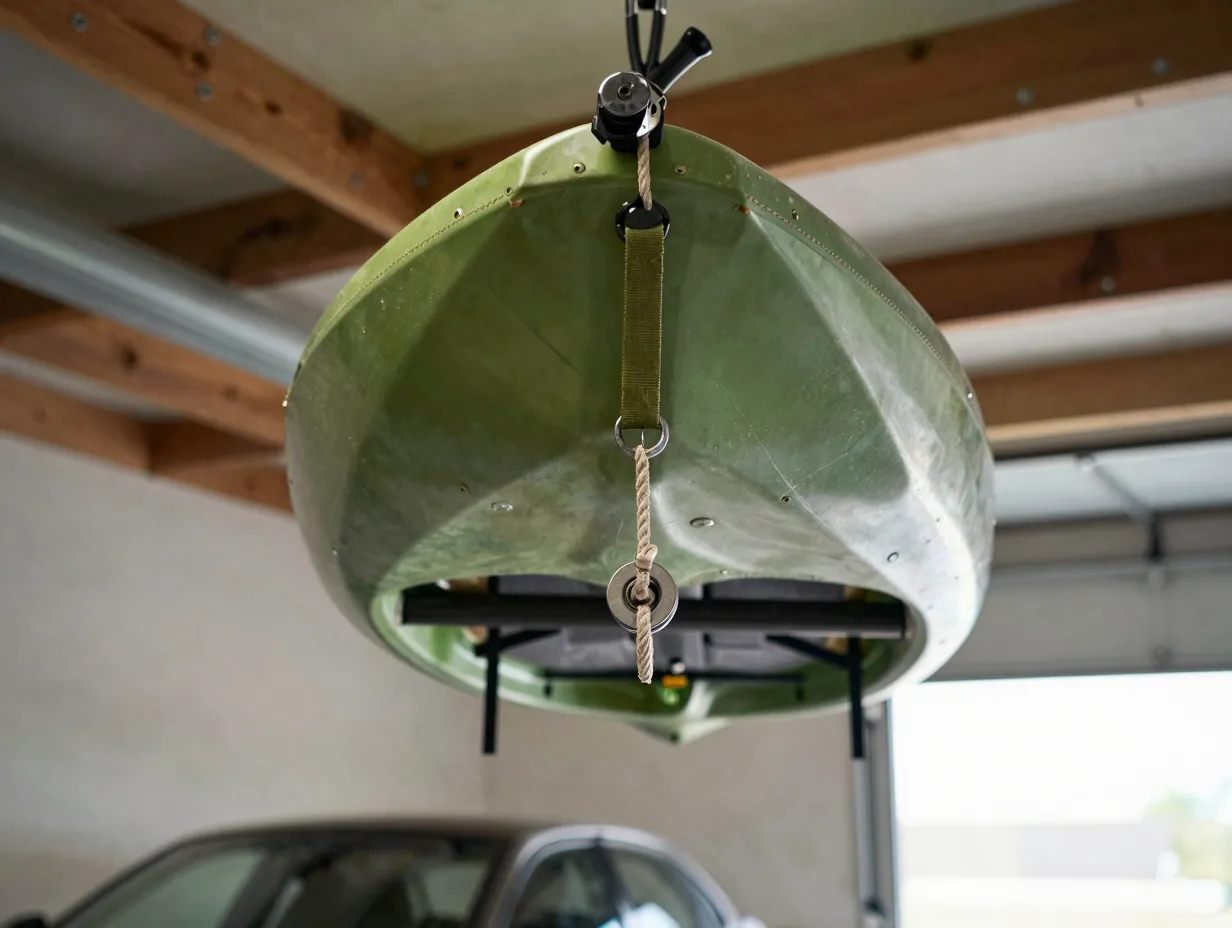
A ceiling-mounted pulley hoist is widely considered the gold standard for garage kayak storage. The system uses a set of heavy-duty straps, pulleys, and a locking mechanism to lift the kayak off the floor and suspend it near the ceiling, completely out of the way.
How it works: Two padded cradles attach to the kayak’s hull at balanced points. A rope-and-pulley system allows one person to raise or lower the kayak with minimal effort. Most systems include a locking cleat that holds the kayak securely at ceiling height.
Best for: Garages with 10- to 14-foot ceilings and limited wall space.
Key specs to look for:
- Weight capacity of at least 125 lbs (to accommodate a loaded kayak)
- Padded, wide cradles that distribute hull pressure evenly
- A secure locking mechanism rated for static loads
- Hardware rated for lag-bolt installation into ceiling joists
Estimated cost: $30 to $120 depending on brand and weight rating.
One important note: always anchor hoist hardware into structural ceiling joists, never into drywall alone. Use a stud finder before drilling and verify the joist’s load-bearing capacity.
2. Wall-Mounted J-Style Kayak Cradles
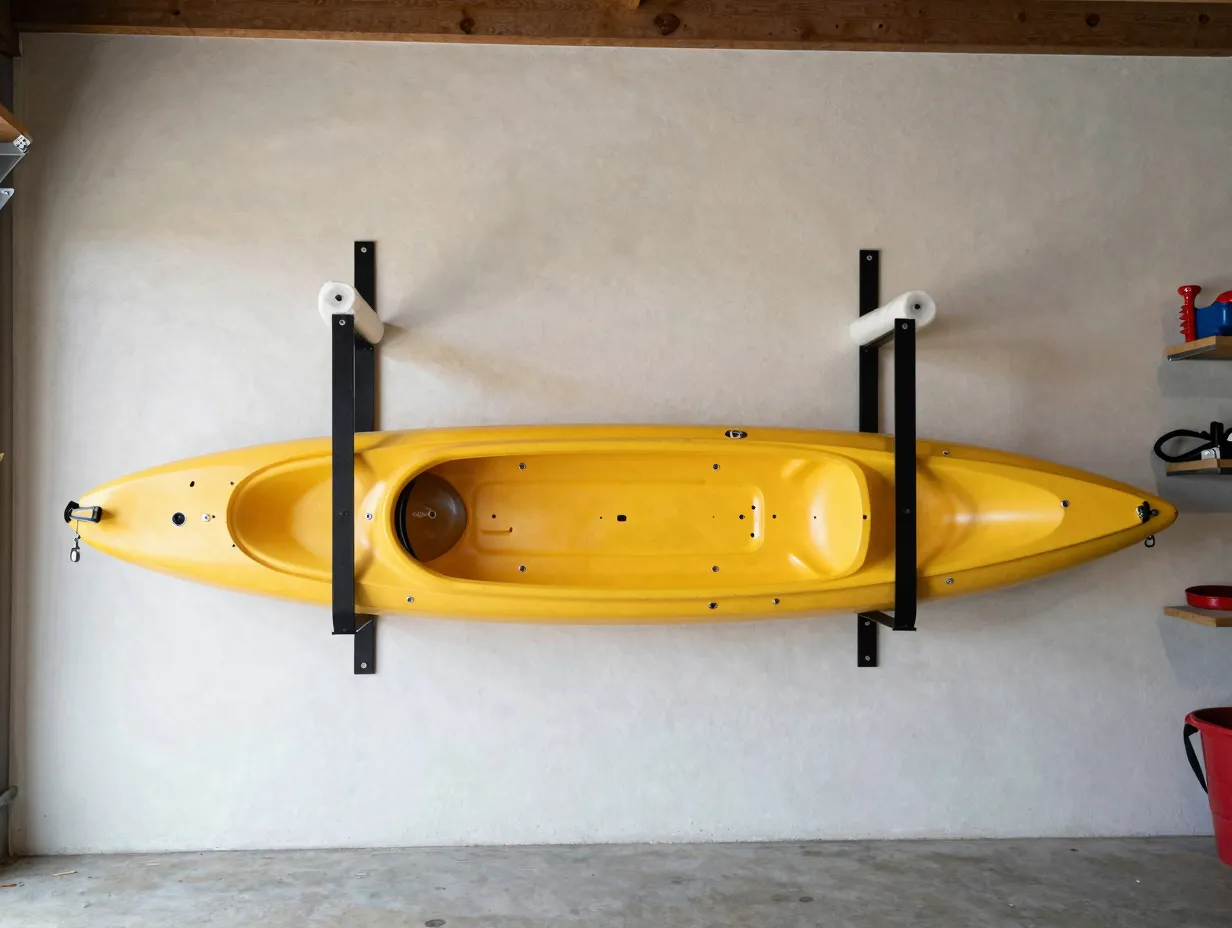
Wall-mounted J-style cradles are among the most popular and affordable solutions for home kayak storage. The “J” shape cradles the kayak on its side, which is the correct storage orientation for most polyethylene hulls.
Why side storage is better: Storing a kayak on its side distributes the hull’s weight along its stronger, more rigid edge rather than concentrating pressure on the flat bottom.
Installation: J-cradles mount directly into wall studs using lag bolts. Most sets include two cradles positioned 24 to 36 inches apart along the wall. The kayak slides in at an angle and rests securely.
Best for: Garages or sheds with open wall space and stud framing.
Advantages:
- Low profile, kayak sits close to the wall
- Affordable (most sets cost $40 to $90)
- Easy single-person loading for kayaks under 70 lbs
- Compatible with most sit-on-top fishing kayak widths
Tip: Add foam pipe insulation or pool noodle sections to the cradle arms if the factory padding seems thin. This reduces hull contact pressure significantly.
3. Freestanding Kayak Storage Rack
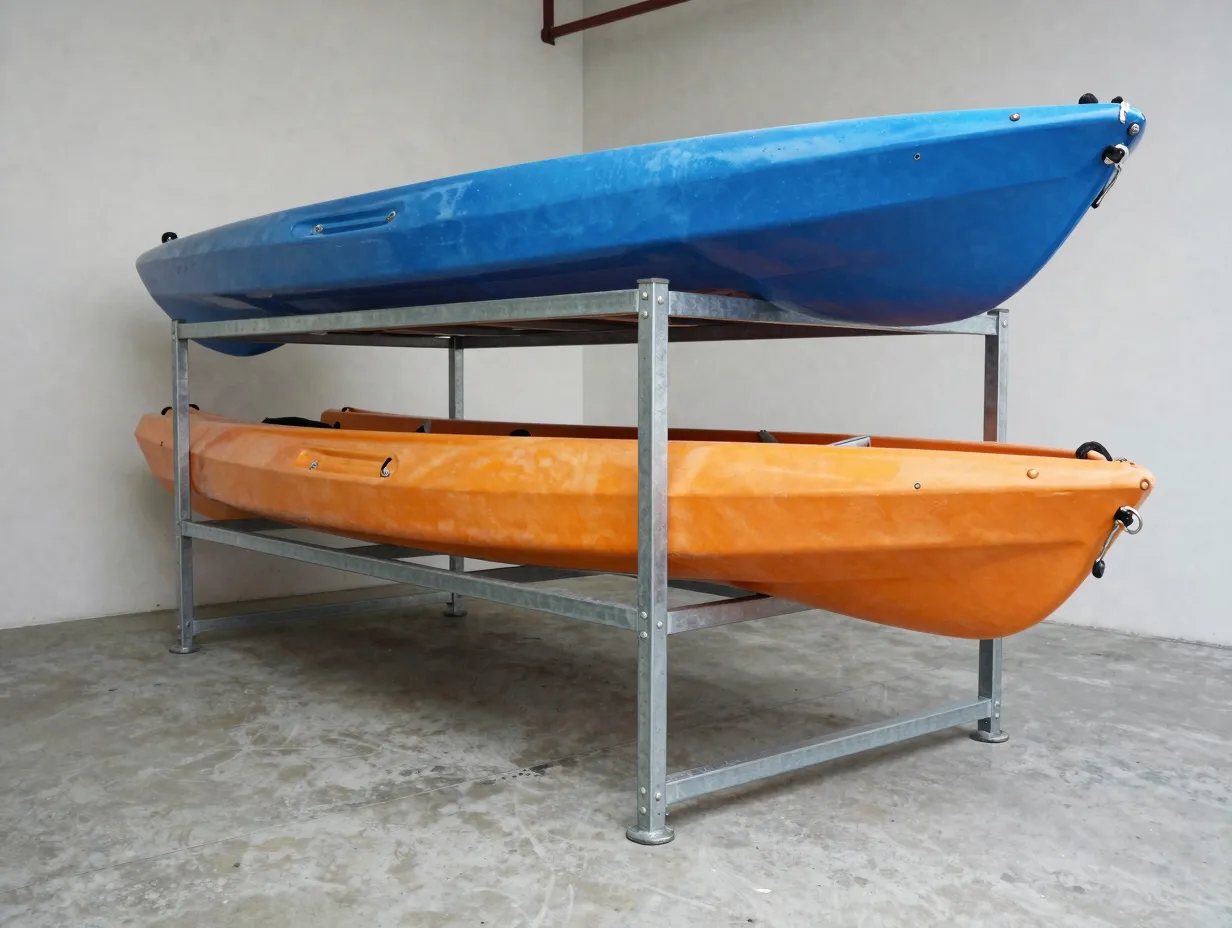
A freestanding rack is the most flexible option because it requires no wall or ceiling anchors. These racks typically hold one to four kayaks and can be positioned anywhere in a garage, shed, or even outdoors under a cover.
Best for: Renters, those with concrete block walls (difficult to anchor into), or anyone who rearranges their garage frequently.
Construction options:
- Steel powder-coated racks: Durable, weather-resistant, typically hold 150 to 250 lbs per arm. Cost: $80 to $200.
- DIY lumber racks: Built from 2×4 or 4×4 framing, custom-sized to fit the kayak and space. Cost: $20 to $60 in materials.
Space consideration: A standard freestanding rack for two kayaks occupies roughly 6 feet of floor length and 3 feet of width. That is a meaningful footprint, so this solution works best in larger garages or dedicated storage areas.
4. Vertical Wall Storage with Nose-Up Mount
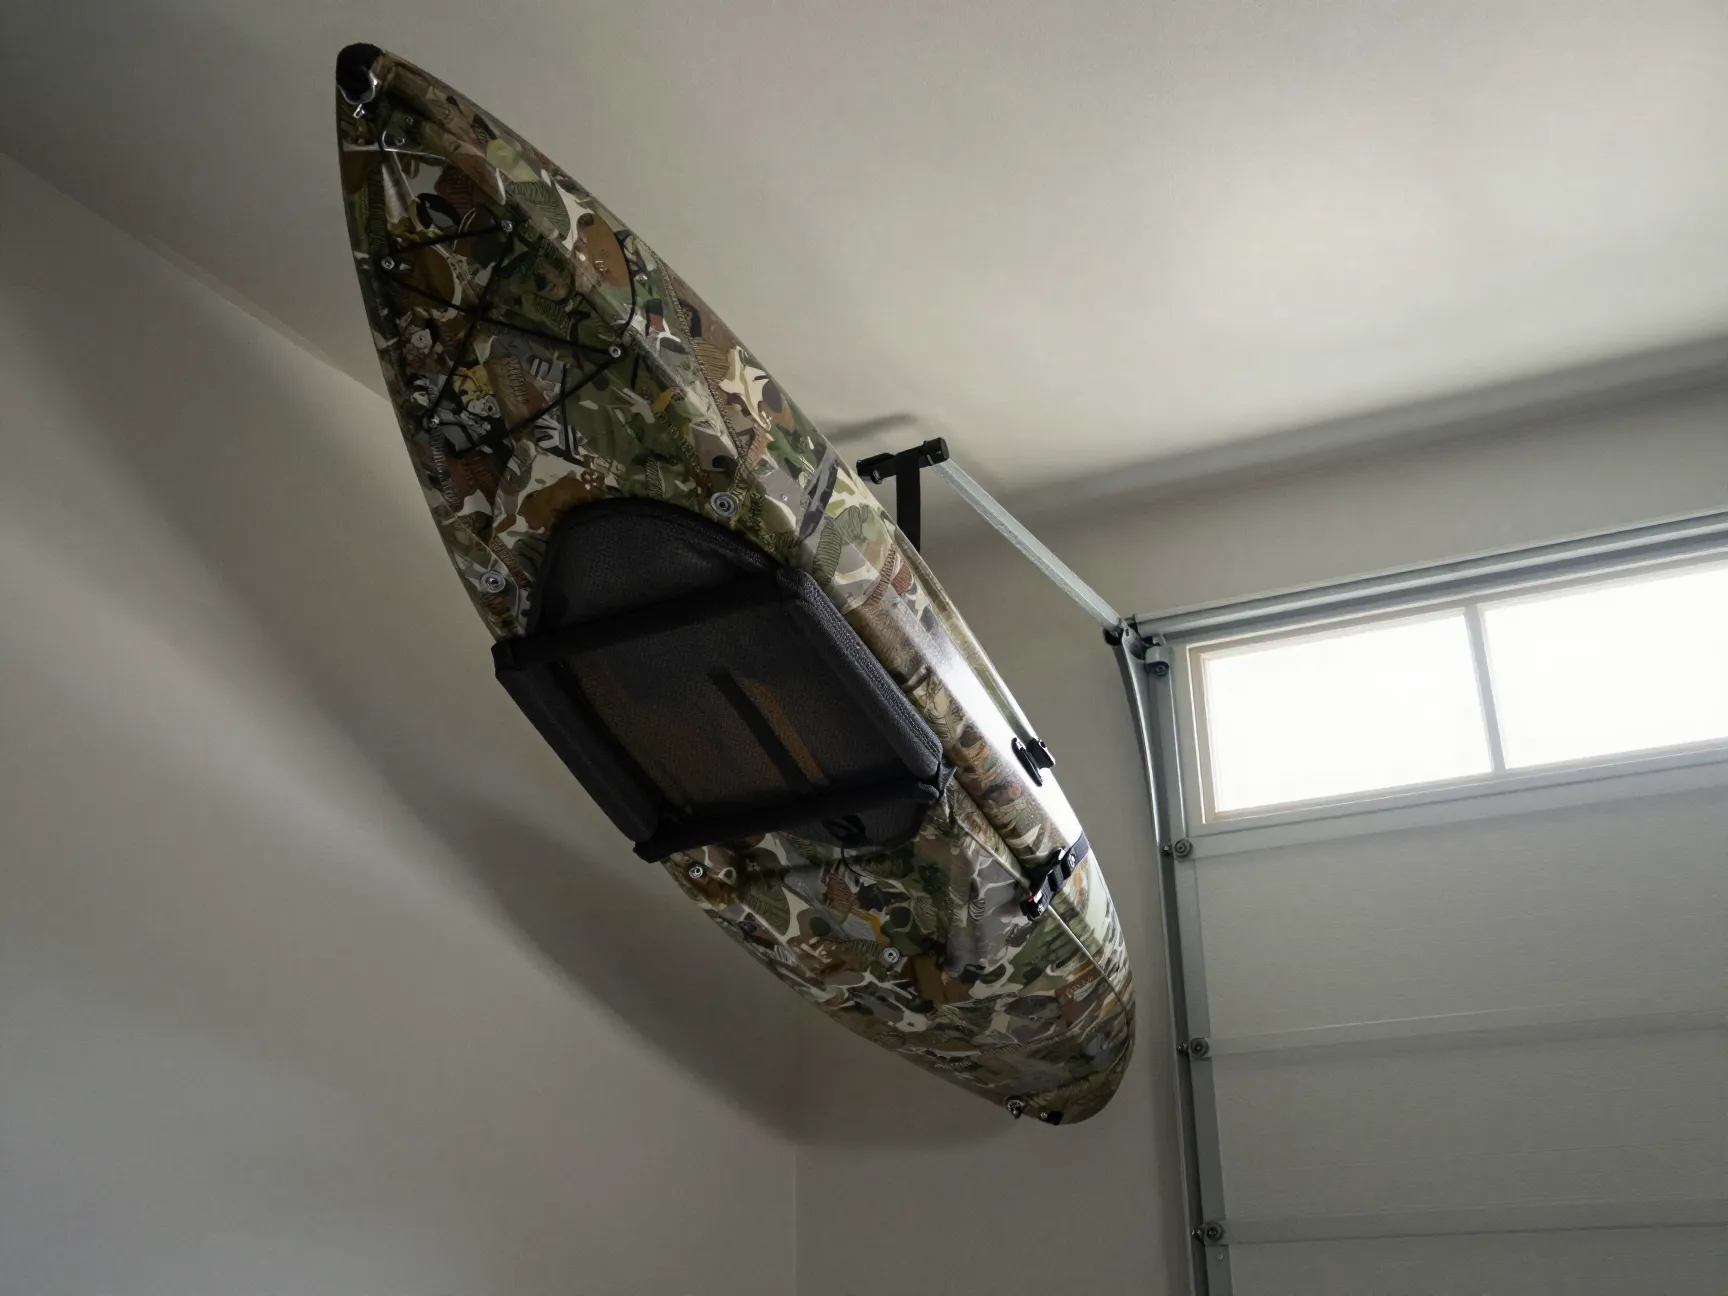
Storing a kayak vertically, nose pointing toward the ceiling, is one of the most space-efficient options available. A single kayak stored vertically occupies less than 2 square feet of floor space.
How it works: A padded cradle or saddle mounts to the wall at approximately hip height to support the kayak’s bow. A second hook or strap near the top of the wall or ceiling keeps the kayak from tipping forward.
Best for: Narrow garages, small sheds, or spaces where floor and ceiling clearance is limited but wall height is available.
Caution: Not all fishing kayaks are ideal for vertical storage. Kayaks with flat, wide bows (common in pontoon-style fishing designs) may not balance well in a nose-up position. Always test stability before leaving the kayak unattended.
Cost: $25 to $75 for wall-mount hardware; DIY versions cost less than $20 in lumber and foam.
5. Overhead Garage Ceiling Rack (Flat Storage)
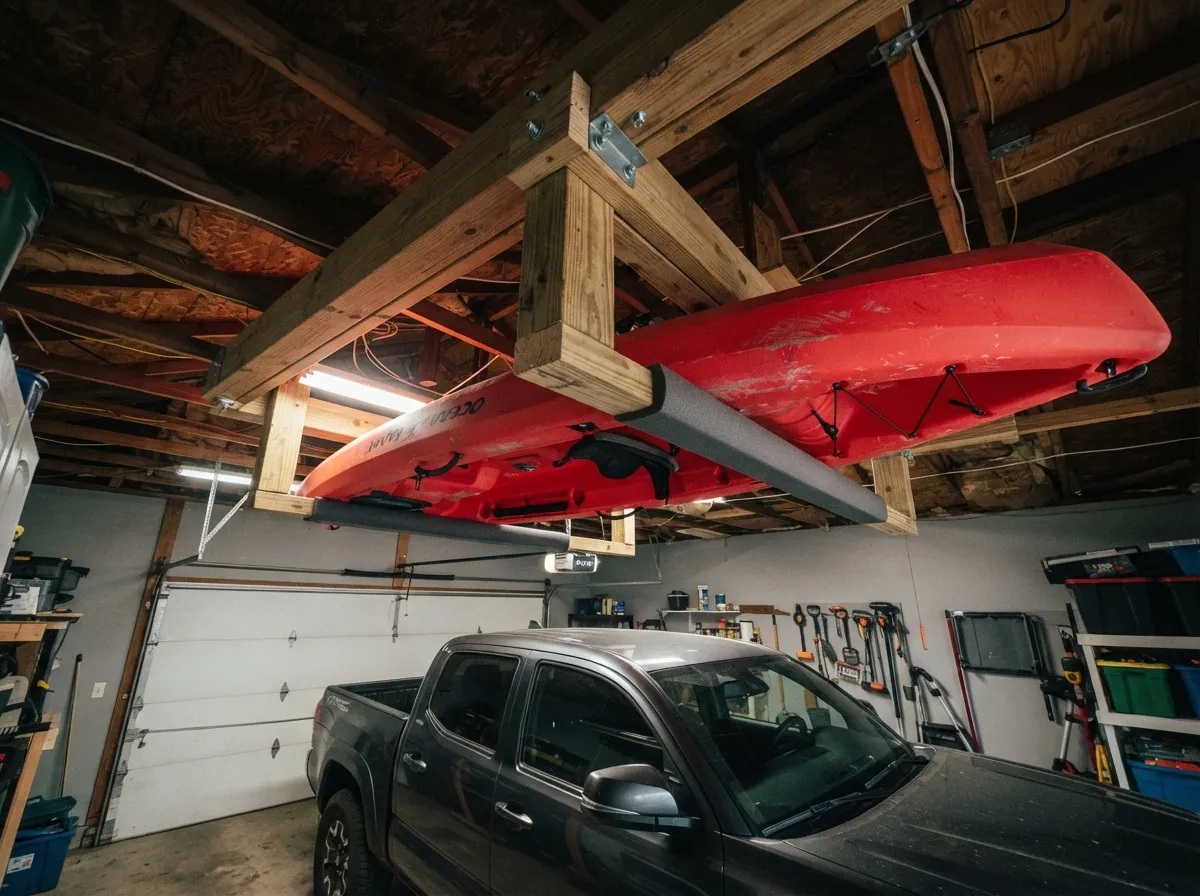
Unlike a pulley hoist, a fixed overhead ceiling rack holds the kayak flat and stationary at ceiling height. These racks are bolted directly into ceiling joists and use wide padded arms to cradle the hull.
Best for: Garages where the kayak is used infrequently (once or twice a month) and where a second person is available to help load and unload.
Key advantage: Flat overhead racks are extremely stable. There are no moving parts, no ropes to manage, and no risk of the locking mechanism failing.
Drawback: Loading a 70-pound kayak overhead without a pulley system requires two people and some coordination. This is not the right solution for solo paddlers who fish frequently.
Cost: $50 to $150 for commercial overhead racks; DIY versions using 2×6 lumber and lag bolts cost $30 to $60.
6. Freestanding Kayak Storage Cart with Wheels
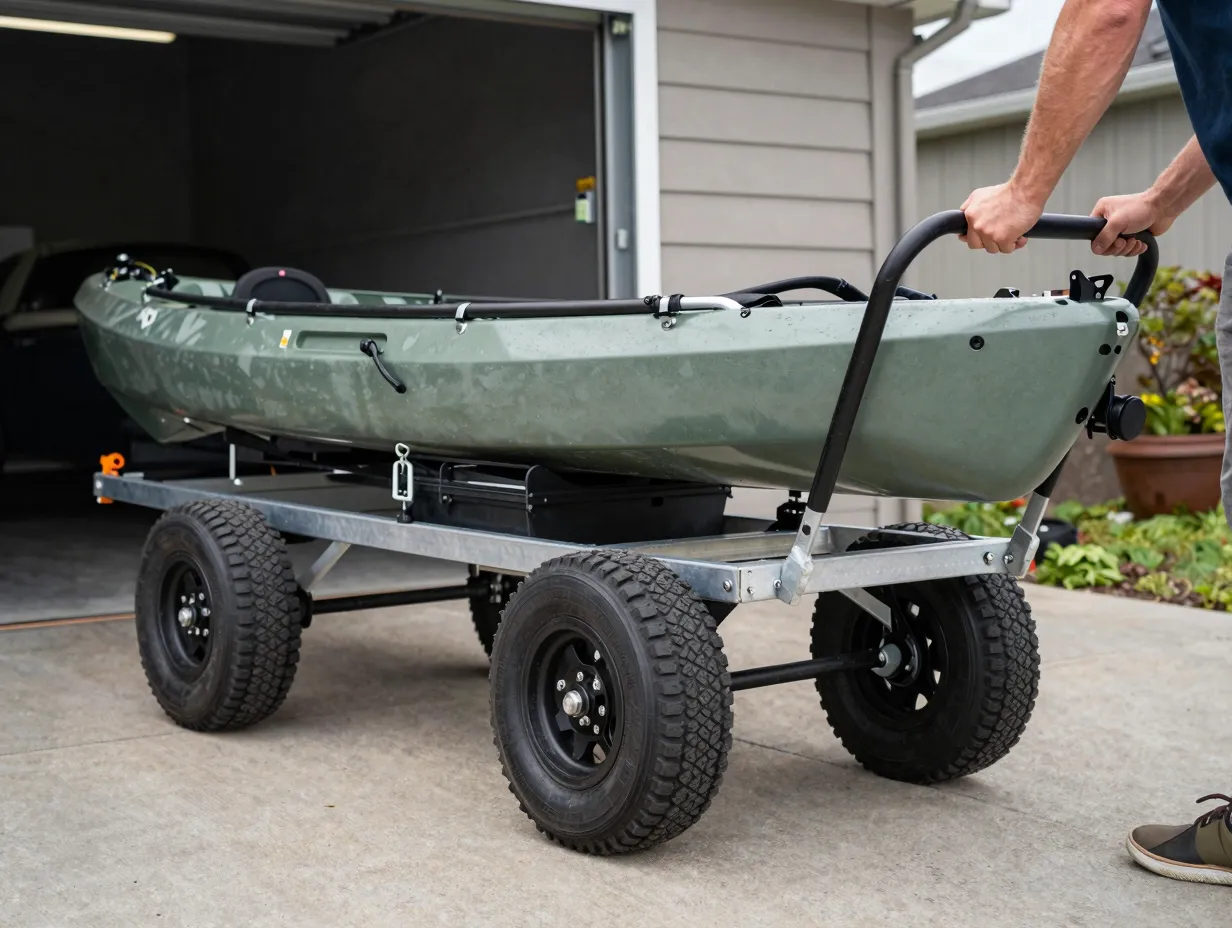
A wheeled kayak cart serves double duty: it stores the kayak and also transports it from the garage to the vehicle or launch point. The cart cradles the kayak at its widest point and rolls on pneumatic or solid rubber wheels.
Best for: Anglers who fish frequently and want to minimize the number of times they lift the kayak on and off a rack.
Practical benefit: A wheeled cart eliminates the need for a separate launch cart. Load the kayak onto the cart in the garage, roll it to the vehicle, load it, and use the same cart at the boat ramp.
Weight capacity: Most commercial carts handle 150 to 300 lbs. Check the rating carefully for heavier fishing kayaks loaded with gear.
Cost: $40 to $150 depending on wheel type and frame material.
Limitation: A cart occupies floor space and does not free up the garage the way a wall or ceiling system does. It is best paired with a wall hook for the paddle and a rod rack to keep the full setup organized.
7. Outdoor Kayak Storage with Weatherproof Cover
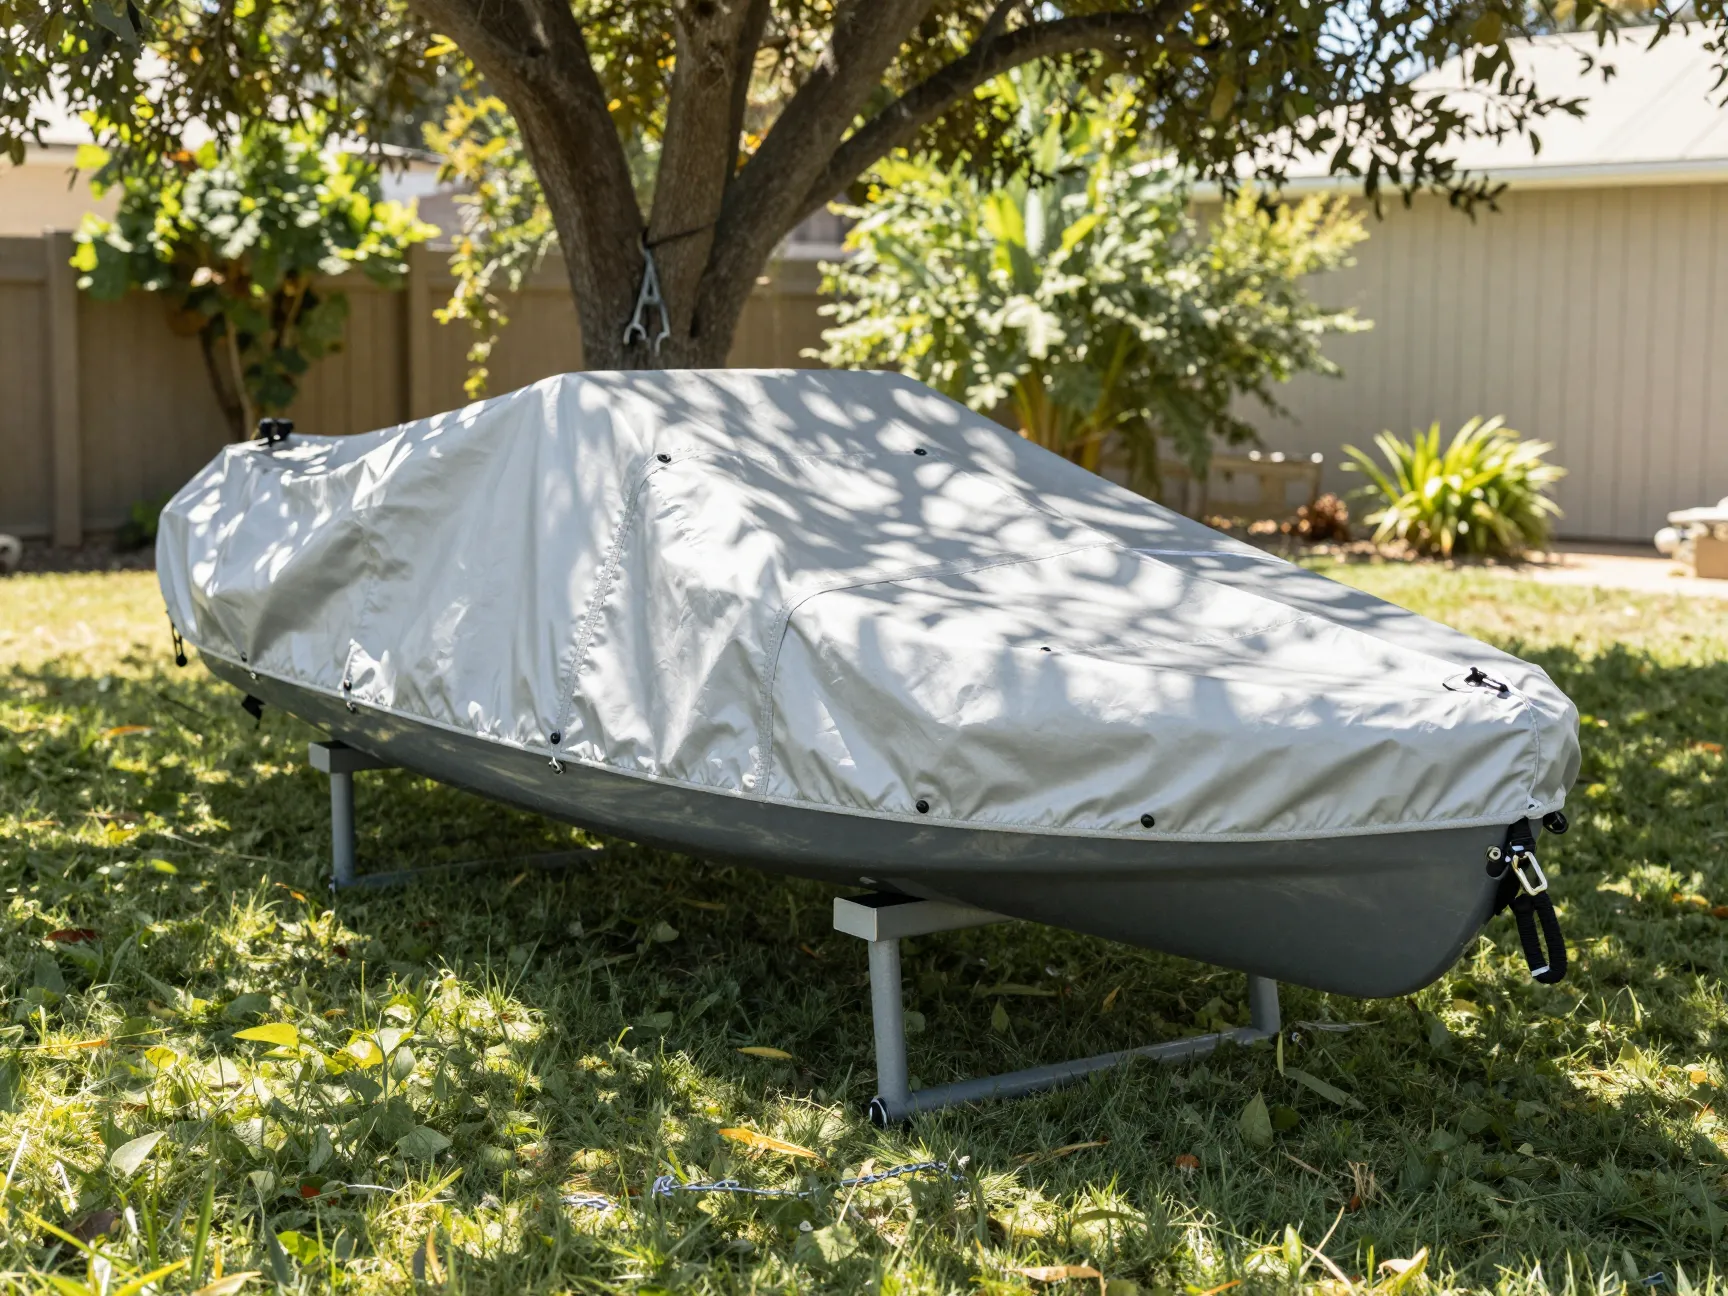
Not every home has garage space available. Outdoor storage is a practical alternative when done correctly. The key is protecting the kayak from three primary threats: UV radiation, moisture, and physical impact.
Essential components of outdoor storage:
- A purpose-built kayak cover rated for UV resistance (look for covers with a UPF rating of 50+)
- A storage rack or cradles that keep the kayak off the ground (prevents moisture wicking and pest intrusion)
- A security cable or lock to deter theft
Best for: Homes without garages, or anglers with multiple kayaks who have run out of indoor space.
UV damage is real: Prolonged UV exposure degrades polyethylene and composite kayak materials, causing fading, brittleness, and eventual cracking. A quality cover extends hull life by years.
Cost: $30 to $80 for a quality cover; $50 to $150 for an outdoor rack or cradle set.
Additional tip: Position the kayak in a shaded area if possible, under a deck overhang, carport, or large tree. Even with a cover, reduced direct sun exposure extends material life.
8. Garage Wall-Mounted Fishing Kayak Organization System
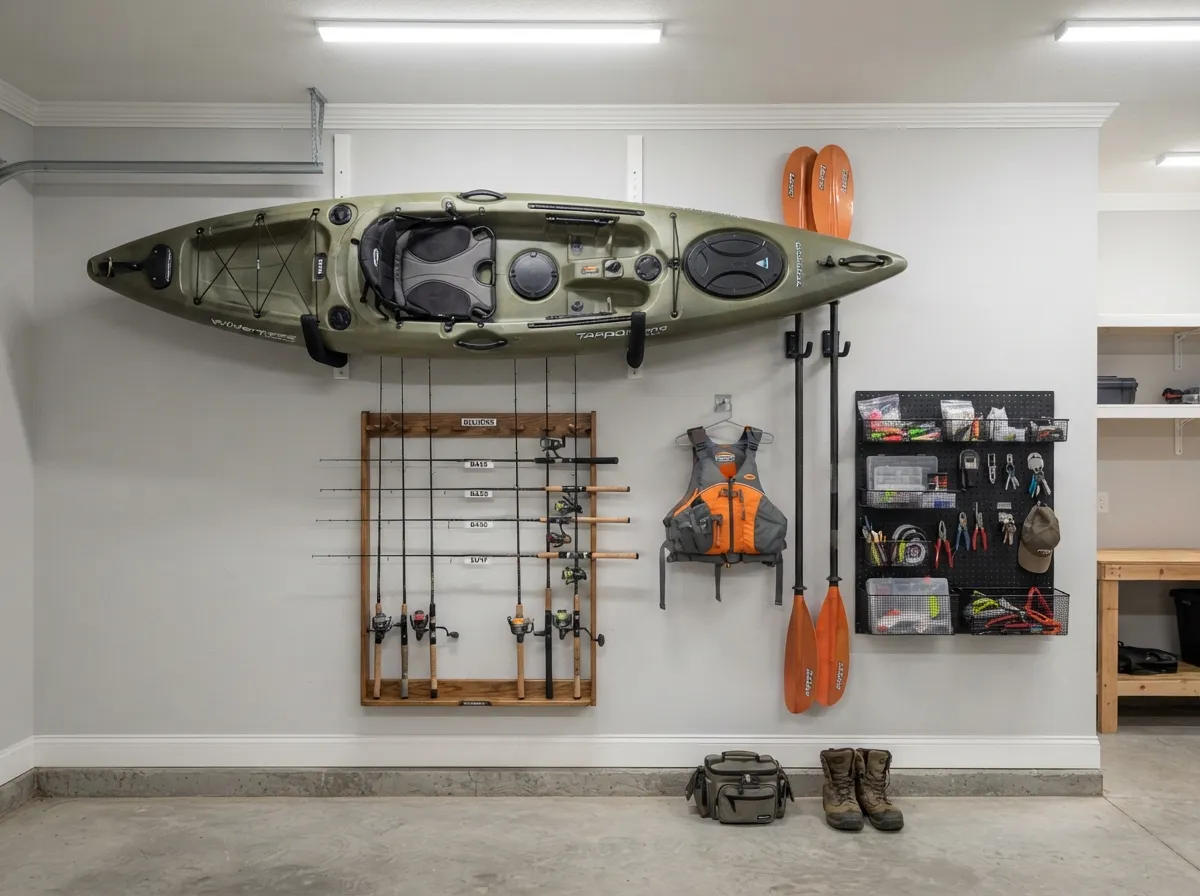
This solution goes beyond storing the kayak itself and addresses the full fishing setup: kayak, paddles, rods, tackle, PFDs, and accessories. A wall-mounted organization system uses a combination of brackets, hooks, bins, and racks to consolidate everything in one dedicated wall section.
Components of a complete wall organization system:
- J-style or flat kayak cradles for the hull
- Vertical fishing rod holders (wall-mounted, holding 6 to 12 rods)
- Paddle hooks (simple J-hooks or dedicated paddle holders)
- Mesh bins or pegboard panels for small gear (pliers, sunscreen, safety whistles)
- A dedicated hook or shelf for the PFD
Best for: Serious anglers who want a single, efficient staging area where everything is ready to grab before a trip.
Space required: A well-designed wall system for one kayak and full gear typically uses a 6- to 8-foot wide wall section.
Cost: $100 to $300 for a complete commercial system; $50 to $150 for a DIY build using pegboard, lumber, and standard hardware.
Organizing the full fishing kit on one wall cuts pre-trip prep time dramatically and eliminates the frustration of hunting for gear the morning of a fishing day.
9. Shed or Outbuilding Dedicated Kayak Storage
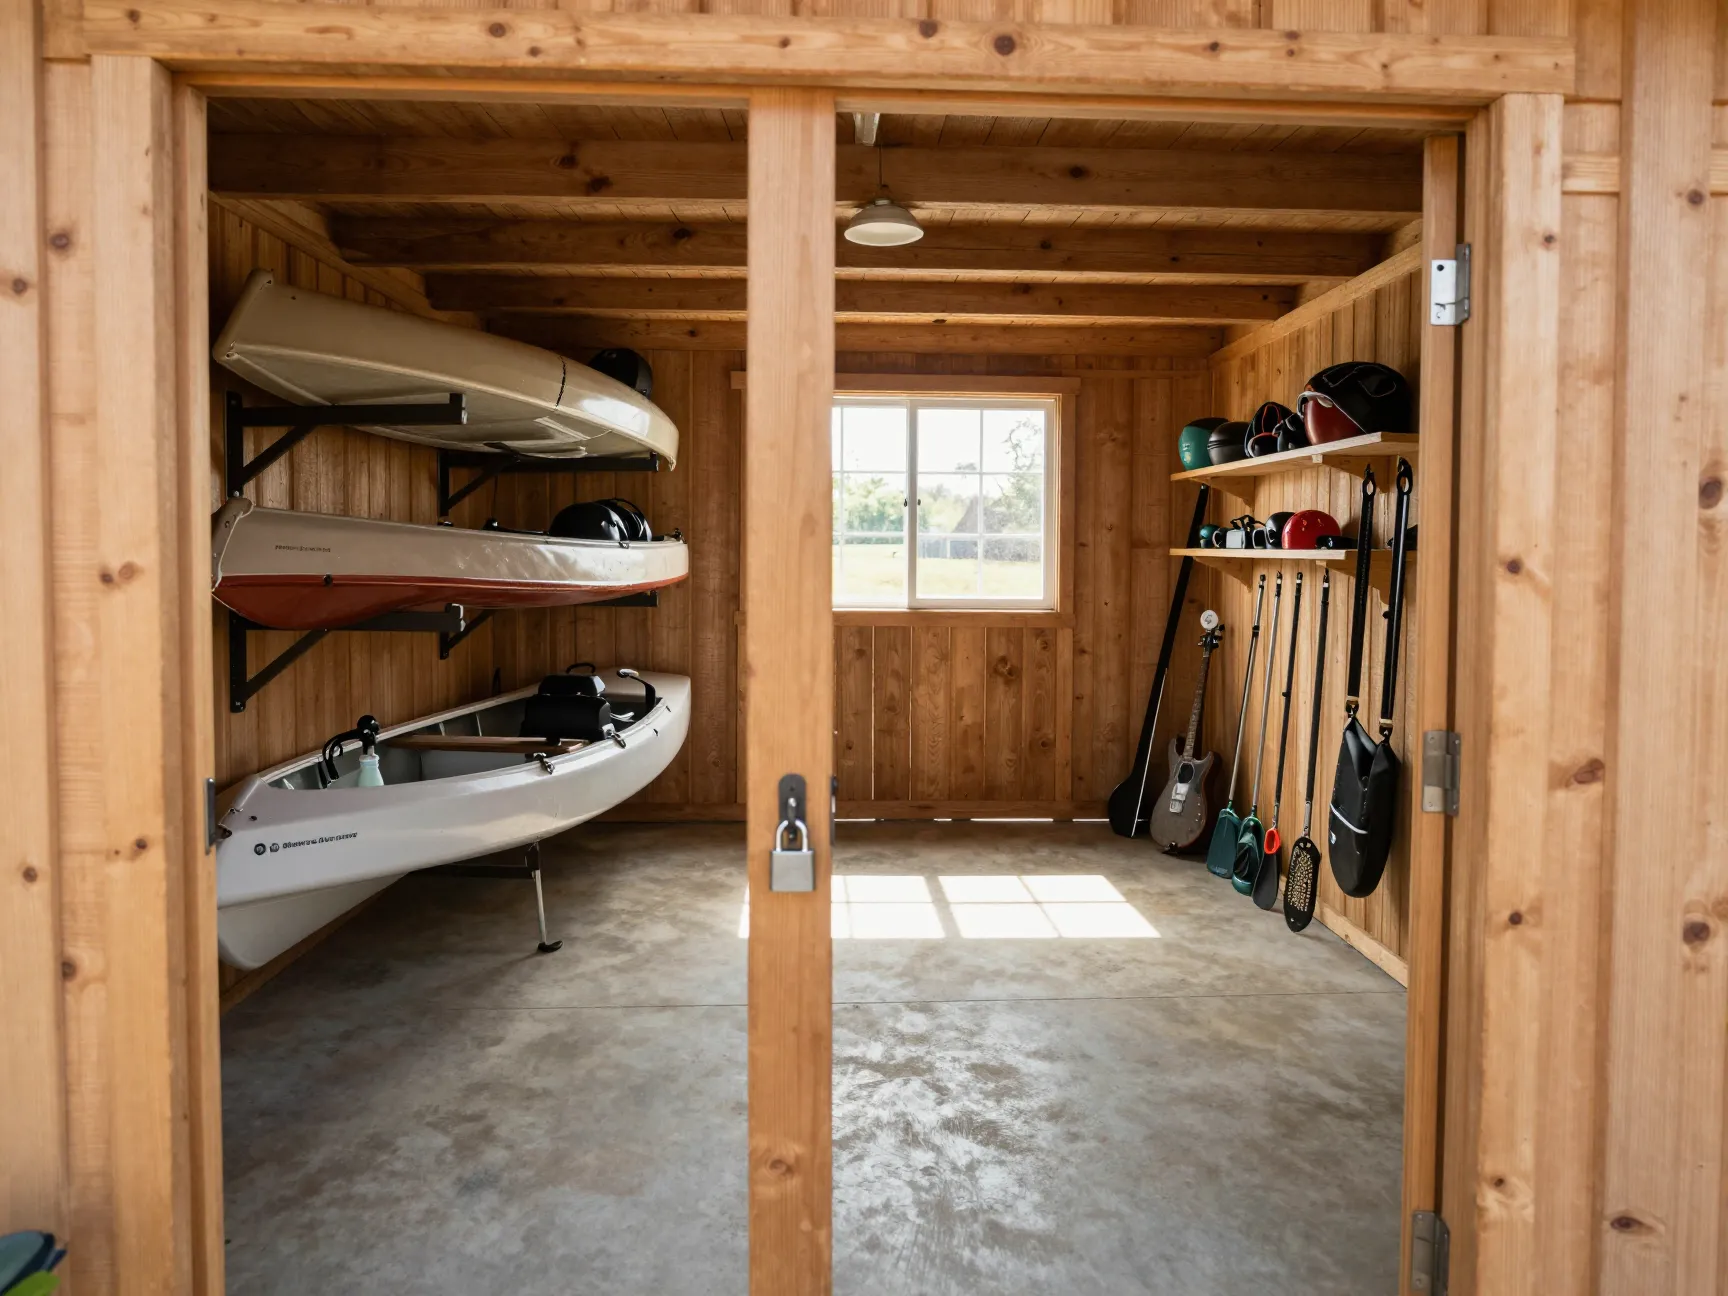
A dedicated storage shed or outbuilding is the most comprehensive solution for serious anglers with multiple kayaks or those who want to completely separate fishing gear from the home garage. A purpose-built or repurposed shed provides controlled access, weather protection, and unlimited customization.
Best for: Anglers with two or more kayaks, families where the garage is shared with vehicles and other equipment, or properties with available yard space.
Setup options:
- A standard 8×12 shed comfortably stores two fishing kayaks with room for accessories
- Interior walls can be fitted with all the wall-mount and ceiling solutions described above
- A concrete or paver floor prevents moisture and makes rolling carts easier to use
Security: A dedicated shed allows for a keyed lock, hasp, and optional security camera, more protection than most open garages offer.
Cost: $300 to $800 for a basic prefab shed; $1,500 and up for a custom-built structure. Repurposing an existing outbuilding is often the most cost-effective route.
Comparing the 9 Smart Fishing Kayak Storage Solutions for Home & Garage
The table below summarizes the key factors for each solution to make comparison straightforward.
| Solution | Floor Space Saved | Approx. Cost | Solo-Friendly | Best Setting |
|---|---|---|---|---|
| 1. Ceiling Pulley Hoist | Maximum | $30,$120 | Yes | Garage |
| 2. Wall J-Style Cradles | High | $40,$90 | Yes | Garage / Shed |
| 3. Freestanding Rack | Moderate | $80,$200 | Yes | Garage / Outdoor |
| 4. Vertical Wall Mount | Maximum | $25,$75 | Yes | Narrow Garage |
| 5. Overhead Ceiling Rack | Maximum | $50,$150 | No | Garage |
| 6. Wheeled Storage Cart | Low | $40,$150 | Yes | Garage / Driveway |
| 7. Outdoor with Cover | N/A | $80,$230 | Yes | Yard / Carport |
| 8. Wall Organization System | High | $100,$300 | Yes | Garage |
| 9. Dedicated Shed | N/A | $300,$1,500+ | Yes | Yard |
How to Choose the Right Solution for Your Space
With so many options among the 9 Smart Fishing Kayak Storage Solutions for Home & Garage, narrowing down the right choice comes down to four practical questions.
1. What is the available ceiling height?
Ceiling hoists and overhead racks require at least 10 feet of clearance to store a standard 12-foot fishing kayak and still allow a vehicle to park underneath. Garages with 8-foot ceilings are better served by wall mounts or freestanding racks.
2. How often is the kayak used?
Frequent anglers (weekly trips) benefit most from wheeled carts or low-profile wall cradles that allow quick loading and unloading. Occasional users can invest in a ceiling hoist or fixed overhead rack without the inconvenience of frequent lowering.
3. Is the storage space owned or rented?
Renters who cannot drill into walls or ceilings should prioritize freestanding racks, wheeled carts, or outdoor storage systems. Homeowners have the full range of options available.
4. How many kayaks need to be stored?
A single kayak fits comfortably on a wall mount or ceiling hoist. Two or three kayaks may require a freestanding multi-kayak rack, a dedicated shed, or a combination of ceiling and wall systems.
DIY vs. Commercial Storage Systems
Both approaches have genuine merit. The right choice depends on skill level, available time, and budget.
Commercial systems offer convenience, pre-tested weight ratings, and warranty protection. They install in under an hour with basic tools. The trade-off is cost and the inability to customize dimensions.
DIY systems built from lumber, hardware-store brackets, and foam padding can be tailored exactly to the kayak’s dimensions and the space’s quirks. A well-built DIY wall rack costs a fraction of a commercial equivalent and often outperforms it in durability.
DIY tip for 2026: Treated 2×4 lumber, 3-inch lag bolts, and 1.5-inch foam pipe insulation from any hardware store are all that is needed to build a functional two-kayak wall rack for under $40. Dozens of free plans are available from kayak manufacturer websites and paddling community forums.
Maintenance Tips for Stored Fishing Kayaks
Proper storage is only part of the equation. A few simple maintenance habits extend kayak life significantly.
- Rinse the hull with fresh water after every saltwater or brackish water trip before storing
- Apply a UV protectant spray (303 Aerospace Protectant is a widely recommended product) to the hull every 2 to 3 months
- Loosen any straps or bungee cords before long-term storage to prevent hull indentation
- Inspect the hull for cracks or stress marks at the start of each season
- Store paddles horizontally or vertically, never leaning at an angle that puts lateral stress on the shaft
Conclusion
Protecting a fishing kayak from hull damage, UV exposure, and disorganized clutter is straightforward when the right storage system is in place. The 9 Smart Fishing Kayak Storage Solutions for Home & Garage outlined in this guide cover every realistic scenario, from a small apartment garage with 8-foot ceilings to a dedicated outbuilding for a multi-kayak collection.
Actionable next steps for 2026:
- Measure the available garage wall height and ceiling clearance before purchasing any hardware
- Identify whether the storage space has accessible wall studs or ceiling joists for anchored systems
- Start with a single solution (wall cradles or a ceiling hoist) and add components like rod racks and paddle hooks as the system evolves
- Apply a UV protectant to the hull before the first storage of the season
- Revisit the storage setup annually to ensure weight ratings are still appropriate as gear loads change
The investment in proper kayak storage pays for itself quickly, in hull life preserved, gear found when needed, and more time on the water instead of searching through a cluttered garage.