9 Best Kayak Fishing Rod Holder Setups for Easy Access
Only 11 seconds. That is the average window an angler has to grab a rod and set the hook before a fish spits the bait. On a kayak, where balance, space, and reach are all working against you, a poorly placed rod holder can cost you the catch of a lifetime. Choosing the right kayak fishing rod holder setup is not just about convenience, it is about converting strikes into fish in the net.
Disclosure: This post contains affiliate links. As an Amazon Associate, we earn from qualifying purchases, and at no extra cost to you.
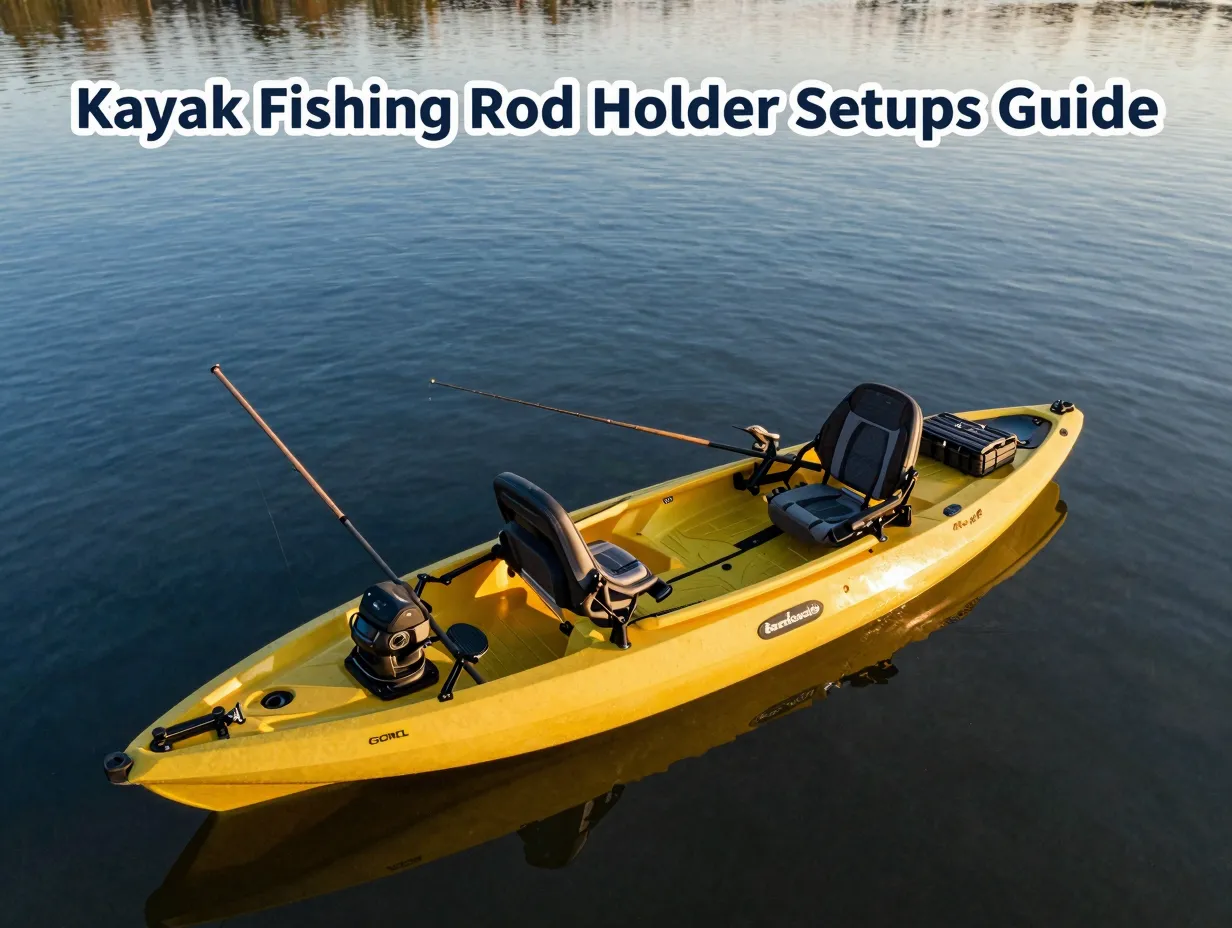
This guide covers the 9 Best Kayak Fishing Rod Holder Setups for Easy Access, breaking down each configuration by mounting style, best use case, and practical advantages. Whether fishing open water, rivers, or tight inshore flats, the right setup transforms a cluttered deck into an efficient fishing machine.
Key Takeaways
- Rod holder placement directly affects hook-set speed, rod security, and paddling clearance
- Flush mount, rail mount, and crate-based systems each serve different fishing styles and kayak types
- Adjustable angle holders offer the most versatility for multi-species fishing
- Proper installation, including correct drilling depth and hardware sealing, prevents water intrusion and structural damage
- Combining two or three holder types on one kayak creates the most efficient, easy-access setup
Why Rod Holder Setup Matters More Than Most Anglers Realize
A rod holder is not just a parking spot for a fishing rod. It is a critical piece of the fishing system. On a kayak, every inch of deck space is contested. Rods stored flat across the bow create paddle interference. Rods leaning against the hull slide overboard. Rods jammed into cup holders at bad angles make hook-sets awkward and slow.
The best kayak anglers treat their rod holder configuration the same way a surgeon organizes a tray, everything within reach, nothing in the way. The wrong setup creates friction at the exact moment speed matters most.
Three core problems a good rod holder setup solves:
- Prevents rods from washing overboard during rough water or re-entry
- Keeps rods accessible within one arm’s reach without twisting or standing
- Reduces deck clutter so paddling, casting, and landing fish stay smooth
Understanding these principles makes it easier to evaluate the 9 Best Kayak Fishing Rod Holder Setups for Easy Access described below.
The 9 Best Kayak Fishing Rod Holder Setups for Easy Access
1. Flush Mount Rod Holders
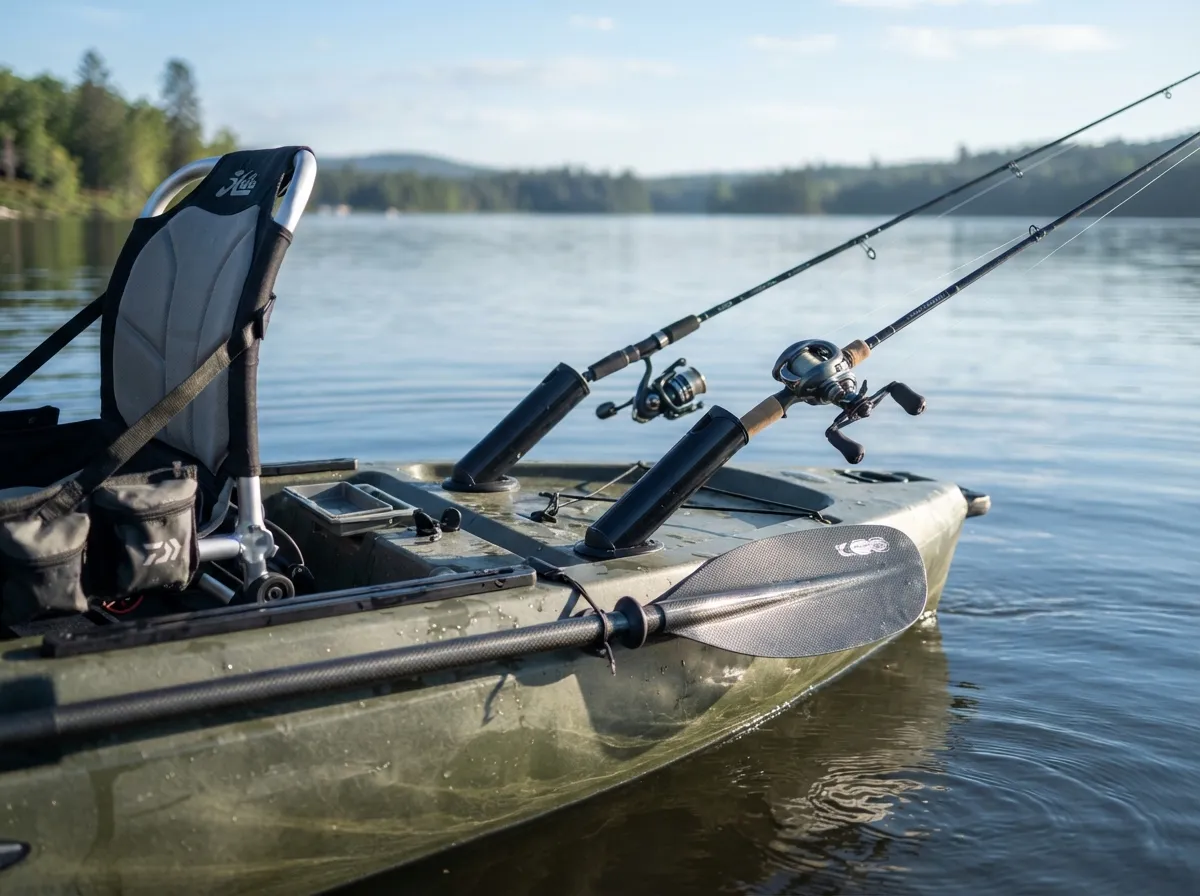
Flush mount holders are drilled directly into the kayak hull and sit flush with the deck surface. They are the most common factory-installed option on fishing kayaks and remain a top choice for custom builds.
Best for: Trolling, rod storage while paddling, and keeping a clean deck profile.
Key advantages:
- Low profile eliminates snagging on lines or gear
- Holds rods at a fixed angle (typically 30 to 45 degrees)
- Extremely secure in rough water or when paddling hard
Installation note: Flush mounts require drilling, so placement must be planned carefully. Mounting too close to the seat limits reach. Mounting too far forward creates paddle interference. The ideal position is just behind the seat, angled outward at roughly 15 degrees from vertical.
“The flush mount is the workhorse of kayak rod storage, unbeatable for trolling and transit, but limited when you need to switch rods quickly.”
2. Rail-Mounted Rod Holders
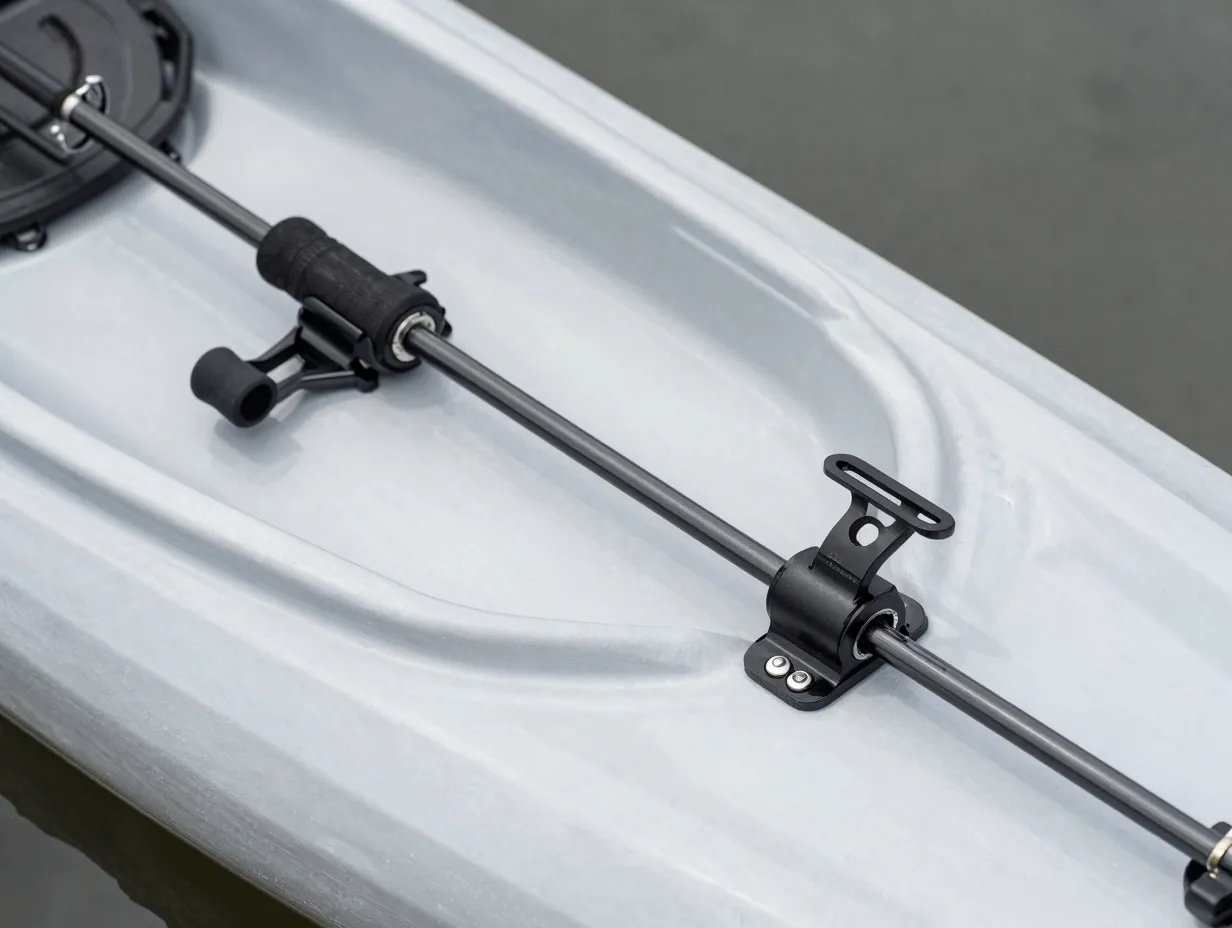
Rail-mounted holders clamp onto track systems (such as Yakima tracks or RAM Track systems) without requiring any drilling beyond the track installation itself. They can be repositioned along the rail in seconds.
Best for: Anglers who switch between fishing styles frequently or want to reconfigure their setup between trips.
Key advantages:
- Tool-free repositioning along the track
- Compatible with a wide range of aftermarket rod holder heads
- No permanent hull penetrations beyond the track itself
Rail systems like the YakAttack GearTrac or Scotty Track allow holders to slide forward, backward, or be removed entirely. This flexibility makes rail-mounted holders the top choice for tournament anglers who need different configurations for different water types.
3. Adjustable Angle Holders (RAM-Style Mounts)
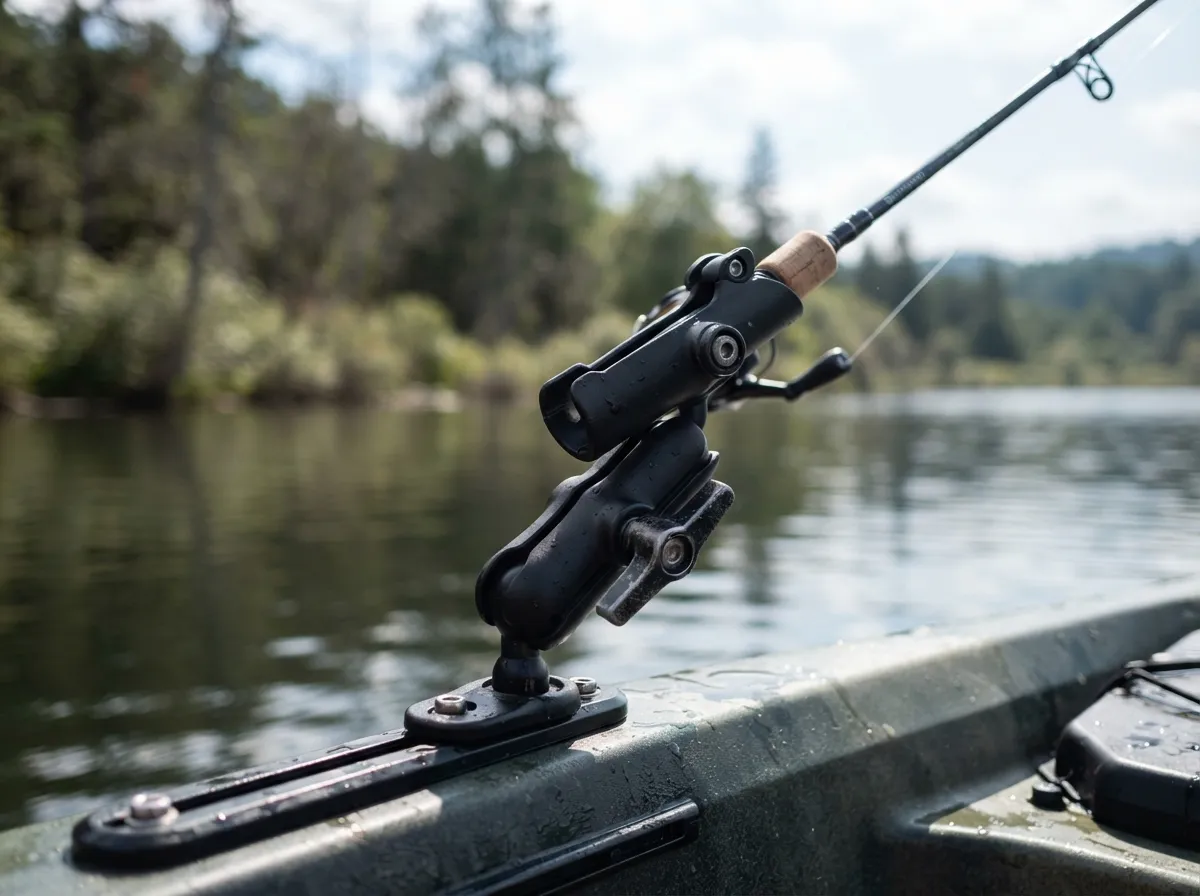
RAM Mounts and similar ball-and-socket systems allow the rod holder head to pivot and lock at virtually any angle. The ball joint absorbs vibration and can be repositioned without tools in most configurations.
Best for: Sight fishing, casting-focused trips, and anglers who need rods at precise angles for different techniques.
Key advantages:
- Infinite angle adjustment within the ball range
- Vibration-dampening design protects rod guides
- Compatible with nearly every kayak mounting platform
The RAM ROD 400 series is one of the most widely used systems in this category. It pairs with flush mount bases, track systems, or screw-down bases, making it one of the most versatile options in the 9 Best Kayak Fishing Rod Holder Setups for Easy Access.
4. Stern Crate Rod Holder Systems
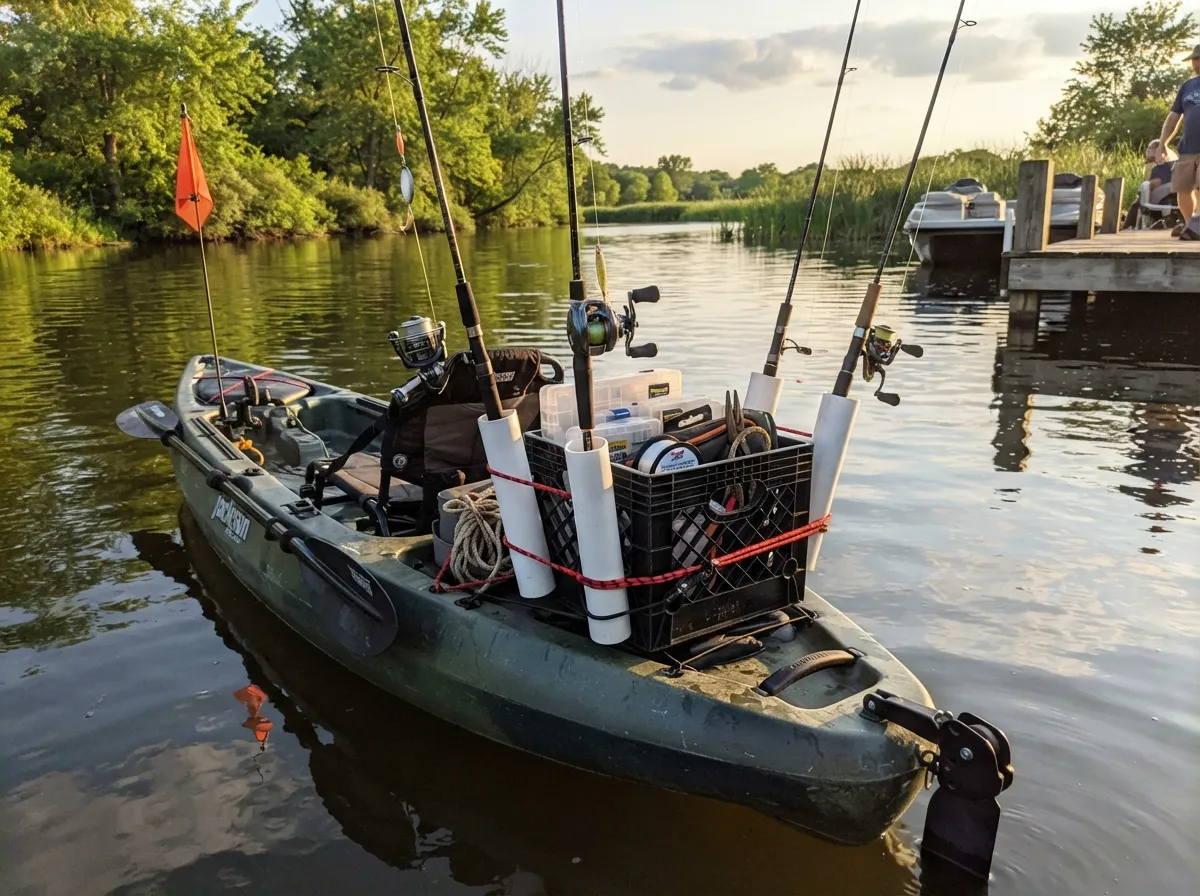
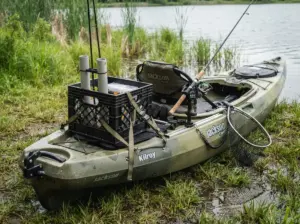
A milk crate or purpose-built kayak crate mounted at the stern is one of the oldest and most effective rod storage solutions. PVC tubes inserted through the crate sides hold rods vertically or at a slight angle.
Best for: Anglers carrying multiple rods rigged with different lures, or those who want maximum rod capacity without drilling.
Key advantages:
- No hull modifications required
- Holds 4 to 8 rods depending on crate size
- Doubles as gear and tackle storage
Crate systems are particularly popular among bass and crappie anglers who pre-rig 6 to 8 rods before a trip and want instant access to each one without retying.
5. Behind-the-Seat Horizontal Rod Holders
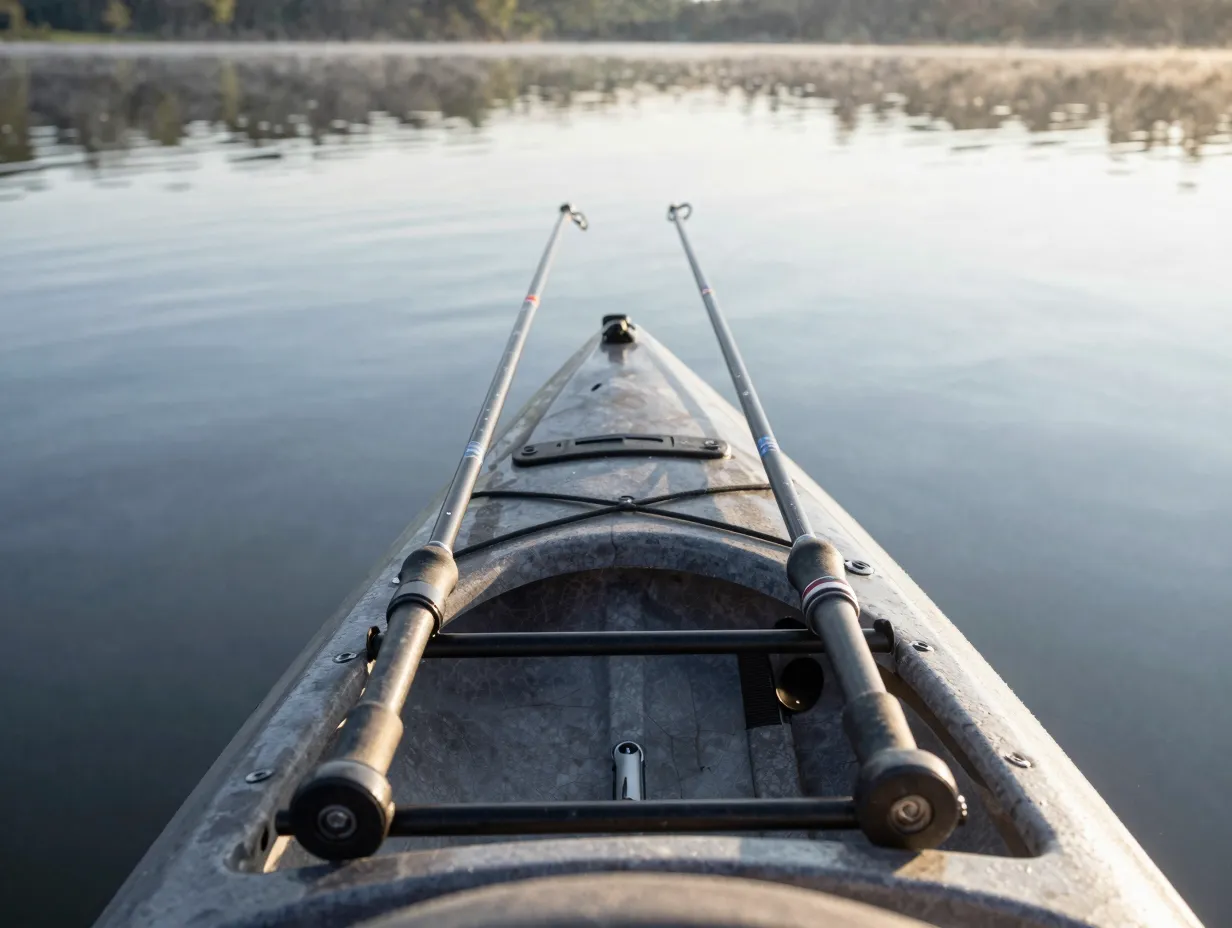
Horizontal holders mount to the kayak’s side rails or seat frame and hold rods parallel to the kayak’s length, tips pointing toward the stern. This keeps rods out of the casting zone while remaining accessible with a backward reach.
Best for: Paddling long distances with rods rigged and ready, or storing a backup rod while actively fishing another.
Key advantages:
- Keeps rods below the paddler’s shoulder line, reducing wind resistance
- Rods stay rigged without tangling
- Works well on both sit-on-top and sit-inside kayaks
Brands like Scotty and YakAttack offer dedicated horizontal holders that clamp to existing hardware. The Scotty 282 Portable Fly Rod Holder is a popular option for trout and bass anglers who need a horizontal storage solution without permanent installation.
6. Bow-Mounted Vertical Rod Holders
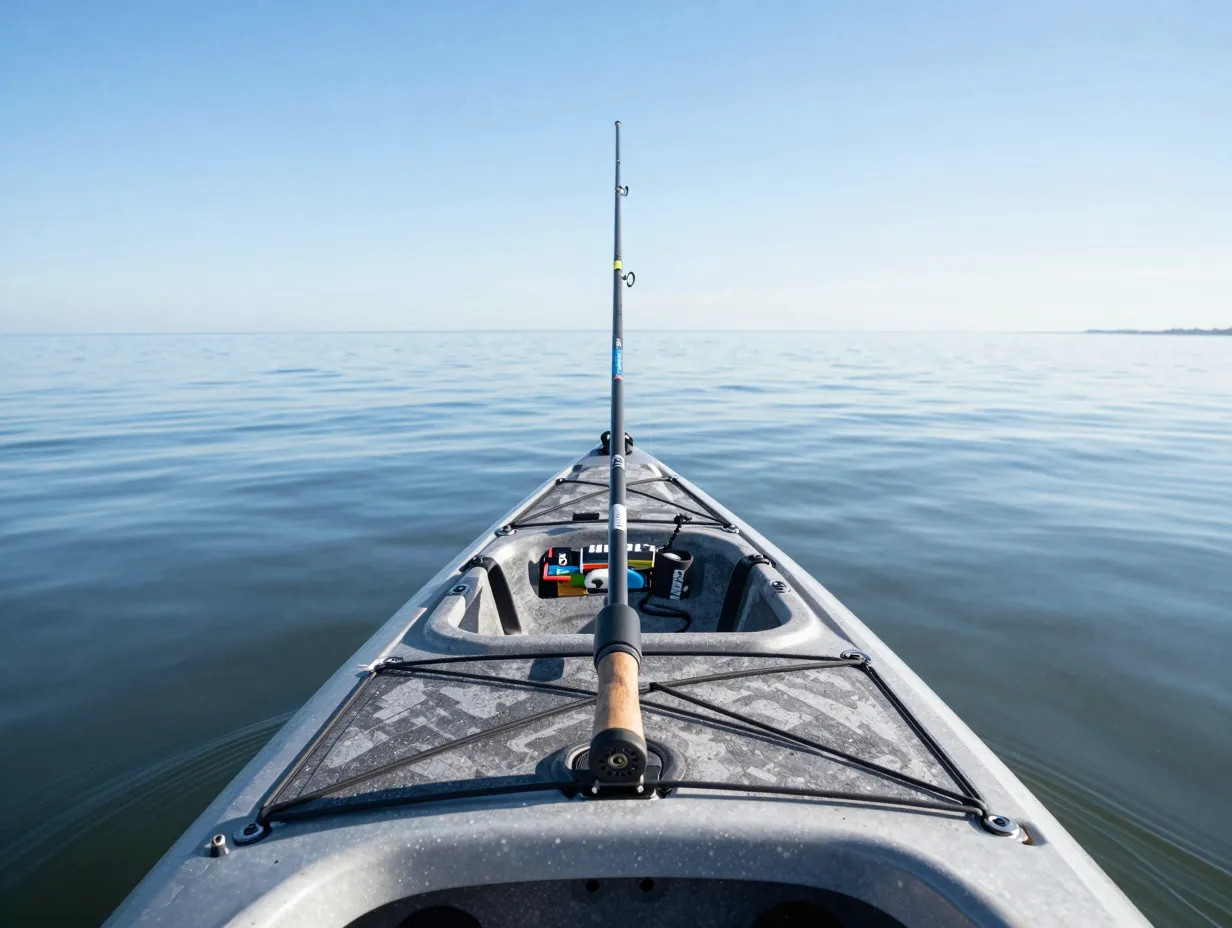
Mounting a vertical rod holder at the bow keeps a spare rod forward of the paddler and completely out of the fishing zone. This setup is especially useful on longer kayaks where the bow offers usable real estate.
Best for: Carrying a second rigged rod for quick species switches, or storing a net/push pole alongside a rod.
Key advantages:
- Completely removes the spare rod from the active fishing area
- Reduces clutter around the seat and cockpit
- Effective on tandem kayaks where the bow paddler can access the rod
The main limitation is reach, grabbing a rod from the bow while seated requires leaning forward, which affects stability on narrow kayaks. This setup works best on wider, more stable platforms like the Hobie Pro Angler or Old Town Predator series.
7. Kayak Fishing Rod Leash and Clip Systems
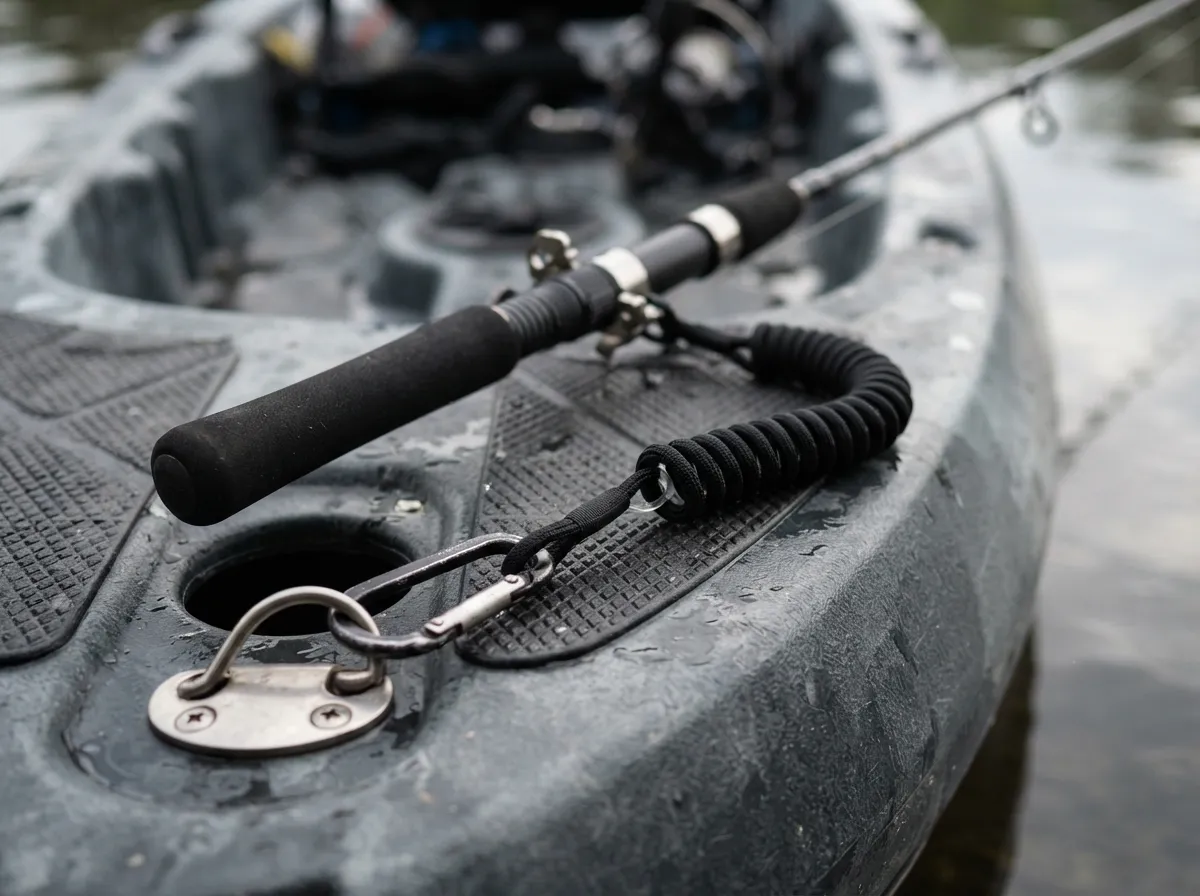
Rod leashes and bungee clip systems are not traditional holders, but they function as a lightweight, low-profile alternative for anglers who prefer to keep rods in hand or set them across the hull temporarily.
Best for: Ultralight kayak setups, paddleboard fishing, and minimalist anglers.
Key advantages:
- Zero installation required
- Prevents rods from sinking if dropped overboard
- Works on any kayak surface
Rod leashes clip to the reel seat and attach to a D-ring or bungee cord on the hull. While they do not provide the organized access of a mounted holder, they serve as an essential safety backup for any rod holder system. Every kayak angler should carry at least one rod leash regardless of their primary holder setup.
8. Under-Gunwale Clamp-On Rod Holders
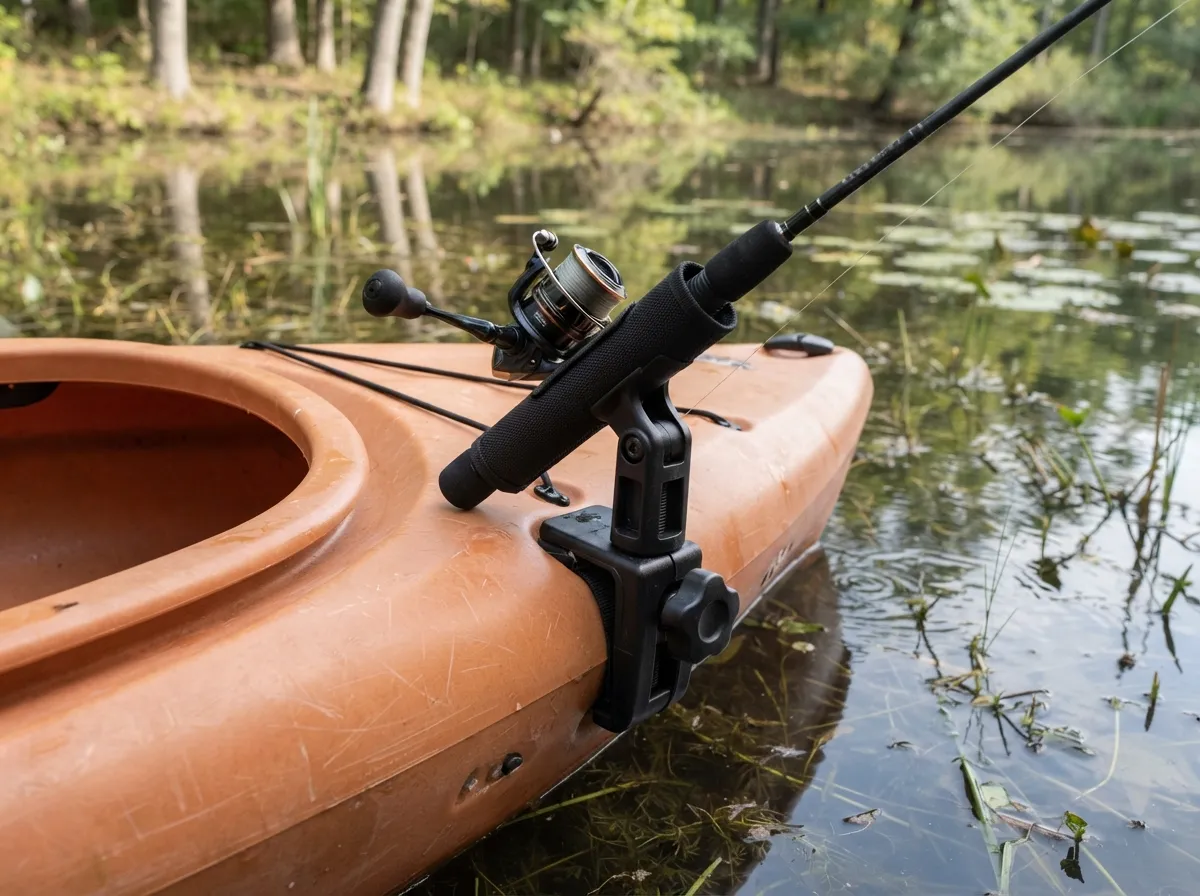
Clamp-on holders grip the gunwale (the top edge of the kayak hull) without drilling or track systems. They use a friction clamp mechanism and can be installed or removed in under a minute.
Best for: Rental kayaks, borrowed boats, or anglers who want a no-commitment installation.
Key advantages:
- No tools, no drilling, no permanent modification
- Repositionable along the entire gunwale length
- Affordable entry point for beginners
The trade-off is security. Clamp-on holders are not as rigid as drilled or track-mounted systems and can shift under heavy load or rough water. They are best suited for calm water fishing or as temporary setups while planning a permanent configuration.
9. Custom PVC Pipe Rod Holder Builds
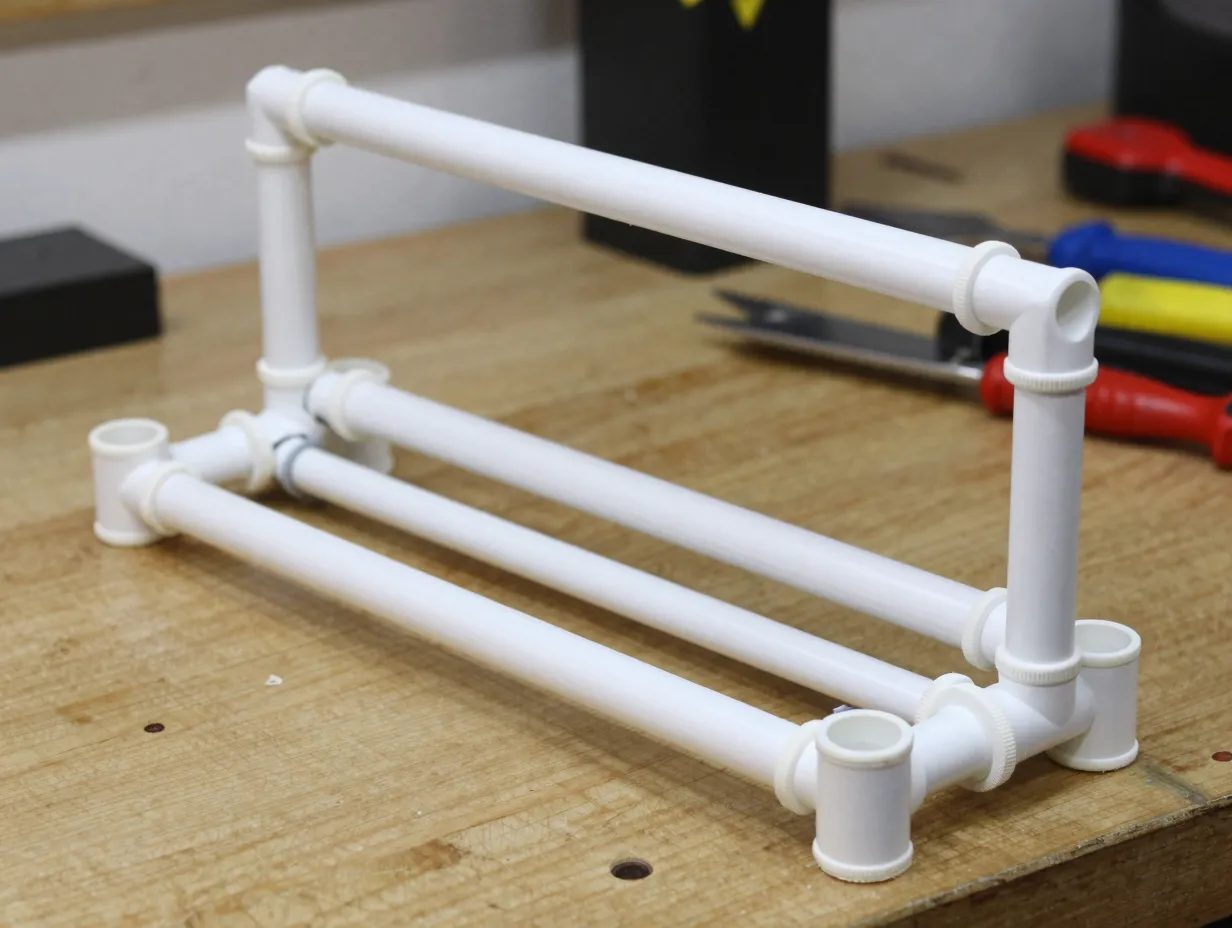
Custom PVC builds allow anglers to design rod holder systems tailored exactly to their kayak layout, fishing style, and rod count. Using standard plumbing fittings, PVC pipe, and UV-resistant adhesive, a custom rack can be built for under $30.
Best for: DIY-minded anglers, unusual kayak shapes, or those who want a setup no off-the-shelf product offers.
Key advantages:
- Fully customizable angle, height, and spacing
- Extremely durable and UV-resistant when using Schedule 40 or 80 PVC
- Low cost compared to branded systems
A basic custom build uses a 1.5-inch PVC base pipe running along the gunwale, with angled branch pipes cut and glued at the desired rod angles. Mounting to the kayak can be done via zip ties through existing hardware holes, clamps, or adhesive-backed mounts. Many experienced kayak anglers combine a custom PVC stern crate with rail-mounted front holders for a complete, high-access system.
Comparing the 9 Setups at a Glance
| Setup | Drilling Required | Rod Capacity | Best Use Case |
|---|---|---|---|
| 1. Flush Mount | Yes | 2-4 | Trolling, transit |
| 2. Rail-Mounted | Track only | 2-6 | Tournament, versatile |
| 3. Adjustable Angle | Base only | 1-3 | Sight fishing, casting |
| 4. Stern Crate | No | 4-8 | Multi-rod trips |
| 5. Horizontal Behind Seat | Minimal | 2-4 | Long paddles, backup rods |
| 6. Bow Vertical | Yes | 1-2 | Spare rod storage |
| 7. Rod Leash/Clip | No | 1 | Safety backup |
| 8. Clamp-On | No | 2-4 | Rentals, beginners |
| 9. Custom PVC | Optional | 4-10 | DIY, custom layouts |
How to Choose the Right Setup for Your Kayak
Not every setup works on every kayak. Choosing the right configuration from the 9 Best Kayak Fishing Rod Holder Setups for Easy Access depends on four key factors.
1. Kayak width and stability
Wider kayaks (32 inches or more) handle more hardware without affecting balance. Narrow touring kayaks benefit from low-profile flush mounts and horizontal holders that do not shift the center of gravity.
2. Fishing style
- Trollers need flush mounts angled outward at the stern
- Bass anglers benefit from crate systems with 6 to 8 pre-rigged rods
- Fly fishers need horizontal holders that keep rods out of the casting stroke
- Sight fishers need adjustable-angle holders that can be repositioned quickly
3. Frequency of reconfiguration
Anglers who fish the same water the same way every trip can commit to drilled flush mounts. Anglers who switch between bass, trout, and saltwater trips benefit from track-based rail systems that reconfigure without tools.
4. Budget
- Entry-level: Clamp-on holders and rod leashes ($10 to $30)
- Mid-range: Flush mounts and rail systems ($30 to $120)
- Premium: Full track systems with RAM mounts and multiple holders ($150 to $400+)
Installation Best Practices for Drilled Holders
For any setup requiring hull penetration, proper installation prevents water intrusion and structural failure.
Follow these steps for every drilled installation:
- Mark all hole positions with masking tape before drilling to prevent gel coat cracking
- Use a step drill bit to create clean, burr-free holes
- Apply marine-grade sealant (3M 4200 or equivalent) around every hole before inserting hardware
- Use stainless steel or nylon hardware, never standard zinc-plated bolts, which corrode rapidly
- Torque bolts to snug-plus-quarter-turn, not overtight, to avoid cracking the hull
- Allow sealant to cure fully (typically 24 hours) before launching
“One improperly sealed hole can fill a kayak’s foam core with water over a single season, adding pounds of dead weight and degrading structural integrity.”
These steps apply to flush mounts, bow vertical holders, and any track system requiring hull screws.
Combining Setups for Maximum Efficiency
The most effective kayak fishing rod holder systems combine two or three of the setups described above. Here are three proven combination strategies used by experienced kayak anglers.
The Tournament Setup
Rail-mounted adjustable holders at the sides plus a stern crate with 4 to 6 rods. This gives instant access to active rods on the rails while backup rigs stay organized in the crate.
The Trolling Setup
Two flush mounts angled outward at 45 degrees at the stern, plus horizontal holders behind the seat for spare rods. Trolling rods stay in the flush mounts while paddling; spare rods are within reach for when fish are located.
The Minimalist Setup
Two clamp-on holders plus two rod leashes. Ideal for weekend anglers who do not want to modify their kayak but need reliable rod storage on calm water.
Common Mistakes to Avoid
Even experienced anglers make setup errors that reduce access speed and rod security.
Mounting holders too far forward creates paddle interference on every stroke. Keep active rod holders at or behind the seat position.
Using too steep an angle on flush mounts makes rods difficult to grab with one hand. The ideal angle for easy one-handed retrieval is 30 to 45 degrees from vertical.
Overloading a crate system with rods that are too long causes tip tangles and makes individual rods hard to pull out quickly. Keep rod lengths within 6 inches of each other in a crate system.
Ignoring line management is the most overlooked mistake. Even the best rod holder setup fails if lines are not clipped or reels are not in free-spool, because a fish strike will pull the rod out of the holder before the angler can react.
Conclusion
The difference between a frustrating day on the water and a productive one often comes down to gear organization, and nothing affects kayak fishing organization more directly than rod holder placement. The 9 Best Kayak Fishing Rod Holder Setups for Easy Access reviewed here cover every fishing style, kayak type, and budget level, from the no-drill simplicity of clamp-on holders and rod leashes to the full-custom efficiency of track-based rail systems and PVC crate builds.
Actionable next steps:
- Assess your current kayak’s deck space and identify the two or three positions where rods are most often in the way or hardest to reach
- Match your primary fishing style to the setup descriptions above, trollers, bass anglers, and fly fishers each have a clear best-fit option
- Start with a low-commitment setup (clamp-on or crate) to test placement before committing to drilled installations
- Add a rod leash to every rod regardless of which holder system is used, it is the cheapest insurance against a lost rod
- Revisit the configuration after three or four trips and adjust holder angles or positions based on real-world reach and access patterns
A well-planned rod holder system does not just store rods, it makes every cast, every hook-set, and every fish fight faster and more controlled. That 11-second window to grab the rod and set the hook gets a lot more manageable when the rod is exactly where it needs to be.