9 DIY Fishing Pole Storage Projects To Organize Your Gear On A Budget
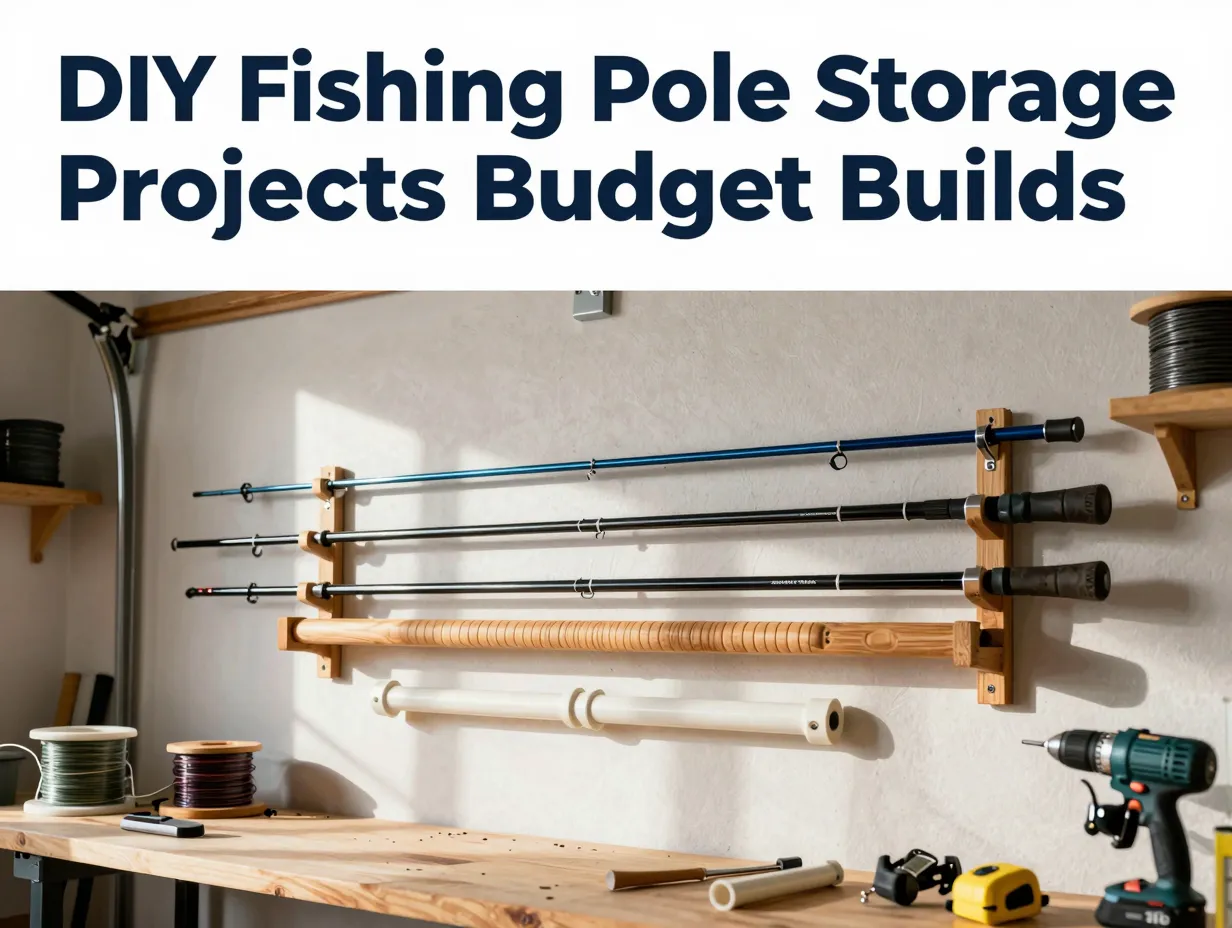
Tangled fishing rods, snapped guides, and a garage floor that looks like a sporting goods store exploded, that is the reality for an estimated 49 million recreational anglers in the United States alone. Most commercial rod storage solutions cost between $40 and $150, and they rarely fit the specific space or rod count an angler actually owns. The good news: the 9 DIY fishing pole storage projects to organize your gear on a budget covered in this guide require nothing more than basic tools, a hardware store run, and a free afternoon. Whether the space available is a cramped apartment closet or a full two-car garage, at least one of these builds will solve the problem permanently.
Disclosure: This post contains affiliate links. As an Amazon Associate, we earn from qualifying purchases, and at no extra cost to you.
Key Takeaways
- All 9 DIY fishing pole storage projects in this guide can be completed for under $30 in most cases, using materials from any hardware store.
- PVC pipe, wooden dowels, pool noodles, and repurposed lumber are the most cost-effective raw materials for rod storage builds.
- Proper rod storage prevents guide damage, line twist, and blank warping, protecting gear worth far more than the storage itself.
- Wall-mounted and ceiling-mounted systems free up floor space, which is the most valuable real estate in any garage or workshop.
- Every project listed here can be scaled up or down to accommodate anywhere from 4 to 20+ fishing rods.
Why DIY Fishing Rod Storage Makes More Sense Than Buying Retail
Commercial fishing rod racks are not built for the average angler’s actual collection. A typical bass fisherman might own 8 to 15 rods rigged with different lures. A fly angler might have delicate 9-foot rods that need horizontal support to prevent warping. Retail racks are often designed for display, not daily use, and they rarely account for reels attached to rods.
DIY fishing pole storage solves three problems at once:
- Cost: Most builds cost $5 to $25 in materials.
- Customization: The builder controls spacing, height, and capacity.
- Protection: Custom foam or rubber padding can be added exactly where guides and blanks make contact.
“The best rod storage is the storage that actually gets used consistently. If it’s inconvenient, rods end up leaning against the wall, which is how blanks get broken.”
Beyond cost savings, building rod storage is a practical skill that transfers to other tackle organization projects. Once the workflow is understood, the same materials and techniques apply to net holders, tackle box shelves, and wader storage.
The 9 DIY Fishing Pole Storage Projects To Organize Your Gear On A Budget
The following projects are ranked loosely from simplest to most involved. Each entry includes estimated material cost, tools required, and the type of space it suits best.
1. PVC Pipe Wall-Mounted Rod Rack
Estimated cost: $8 to $15
Best for: Garage walls, shed walls, basement walls
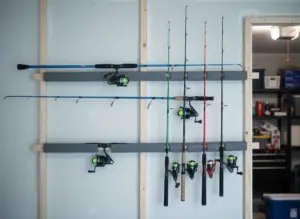
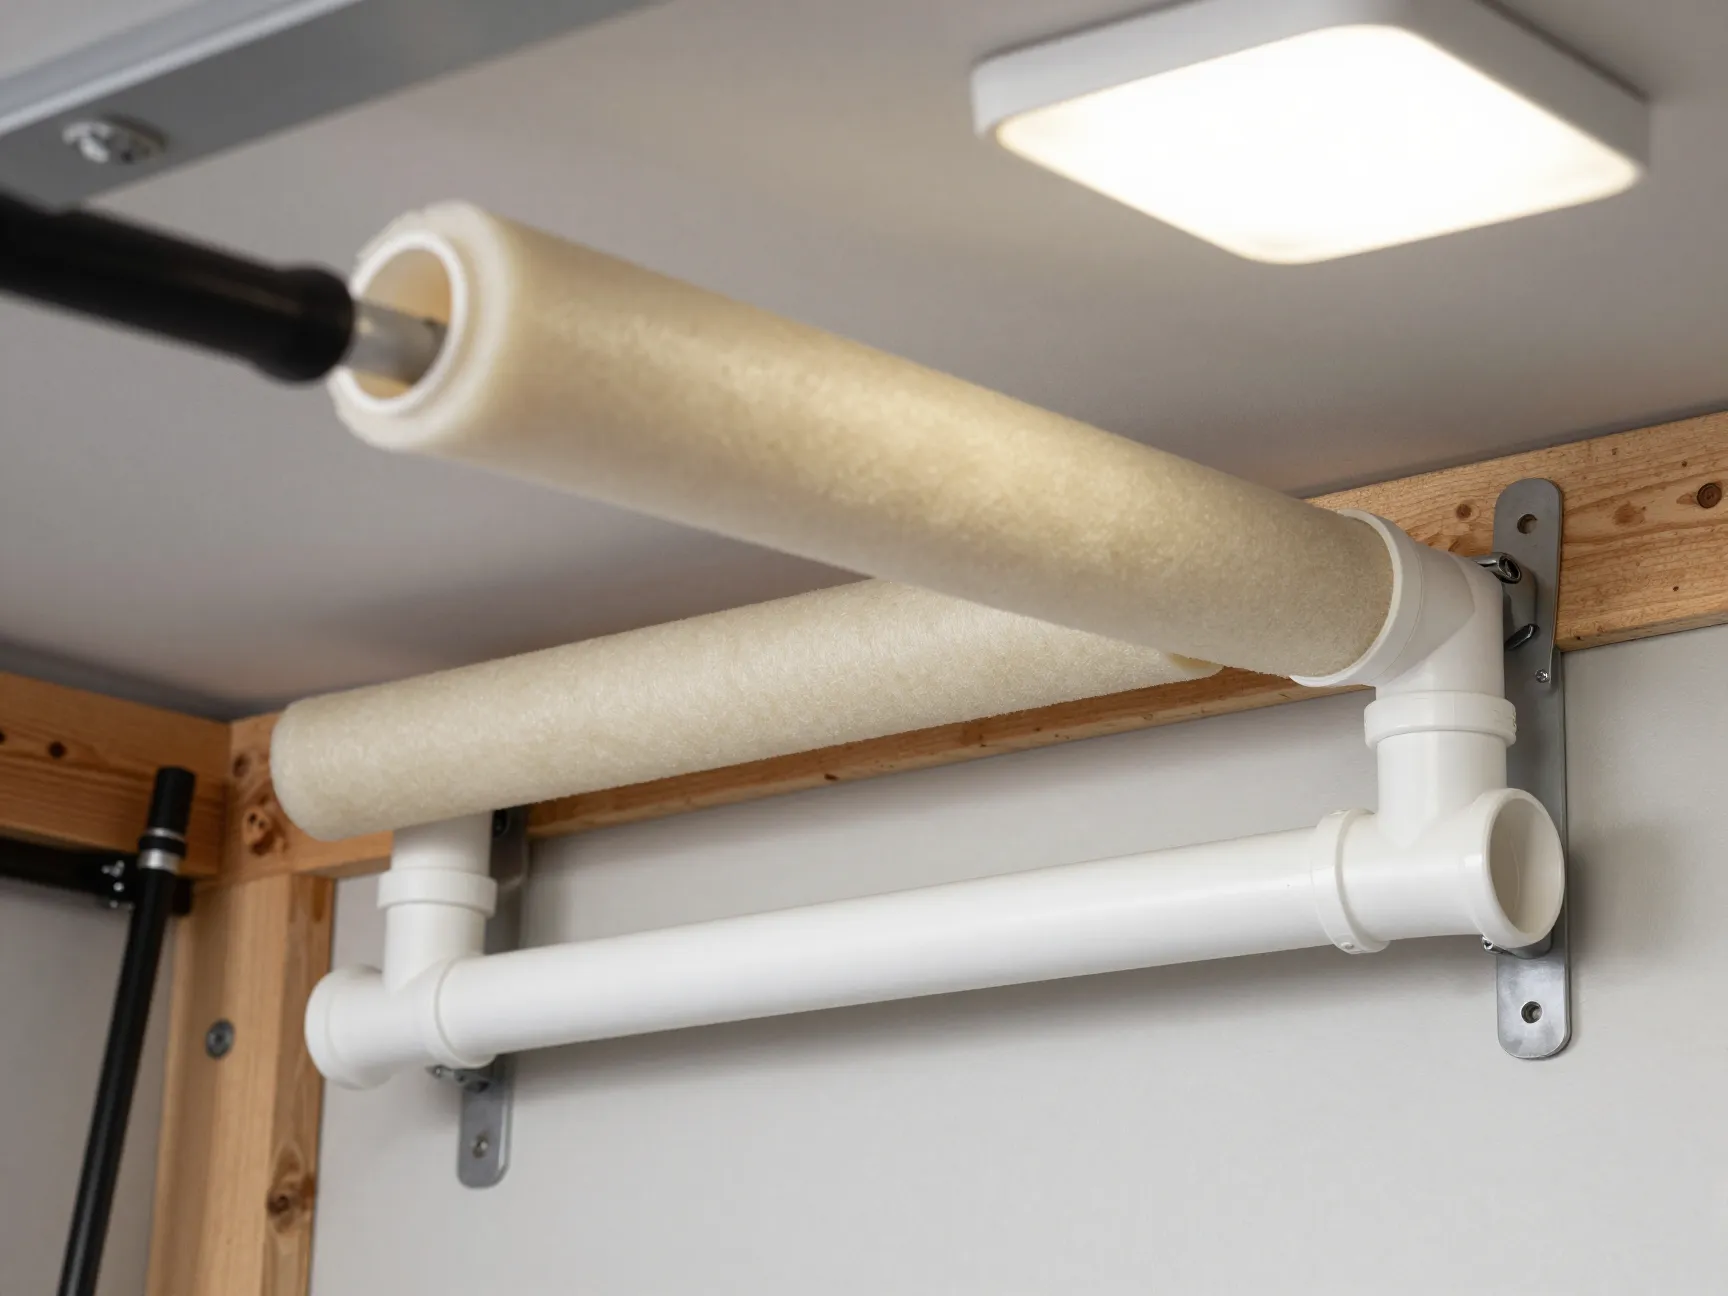
PVC pipe is the most versatile material in DIY fishing rod storage. For this build, two horizontal lengths of 1.5-inch PVC pipe are mounted to wall studs using standard pipe clamps. The lower pipe supports the rod handles and cork grips. The upper pipe, positioned about 18 to 24 inches above, holds the rod tips with foam pipe insulation slid inside to prevent guide damage.
Materials needed:
- Two 5-foot lengths of 1.5-inch PVC pipe
- 6 to 8 pipe clamps (sized for 1.5-inch pipe)
- Foam pipe insulation (the split kind, found in the plumbing aisle)
- 12 to 16 wood screws
- Wall anchors if studs are not accessible
Cut the foam insulation into 4-inch sections and press them into the upper pipe at evenly spaced intervals. Each foam section cradles one rod tip without putting pressure on the guides. This system holds 8 to 12 rods depending on wall length and can be extended easily by adding a third pipe section.
2. Wooden Dowel Rod Holder
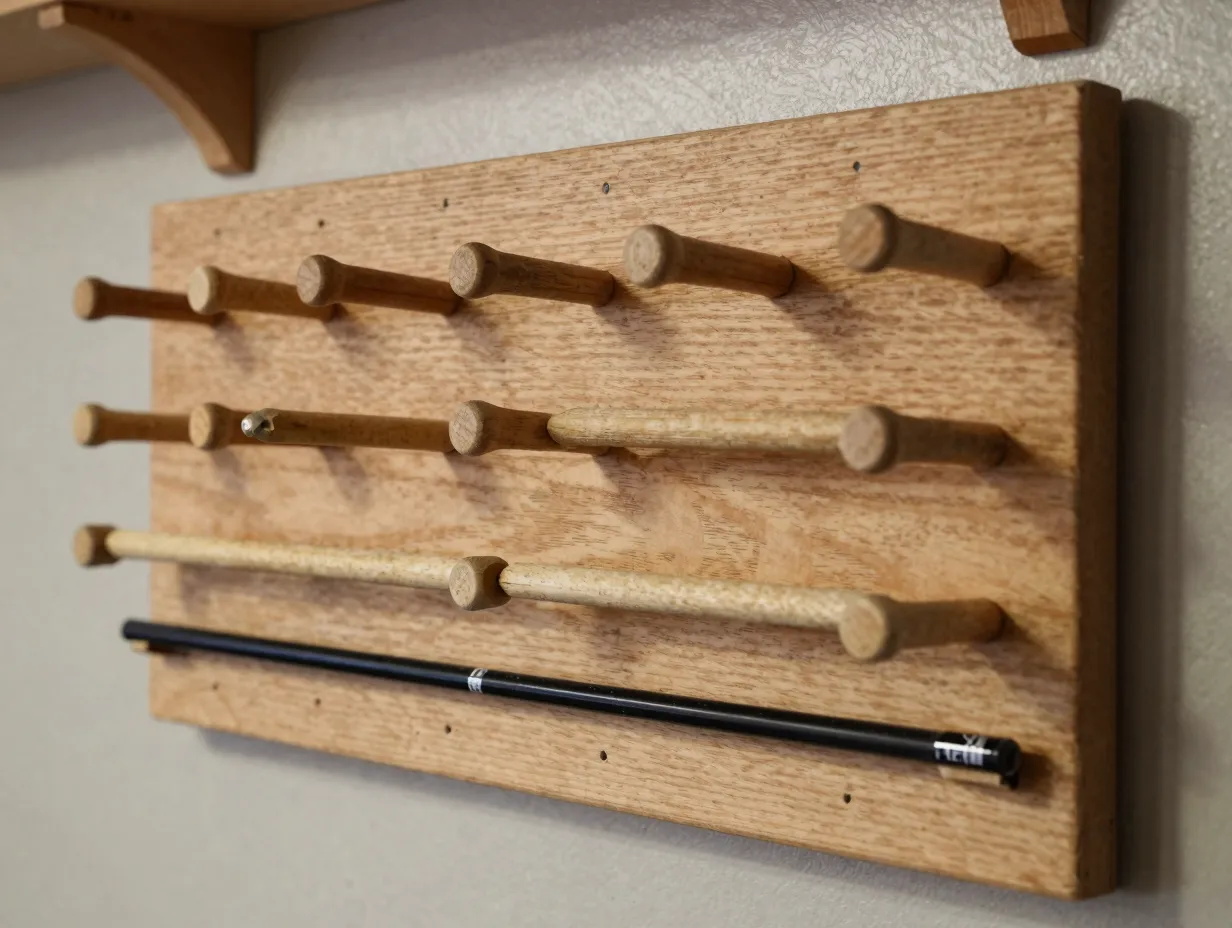
Estimated cost: $10 to $20
Best for: Workshops, garages, dedicated fishing rooms
This is a classic design that has been used in tackle shops for decades. A 1×6 or 1×8 board is cut to the desired length and drilled with evenly spaced holes sized to accept 3/4-inch wooden dowels. The dowels are glued into the holes and angled slightly upward. Rods rest between the dowels, with each pair of dowels cradling one rod.
A second board mounted below the first holds the rod butts in place. Cutting a shallow notch or adding a small screw eye to each dowel position keeps rods from sliding sideways.
Pro tip: Sand all dowel ends smooth and apply two coats of polyurethane to prevent moisture absorption, which can cause the wood to swell and scratch rod blanks over time.
This build is highly scalable. A 4-foot board with 10 dowel pairs holds 10 rods comfortably. The natural wood aesthetic also looks clean enough for a home office or den if fishing gear is stored indoors.
3. Pool Noodle Rod Organizer
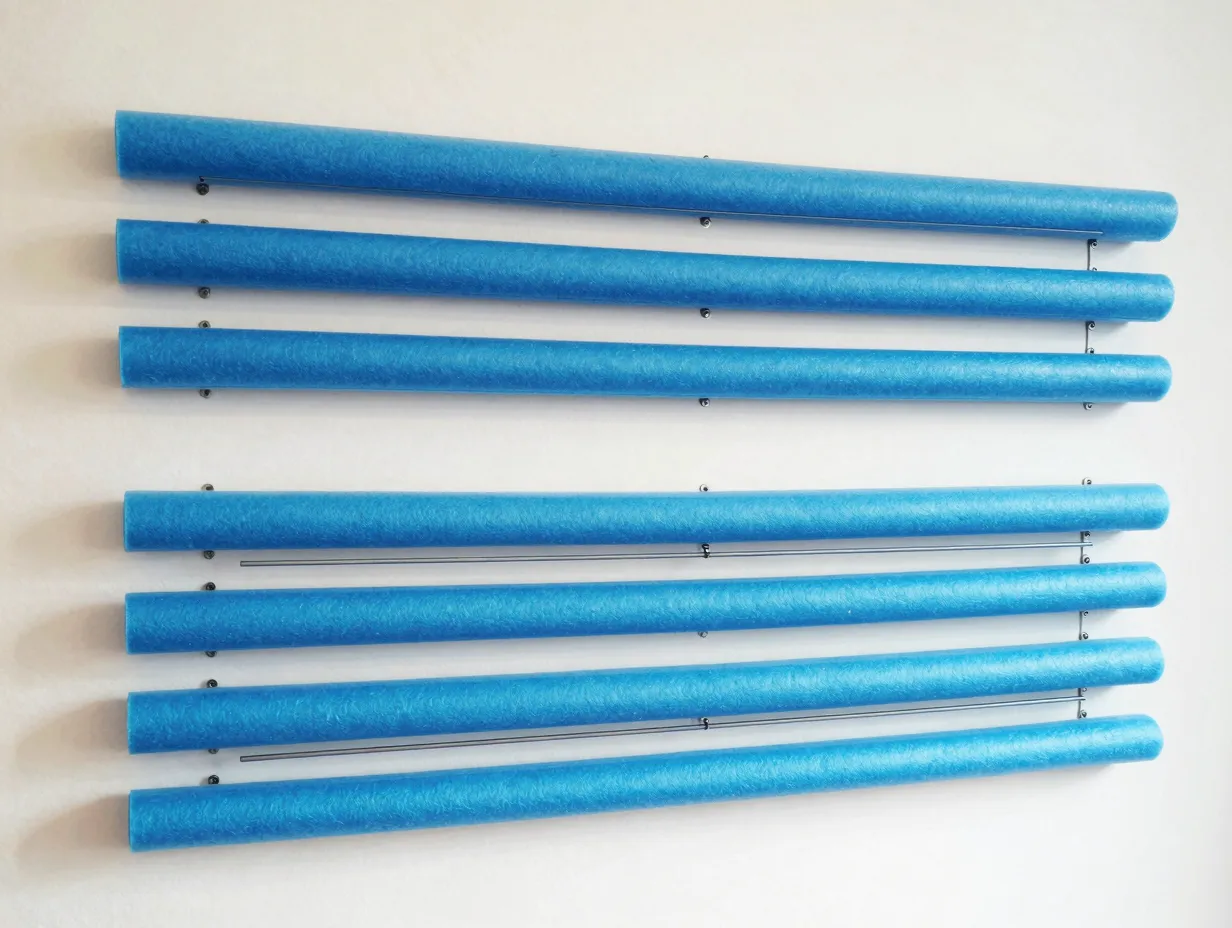
Estimated cost: $3 to $8
Best for: Tight budgets, apartment storage, temporary setups
Pool noodles are one of the most underrated materials in DIY tackle organization. A single pool noodle costs about $1 to $2 at most dollar stores or big-box retailers. For this build, a pool noodle is cut into 6-inch sections and mounted to a wall using a single screw through the center of each section.
Each noodle section acts as a soft, flexible cradle for a rod blank. The foam grips the rod gently without putting pressure on guides. Two rows of noodle sections, one high, one low, support rods horizontally along the wall.
This is the fastest build on this list. With a utility knife and a drill, the entire setup can be completed in under 20 minutes. It is also the most forgiving for beginners because there are no precise measurements required.
Limitation: Pool noodle foam degrades faster than PVC or wood, especially in humid environments. Plan to replace noodle sections every two to three seasons.
4. Ceiling-Mounted Horizontal Rod Storage
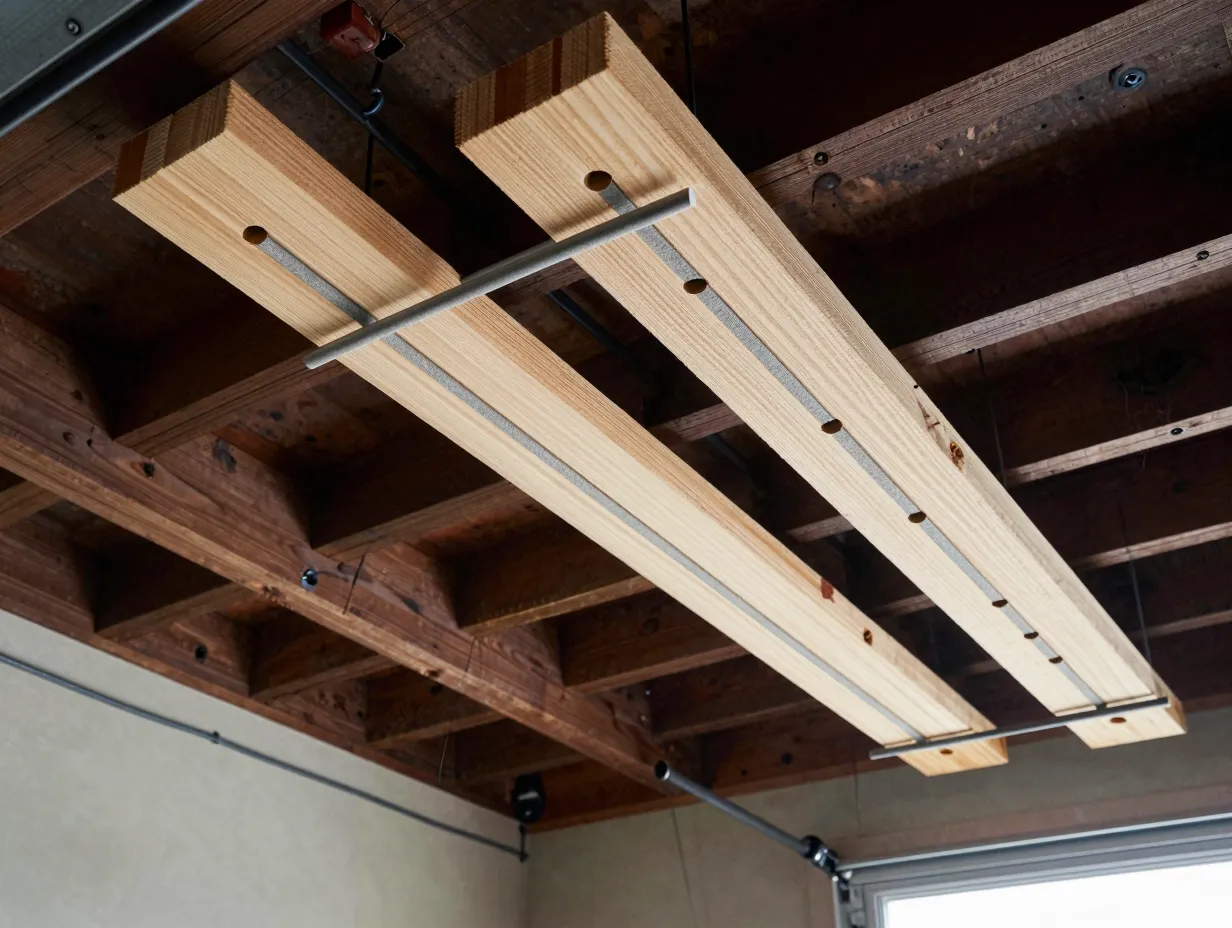
Estimated cost: $15 to $25
Best for: Garages with high ceilings, storage areas where wall space is limited
When wall space is at a premium, the ceiling becomes the best real estate in the room. This build uses two parallel 2×4 boards mounted to ceiling joists, running the length of the storage area. Holes are drilled through both boards at matching intervals. Rods slide through the holes horizontally, with the blank supported at two points.
The hole diameter should match the rod blank diameter at the point of contact, typically 3/4 inch to 1 inch for most spinning and casting rods. Lining each hole with a short section of foam pipe insulation or a rubber grommet prevents abrasion.
Key measurement: Space the two ceiling boards 24 to 36 inches apart. This provides enough support for rods up to 7 feet without flex stress on the blank.
This system keeps rods completely out of the way and is ideal for long-term storage of rods that are not used every week. It also works well for fly rods, which benefit from horizontal storage to prevent tip warping.
5. Repurposed Wooden Ladder Rod Rack
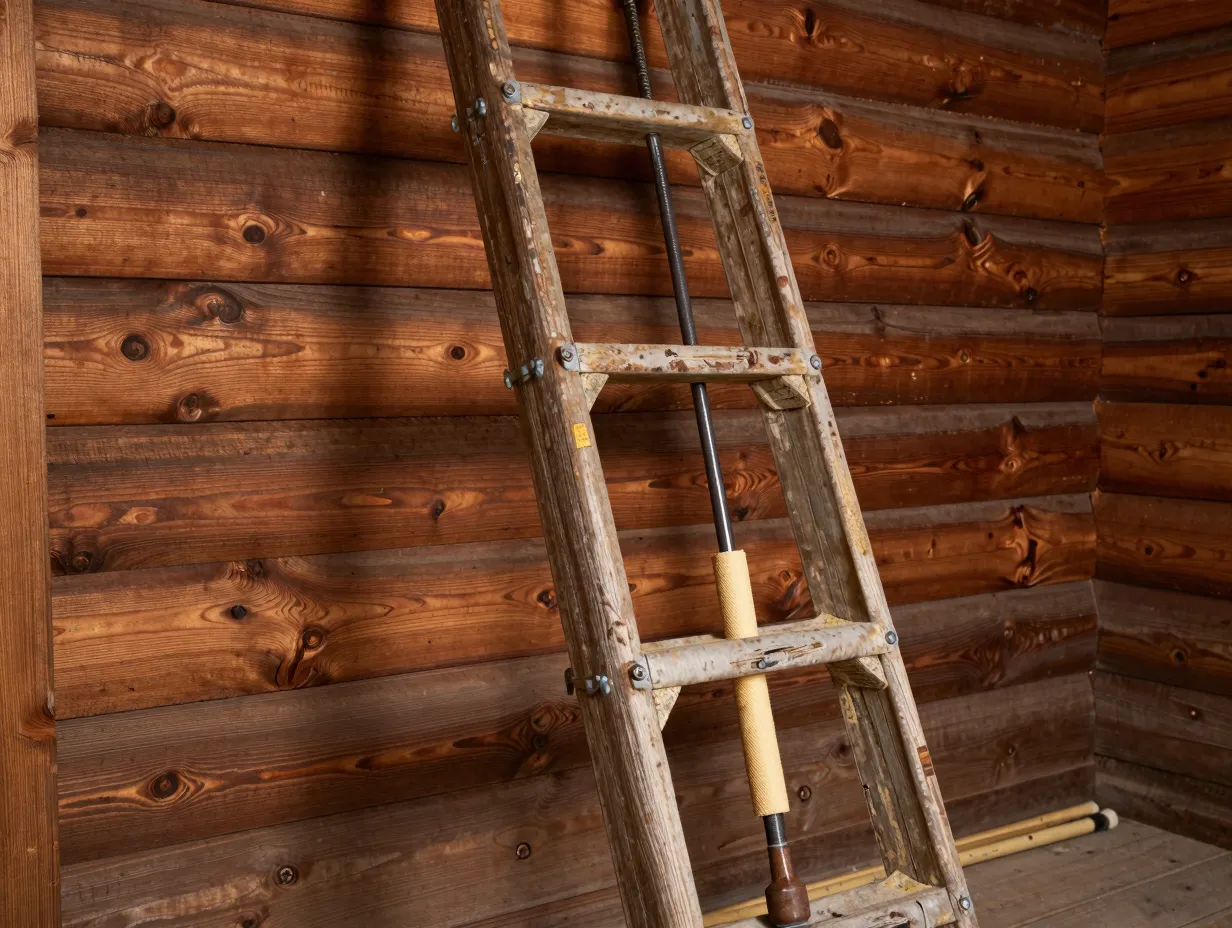
Estimated cost: $0 to $15 (often free if an old ladder is available)
An old wooden ladder, the kind found at garage sales or in the back of a barn, makes a surprisingly effective vertical rod storage rack. The rungs of the ladder serve as natural rod separators. The ladder is mounted flat against a wall or leaned at a slight angle.
Rods are placed between the rungs, with the butt resting on the floor or on a small wooden ledge attached to the ladder’s base. Adding foam pipe insulation to each rung protects rod blanks from the hard wood surface.
This build requires almost no construction skill. If the ladder is already owned, the only cost is the foam insulation. The rustic aesthetic works well in cabins, fishing lodges, or garage spaces with a workshop feel.
Variation: A decorative wooden ladder (the kind sold as a blanket rack) can be used indoors for a cleaner look, holding 6 to 8 rods in a living space without looking out of place.
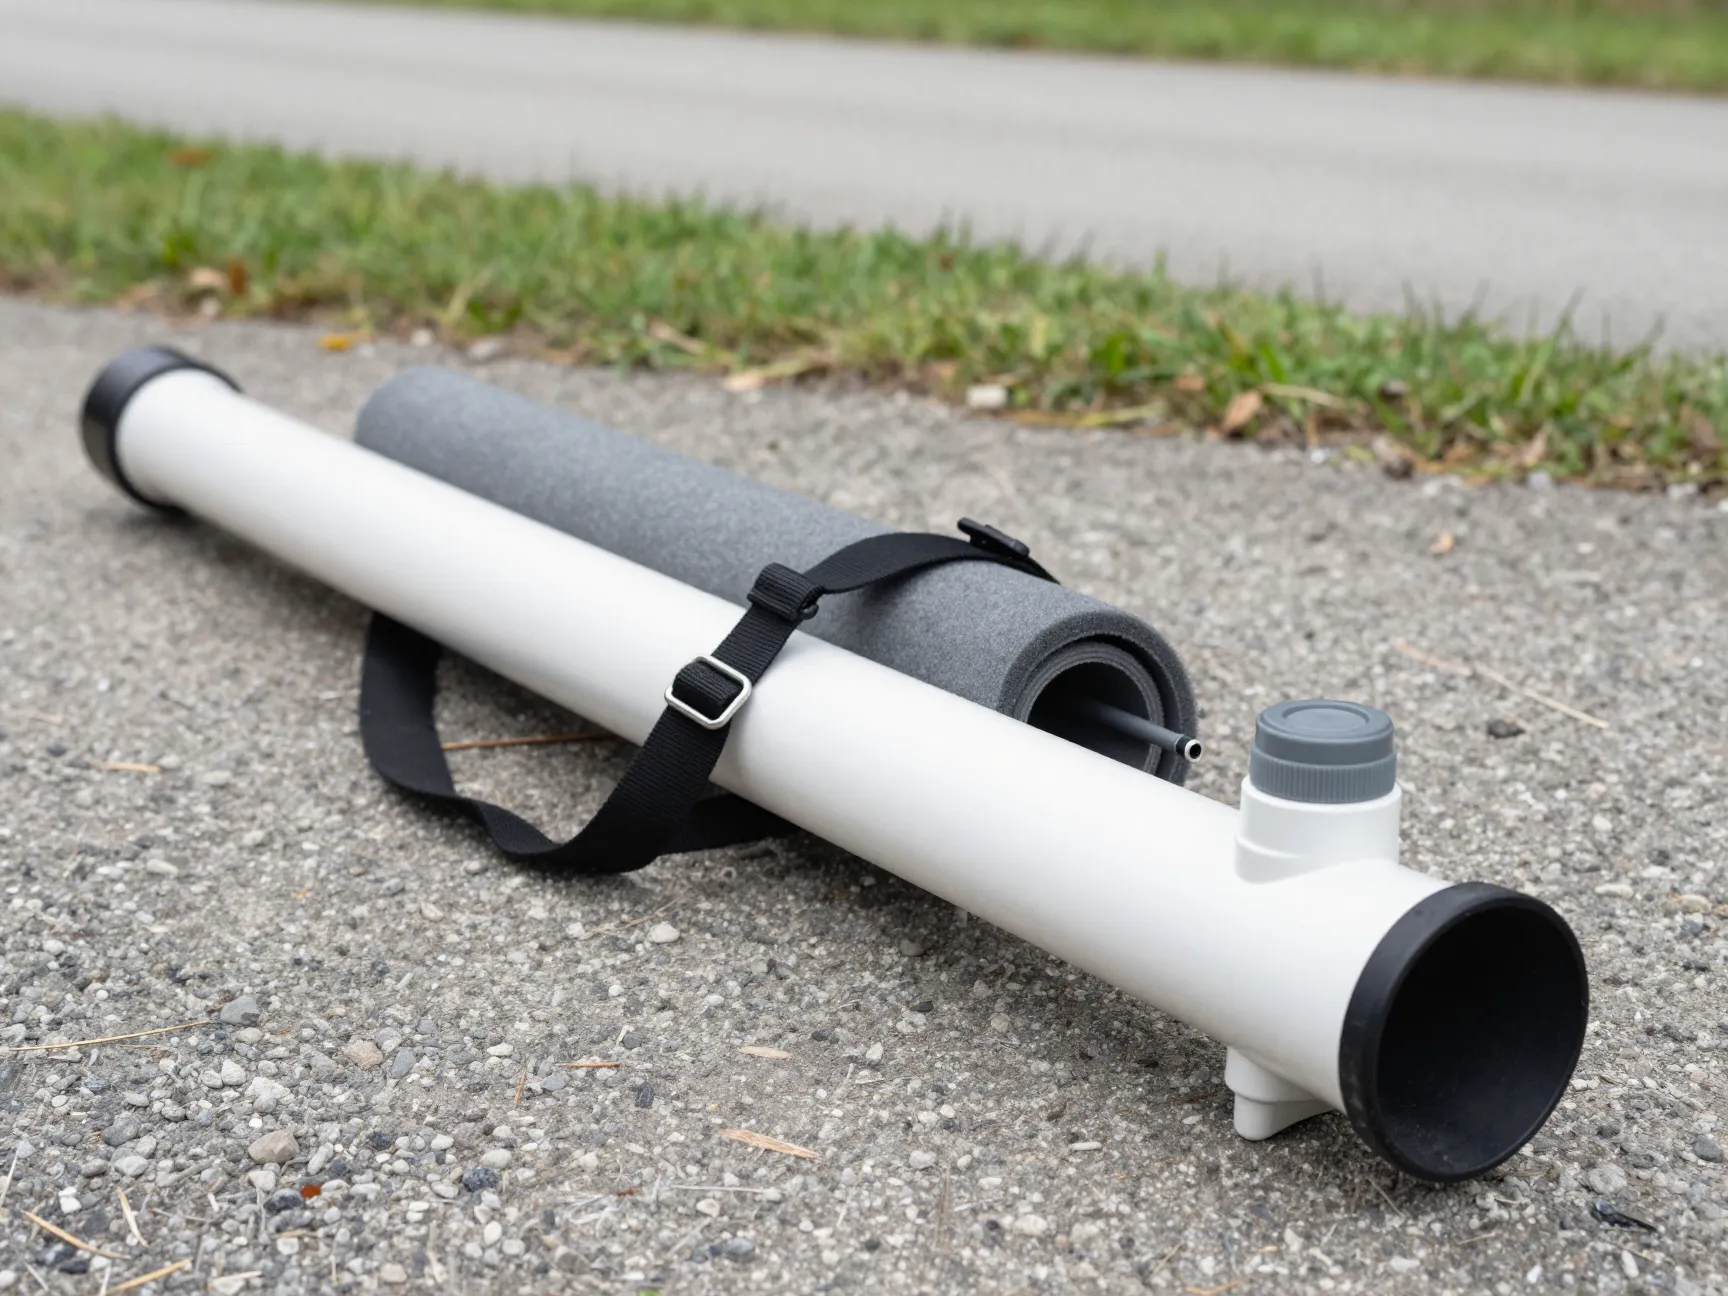
6. PVC Portable Rod Carrier Tube
Estimated cost: $12 to $22
Best for: Travel, kayak fishing, shore fishing, tournament anglers
This project shifts from wall storage to portable storage. A 4-inch diameter PVC pipe, cut to the length of the longest rod being transported, becomes a protective carrying tube. End caps are attached, one permanently glued, one left removable for easy rod access.
Foam pipe insulation is coiled inside the tube to cushion rods during transport. A shoulder strap is attached using two drilled holes and a length of nylon webbing with a clip buckle from a craft store.
Capacity: A 4-inch tube holds 4 to 6 rods comfortably. For larger collections, two parallel tubes can be joined with PVC pipe straps.
This is one of the most practical builds on this list for anglers who travel to different fishing spots. It protects guides and tips from the kind of damage that happens when rods are thrown loose in a truck bed or the back of an SUV.
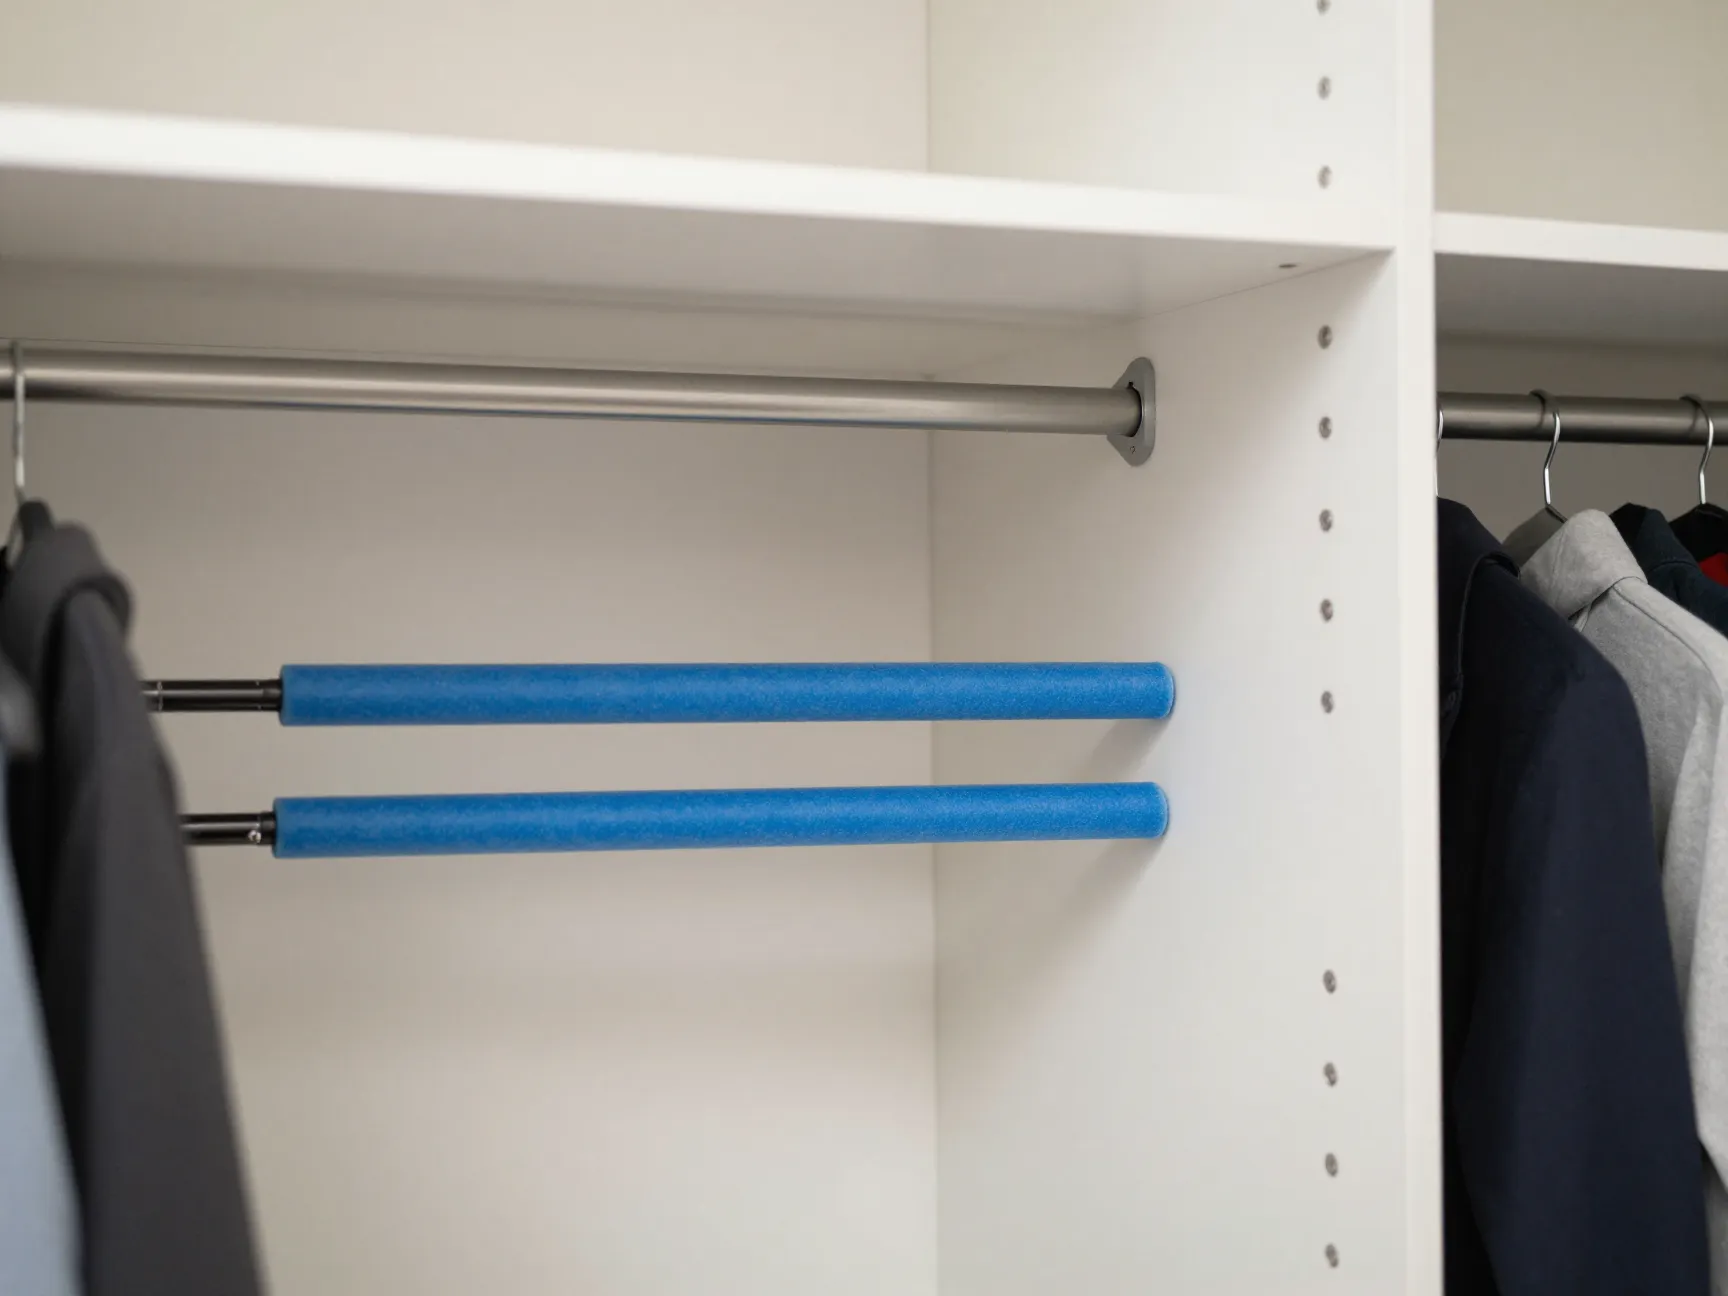
7. Tension Rod Closet Organizer
Estimated cost: $5 to $12
Best for: Apartment dwellers, indoor storage, small spaces
Tension rods, the kind used to hang shower curtains or closet dividers, can be repurposed into a surprisingly effective rod storage system inside a closet or narrow hallway space. Two tension rods are installed horizontally at different heights inside a closet. Fishing rods are laid across both tension rods, supported at two points along the blank.
The key advantage here is that no drilling or permanent installation is required. This makes it ideal for renters or anyone who wants a storage solution that can be removed quickly.
Weight limit: Standard tension rods hold 10 to 20 pounds. A collection of 8 to 10 rods with reels attached may approach this limit. Check the weight rating on the specific tension rod before loading it fully.
For added stability, wrap each tension rod with foam pipe insulation or pool noodle sections to prevent the fishing rod blanks from rolling or sliding.
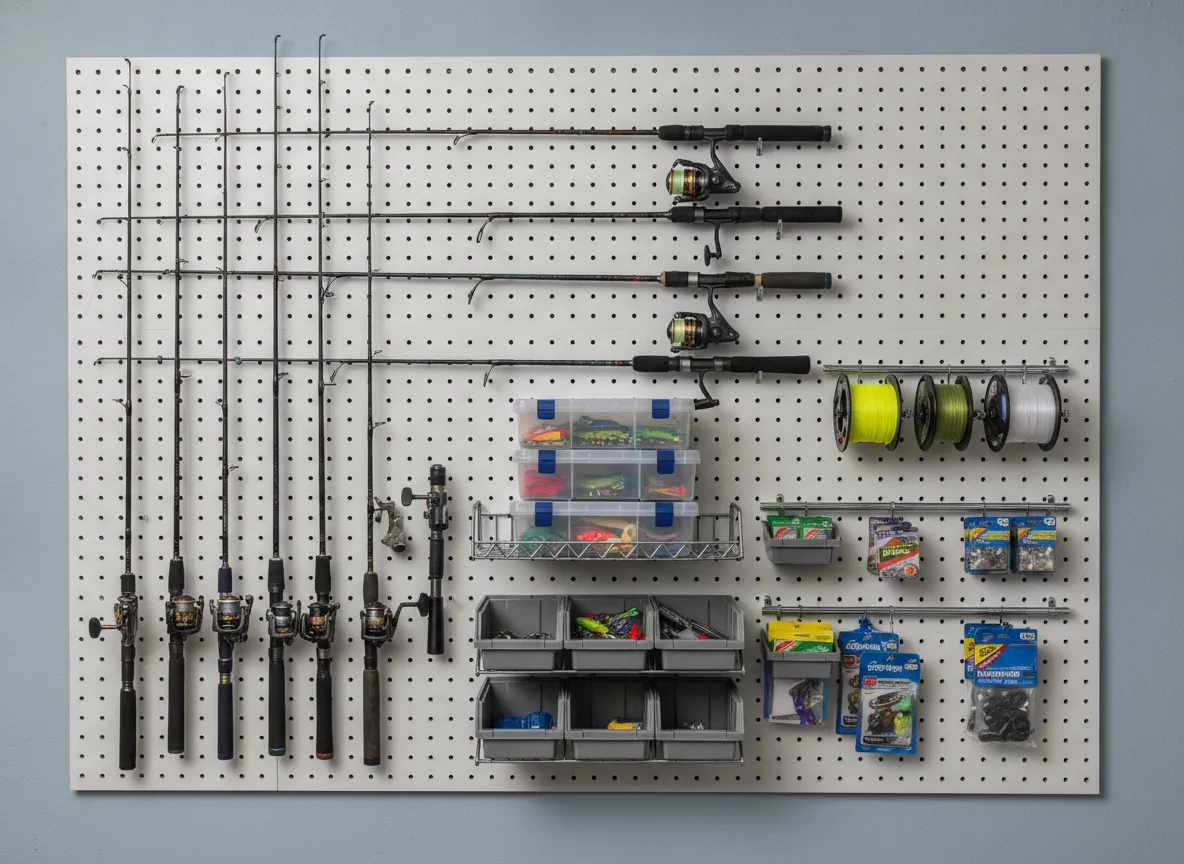
8. Pegboard Rod and Tackle Wall System
Estimated cost: $20 to $35
Best for: Dedicated fishing rooms, garages, workshops
Pegboard is one of the most flexible materials for any kind of workshop organization, and it works exceptionally well for fishing gear. A 4×4 or 4×8 sheet of pegboard mounted to a garage wall becomes the foundation for a complete rod and tackle organization system.
Standard pegboard hooks hold rod handles in place. Longer J-hooks support rod blanks at multiple points. Pegboard bins and shelves hold reels, tackle boxes, lures, and line spools, all on the same wall surface.
Cost breakdown:
- 4×4 pegboard sheet: $10 to $15
- Assorted hooks and bins: $8 to $15
- Mounting hardware: $3 to $5
The modular nature of pegboard means the layout can be reconfigured at any time without tools. As a rod collection grows, hooks are simply repositioned. This makes it the most future-proof option among the 9 DIY fishing pole storage projects covered here.
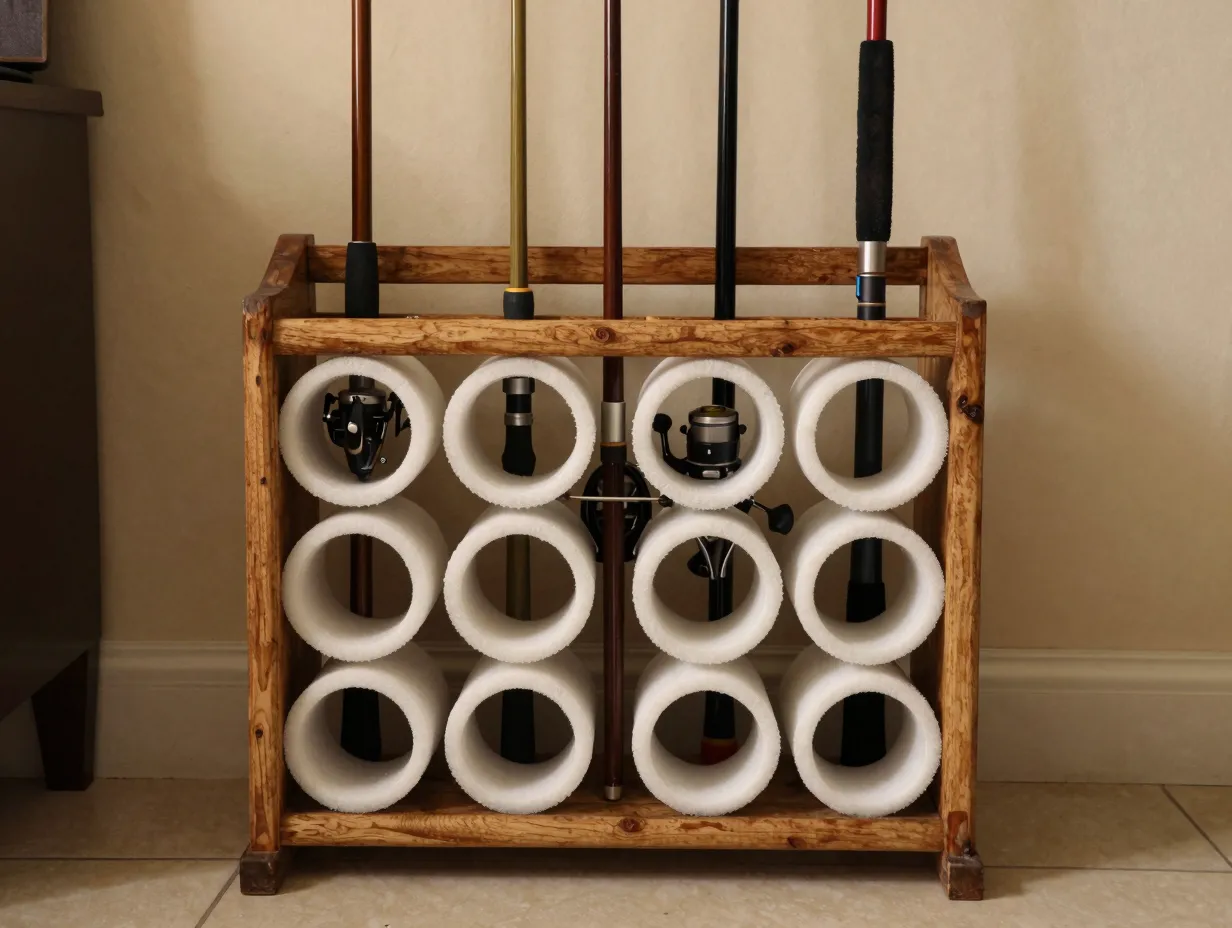
9. Repurposed Wine Rack Rod Holder
Estimated cost: $0 to $20 (often found secondhand)
A wooden wine rack, particularly the kind with circular openings for wine bottles, is dimensionally very close to what a fishing rod storage rack needs. The circular openings, typically 3 to 4 inches in diameter, are sized perfectly for rod handles, cork grips, and even reels.
A standard 12-bottle wine rack holds 12 rods vertically, with each rod standing upright in its own padded slot. Adding a circle of foam weather stripping around the inside of each opening protects rod finishes and prevents rattling.
Wine racks are frequently available at thrift stores, garage sales, and online resale platforms for $5 to $15. This makes it one of the highest-value builds on this list in terms of cost per rod stored.
Tip: Choose a wine rack with a stable base and a back support structure. Freestanding racks without a back brace can tip forward when loaded with heavy rods and reels.
Choosing the Right Project From These 9 DIY Fishing Pole Storage Projects To Organize Your Gear On A Budget
Not every build suits every angler or every space. The table below provides a quick comparison to help match the right project to the right situation.
| Project | Est. Cost | Skill Level | Best Space | Rod Capacity |
|---|---|---|---|---|
| PVC Wall Rack | $8,$15 | Beginner | Garage/Shed | 8-12 |
| Wooden Dowel Rack | $10,$20 | Beginner | Workshop/Den | 6-14 |
| Pool Noodle Organizer | $3,$8 | Beginner | Any wall | 4-10 |
| Ceiling Mount | $15,$25 | Intermediate | Garage ceiling | 10-20 |
| Ladder Rack | $0,$15 | Beginner | Garage/Cabin | 6-10 |
| PVC Portable Tube | $12,$22 | Beginner | Travel/Transport | 4-6 |
| Tension Rod Closet | $5,$12 | Beginner | Closet/Apartment | 6-10 |
| Pegboard System | $20,$35 | Beginner | Garage/Workshop | 8-16 |
| Wine Rack Holder | $0,$20 | Beginner | Any room | 8-12 |
Common Mistakes to Avoid When Building DIY Rod Storage
Even simple builds can go wrong. The most frequent mistakes seen in DIY fishing rod storage projects include:
Ignoring guide protection. Hard wood, bare PVC, and unpadded metal will eventually scratch or crack rod guides. Always line contact points with foam, rubber, or pool noodle material.
Mounting to drywall without hitting studs. A wall rack loaded with 12 rods and reels can weigh 15 to 25 pounds. Drywall anchors alone are not sufficient for this load. Use a stud finder and drive screws into framing members.
Spacing rods too close together. Guides and reel seats need clearance. A minimum of 3 to 4 inches between rod centers prevents tangles and makes it easier to grab individual rods without disturbing the others.
Storing rods in high-humidity areas without ventilation. Cork grips and rod wraps are vulnerable to mold in enclosed, damp spaces. Ensure the storage area has some air circulation, especially in basements and sheds.
Not accounting for rod length variation. A rack designed for 7-foot rods will not safely hold a 10-foot surf rod or a 4-foot ultralight. Build with the longest rod in the collection in mind, or create separate sections for different rod lengths.
Tips for Maximizing the Value of Budget Fishing Rod Storage
Building the storage is only half the equation. Getting the most out of it requires a few organizational habits:
- Label each rod position. A small piece of masking tape or a cable label tag on each rack position tells any angler exactly which rod belongs where and what it is rigged with.
- Store rods with line tension released. Leaving a rod under tension, bent against a wall or leaning at an angle, causes permanent set in the blank over time.
- Clean rods before storing. Salt, sand, and grime left on a rod blank accelerate corrosion on guides and reel seats. A quick wipe-down before hanging takes 30 seconds and extends rod life significantly.
- Hang reels separately when possible. Reels add weight to the rod tip when stored horizontally. If space allows, remove reels and store them in a separate bin or shelf.
Conclusion
Disorganized fishing gear costs anglers money in two ways: damaged rods that need replacement and wasted time searching for the right setup before a trip. The 9 DIY fishing pole storage projects to organize your gear on a budget outlined in this guide eliminate both problems for less than the cost of a single retail rod rack.
Actionable next steps for 2026:
- Count the rods in the current collection and identify the storage space available, wall, ceiling, closet, or portable.
- Choose the project from this list that best matches the space, budget, and skill level.
- Make a materials list before visiting the hardware store to avoid overspending.
- Build the simplest version first. A pool noodle organizer or tension rod system can be completed in under 30 minutes and immediately proves the concept before committing to a more permanent build.
- Photograph the finished build and note what works. Most anglers end up combining two or three of these systems, for example, a ceiling mount for long-term storage and a PVC wall rack for rods in active rotation.
Organized gear is not a luxury. It is the difference between arriving at the water ready to fish and spending the first hour untangling lines and searching for the right rod. Every project on this list is achievable on a weekend with basic tools, and every one of them will pay for itself the first time it prevents a broken guide or a snapped tip.