8 Easy Fishing Pole Holder DIY Projects For Shore, Boat, And Garage
Roughly 55 million Americans go fishing at least once a year, yet a large percentage of them store their rods in a corner, leaning against a wall, or tangled in the back of a truck. Damaged guides, snapped tips, and lost rigs are the predictable result. The good news is that a well-built rod holder costs almost nothing to make, takes less than an afternoon, and solves the problem permanently. This guide covers 8 easy fishing pole holder DIY projects for shore, boat, and garage so that every angler, regardless of budget or skill level, can protect their gear and fish more efficiently.
Disclosure: This post contains affiliate links. As an Amazon Associate, we earn from qualifying purchases, and at no extra cost to you.
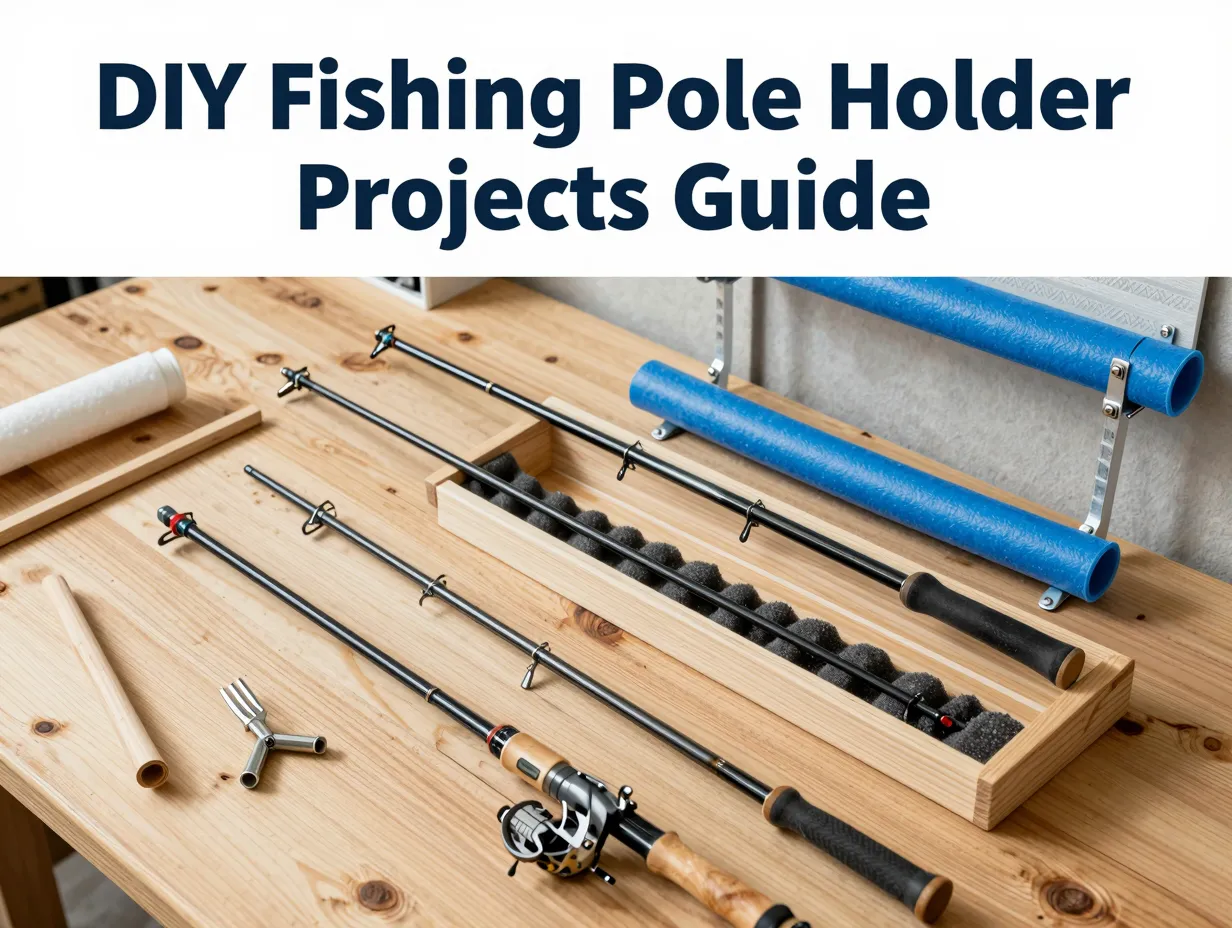
Whether the goal is a quick shore spike hammered into a riverbank or a polished wall-mounted rack for a garage workshop, these projects use common materials like PVC pipe, scrap wood, pool noodles, and basic hardware. No advanced woodworking or plumbing skills are required.
Key Takeaways
- All 8 projects use inexpensive, widely available materials such as PVC pipe, wood, and basic fasteners.
- Projects are grouped by location: shore, boat, and garage, making it easy to choose the right build.
- Most builds can be completed in one to three hours with standard household tools.
- Proper rod storage prevents tip breakage, guide damage, and tangled lines, extending the life of expensive equipment.
- Customization options allow builders to match holder size, rod capacity, and mounting style to their specific needs.
Shore Fishing Rod Holder DIY Projects
Shore fishing demands holders that can be deployed fast, stay stable in sand, mud, or gravel, and handle the weight of a rod under tension from a live bite. The three projects below address those needs with minimal materials.
1. PVC Pipe Sand Spike Rod Holder
Materials needed: 1.5-inch schedule 40 PVC pipe, PVC end cap, PVC primer and cement, a hacksaw or PVC cutter, sandpaper.
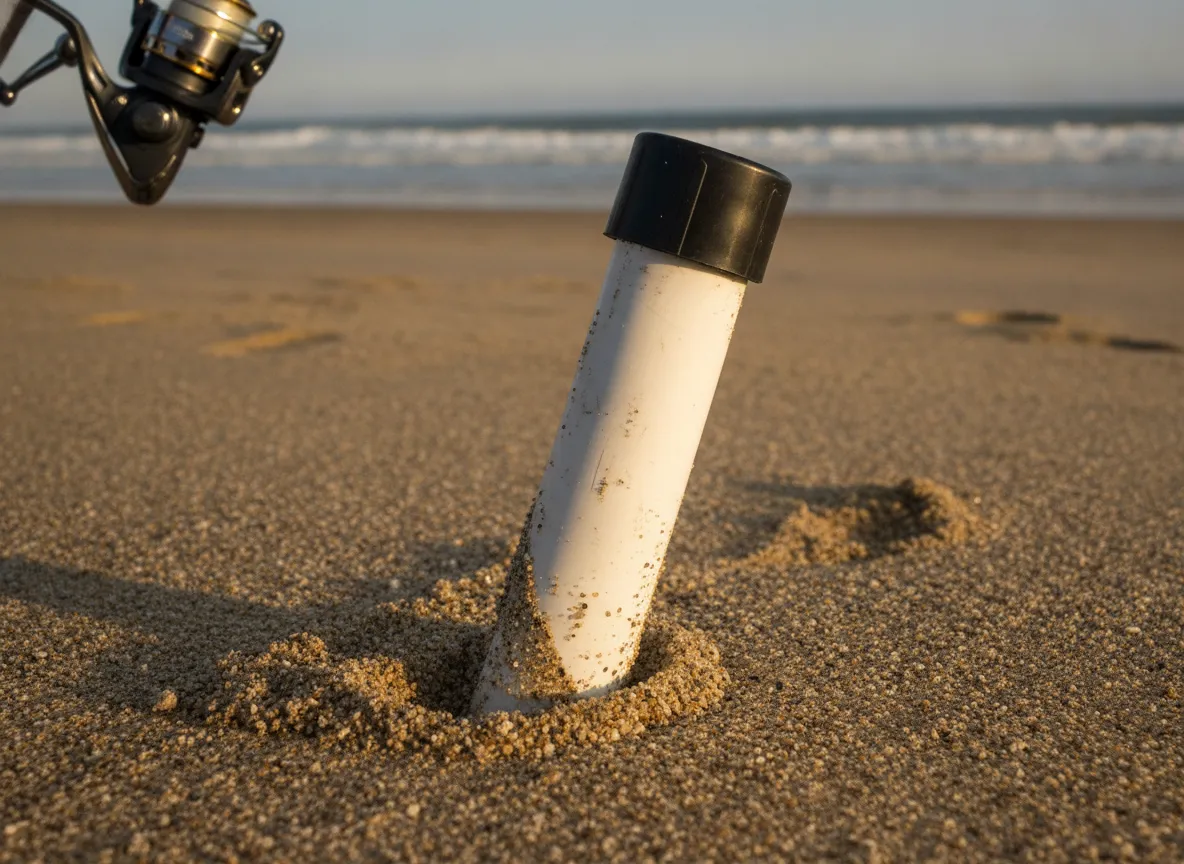
The sand spike is the most popular shore fishing rod holder design in the world for good reason: it works everywhere from ocean beaches to freshwater riverbanks.
How to build it:
Cut a 24-inch length of 1.5-inch PVC pipe. On one end, cut a sharp 45-degree angle to create a point that drives easily into sand or soft soil. Smooth the cut edges with sandpaper. Cement a PVC end cap onto the flat top end to prevent the rod butt from falling through. That is the entire build.
Pro tip: For rocky or hard-packed soil, cut the point at a steeper angle and use a rubber mallet to drive it in. Adding a small drainage hole near the bottom prevents water from pooling inside.
Estimated cost: Under $5 per holder.
Build time: 20 minutes.
2. T-Post Ground Spike With PVC Sleeve
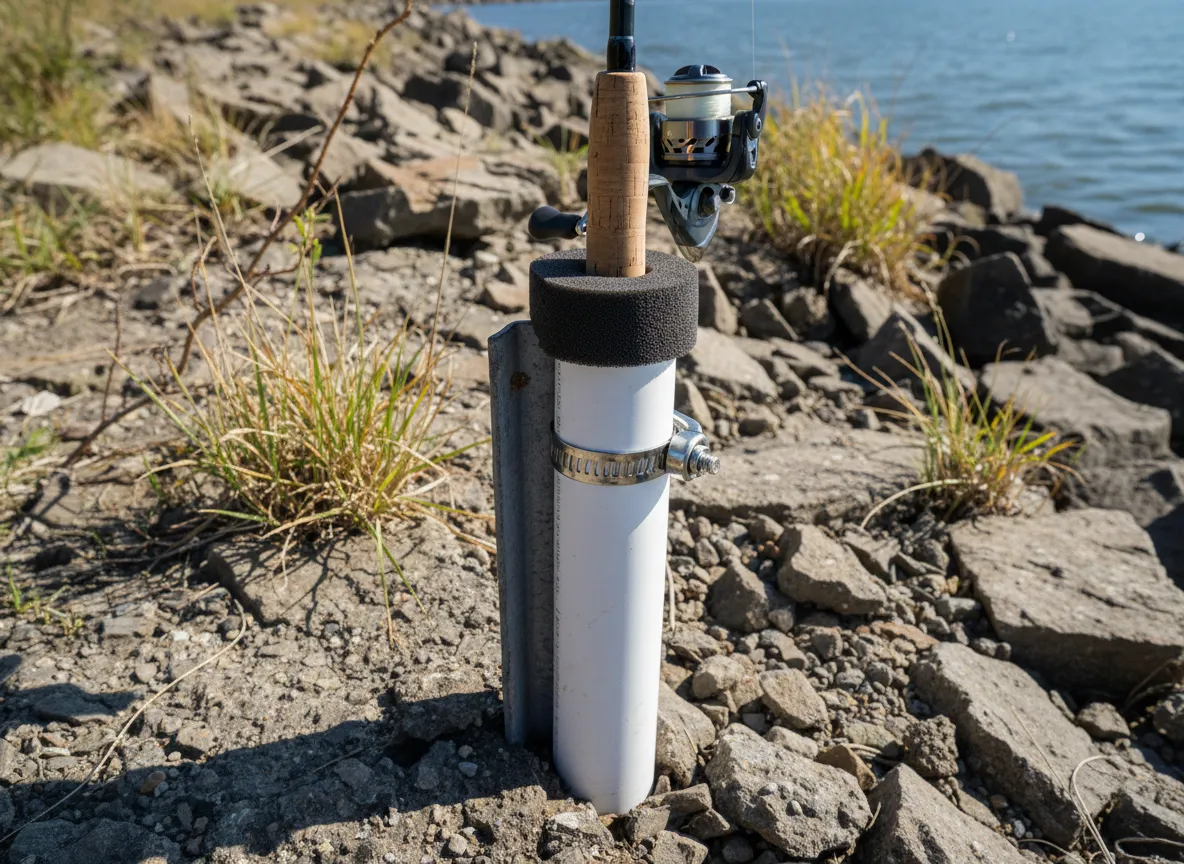
Materials needed: 18-inch steel T-post or rebar, 12-inch length of 2-inch PVC pipe, hose clamp, foam pipe insulation.
This holder is built for anglers fishing from rocky shorelines, jetties, or hard-packed riverbanks where a plain PVC spike will not penetrate.
How to build it:
Drive the steel T-post or a 12-inch rebar stake into the ground using a hammer. Slide the 12-inch PVC sleeve over the top of the post and secure it with a hose clamp. Line the inside of the PVC sleeve with a short section of foam pipe insulation to cushion the rod butt and prevent rattling. The steel provides the anchoring force; the PVC sleeve protects the rod.
Estimated cost: $8 to $12 depending on whether rebar is already on hand.
Build time: 15 minutes.
3. Wooden Forked Branch Rod Rest
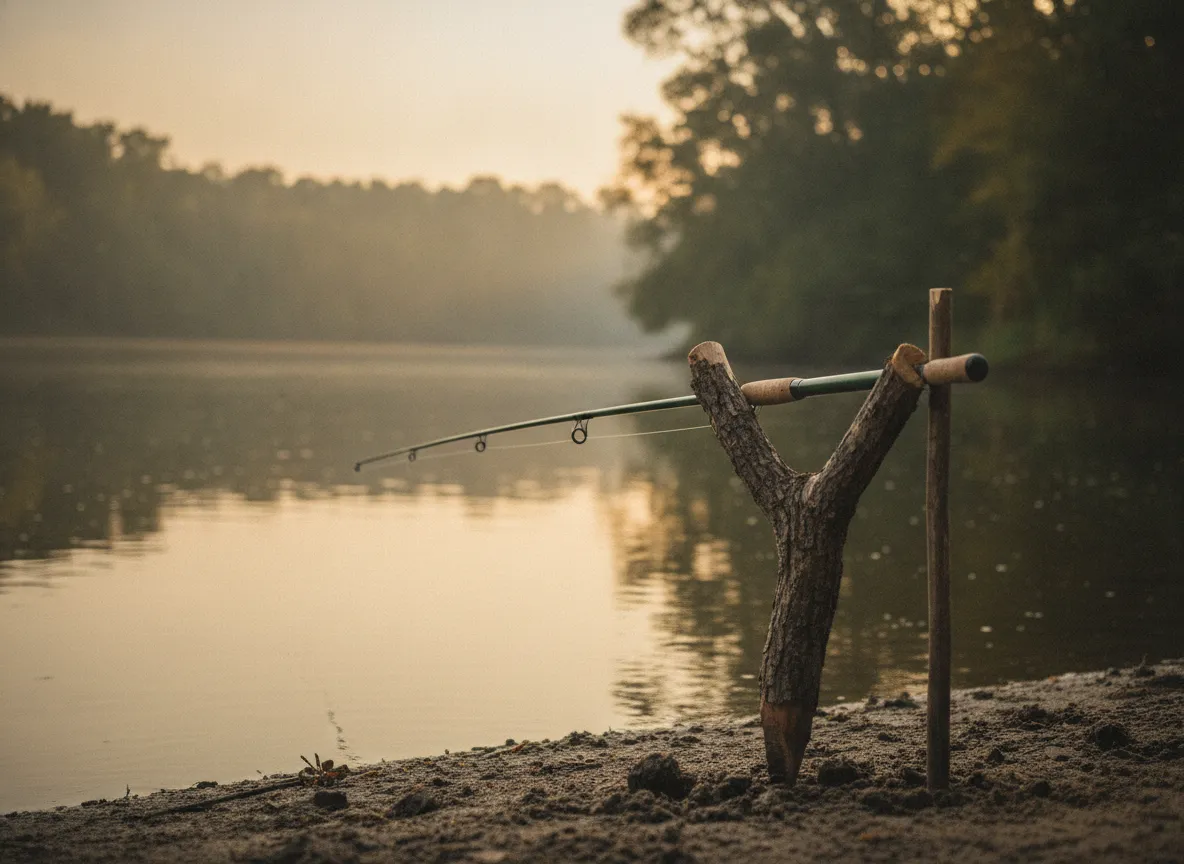
Materials needed: A sturdy forked branch (Y-shaped), a pointed stake, cordage or zip ties.
This is the oldest rod holder design in existence and still one of the most practical for hikers, backpackers, and bank anglers who want zero added weight in their pack.
How to build it:
Find a Y-shaped branch roughly 18 to 24 inches long with a fork wide enough to cradle a rod. Sharpen the base end with a knife or hatchet. Drive it into the bank at a slight backward angle so the fork tilts toward the water. Lay the rod in the fork. For a two-point rest, drive a second straight stake behind the angler to cradle the rod butt.
“The simplest solutions are often the most reliable. A forked stick costs nothing and has held rods steady for thousands of years.”
Estimated cost: $0.
Build time: 5 minutes.
Boat Rod Holder DIY Projects
Boat rod holders must handle vibration, spray, and the constant movement of a vessel underway. They also need to be mounted securely without damaging the hull or gunwale. The next three projects address those challenges.
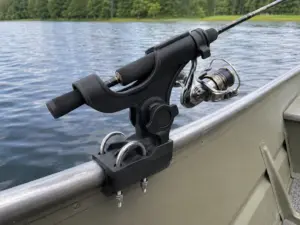
4. PVC Rail-Mount Rod Holder for Boats
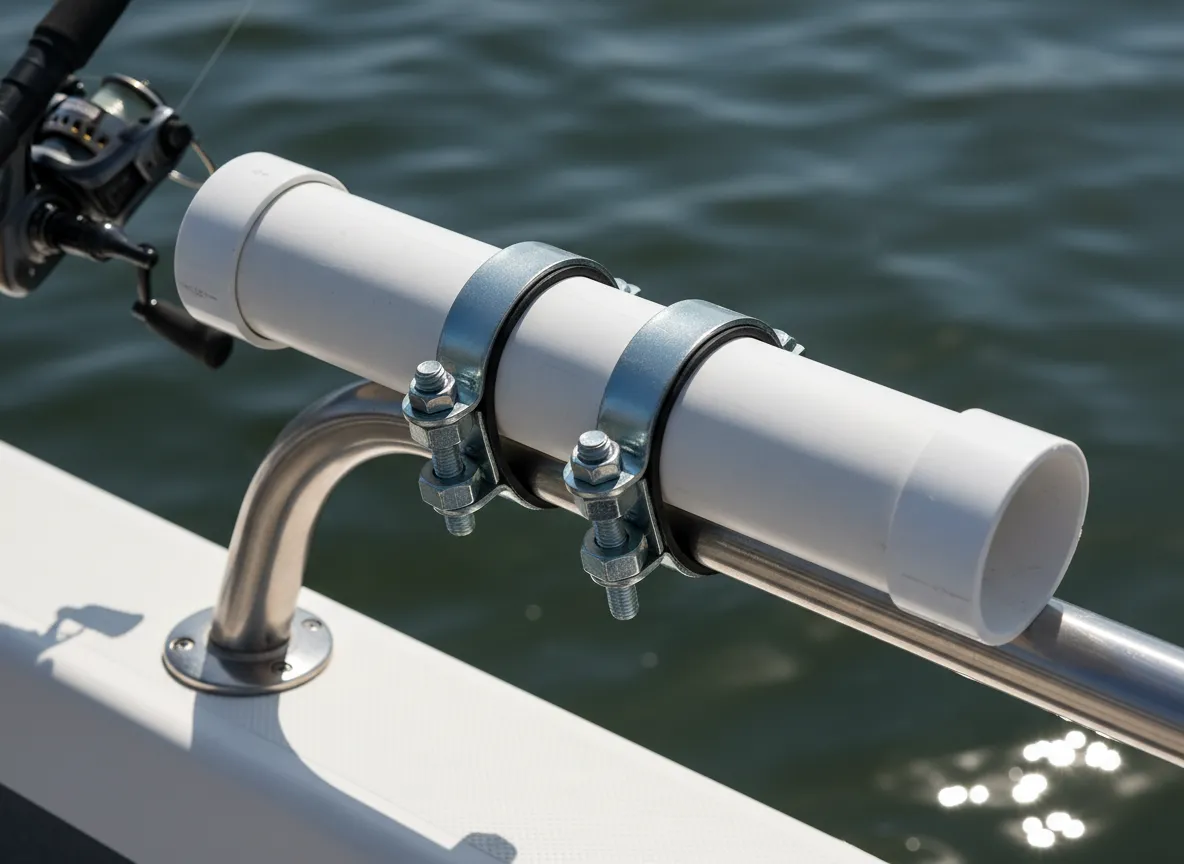
Materials needed: 2-inch schedule 40 PVC pipe (12-inch length), two 1-inch pipe clamps or rail clamps, stainless steel bolts and lock nuts, a drill, rubber gaskets.
This is one of the most searched boat rod holder DIY builds online because it mounts to the gunwale rail without drilling into the hull.
How to build it:
Cut the PVC pipe to 12 inches. Drill two small holes through the pipe wall, spaced to match the width of the rail clamps. Thread stainless steel bolts through the pipe and through the rail clamps, securing them with lock nuts. Place rubber gaskets between the clamps and the rail to prevent scratching. Mount the assembly to the boat rail at a 15-degree outward angle so rods splay away from the boat when trolling.
Key considerations:
- Use stainless steel hardware only. Zinc or galvanized hardware corrodes rapidly in saltwater.
- Check rail clamp compatibility with the rail diameter before purchasing.
- Space multiple holders at least 10 inches apart to prevent rod tangles.
Estimated cost: $10 to $18 per holder.
Build time: 30 minutes.
5. Foam-Lined Flush-Mount Rod Tube
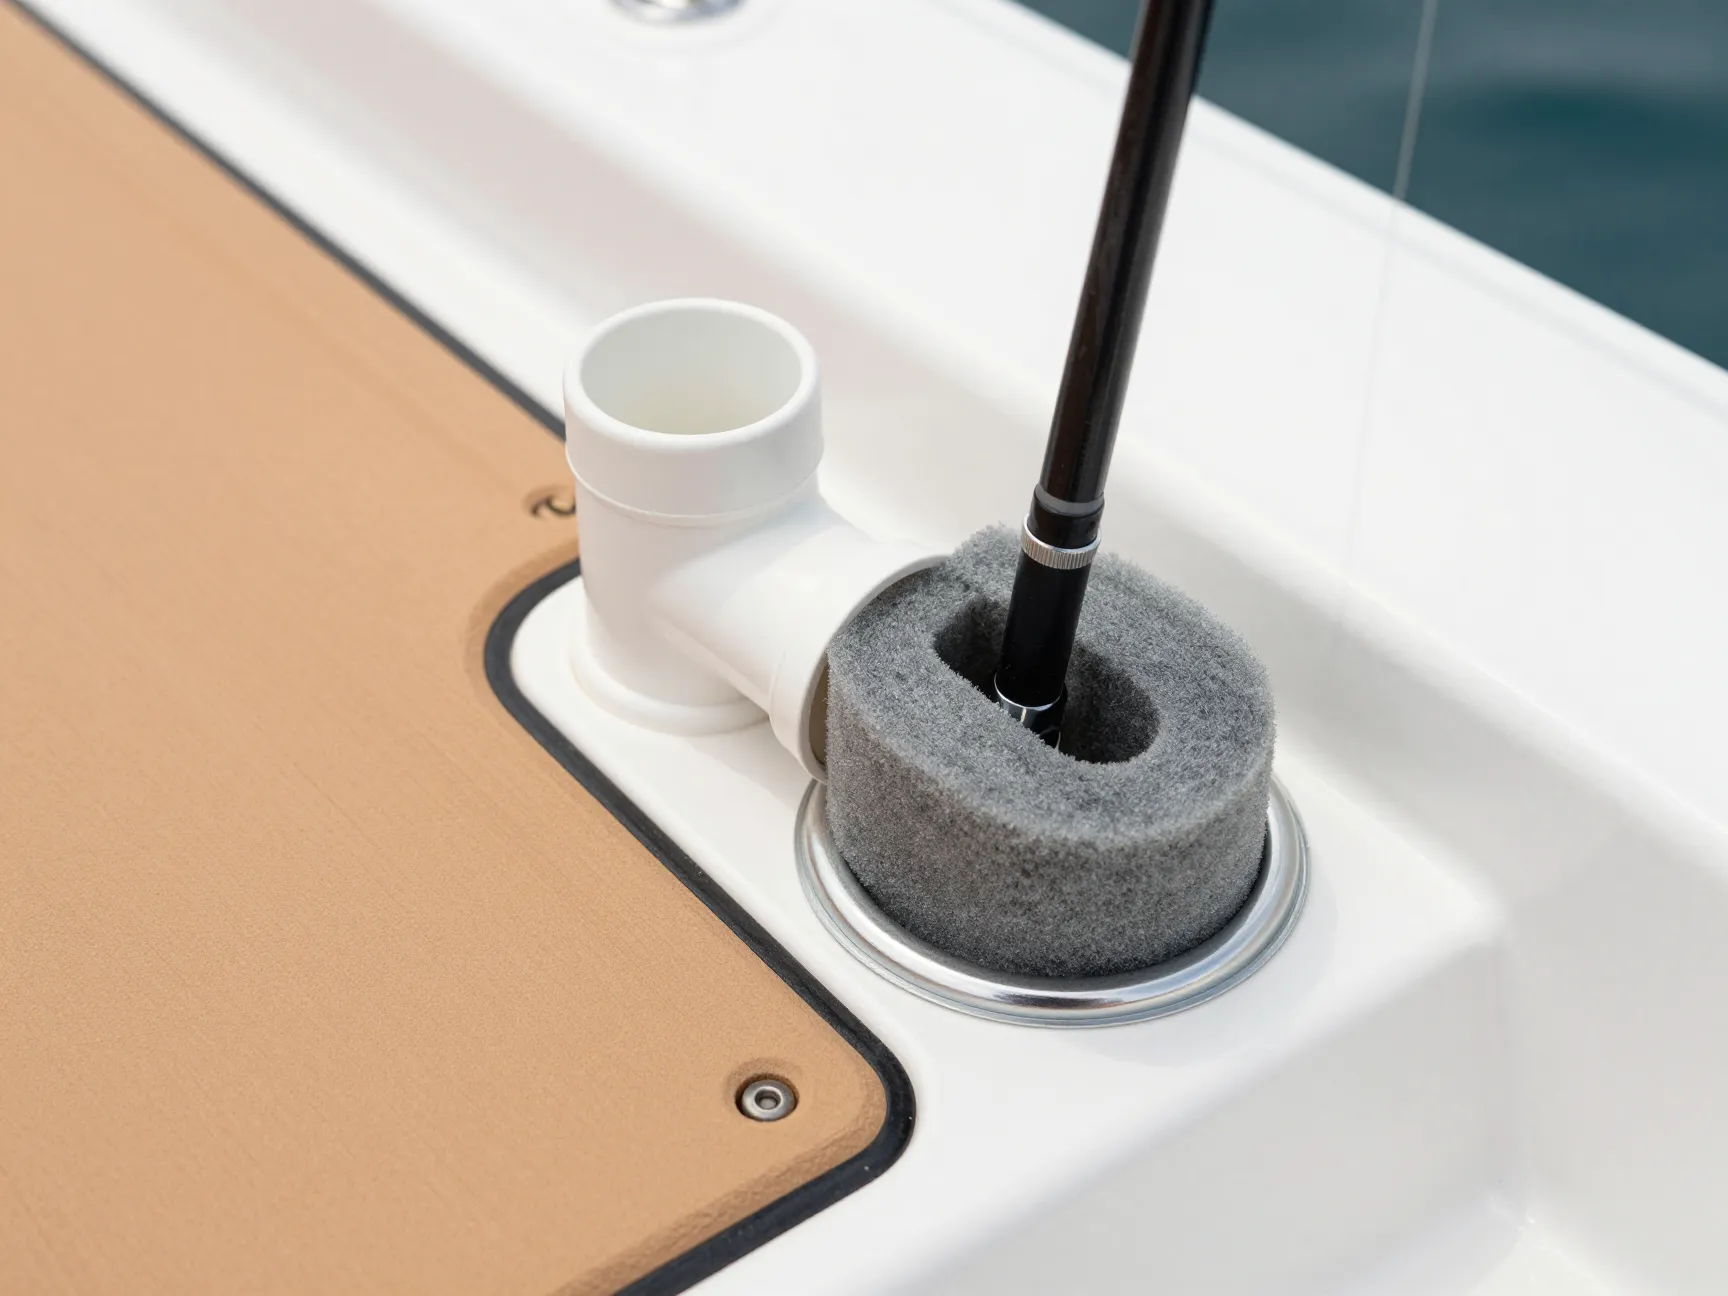
Materials needed: 3-inch PVC pipe (18-inch length), PVC flange, closed-cell foam pipe insulation, stainless screws, a hole saw, marine sealant.
A flush-mount holder sits flat against a boat surface with the rod tube recessed into the deck or gunwale cap. It looks professional and keeps rods out of the way during transit.
How to build it:
Use a hole saw to cut a 3-inch hole in the gunwale cap or a mounting board. Insert the PVC pipe tube through the hole. Secure the PVC flange on the underside with stainless screws. Apply marine sealant around the flange to prevent water intrusion. Line the inside of the tube with closed-cell foam insulation cut to length, which cushions the rod and dampens vibration.
Important: Always apply marine sealant generously. Water intrusion into a wood gunwale cap leads to rot within one season.
Estimated cost: $15 to $25 per holder (excluding hole saw if not already owned).
Build time: 45 minutes.
6. Bungee Cord Kayak Rod Holder
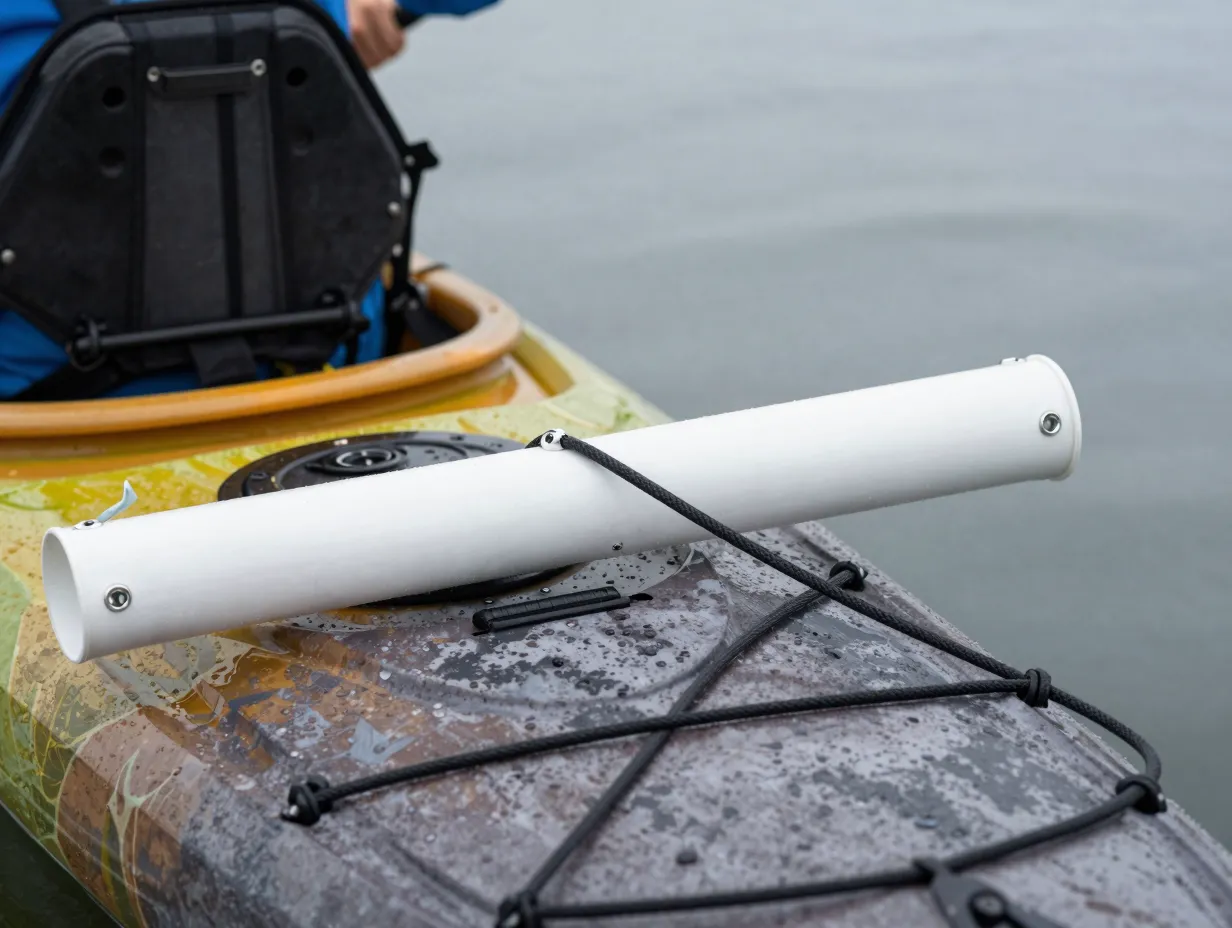
Materials needed: Two 1-inch PVC pipe sections (6 inches each), four stainless steel screw eyes, heavy-duty bungee cord, drill, stainless screws.
Kayak anglers need rod holders that are low-profile, lightweight, and accessible from a seated position. This bungee design does all three.
How to build it:
Mount two short PVC pipe sections horizontally on the kayak deck behind the cockpit using stainless screws through drilled pilot holes. Install screw eyes at the ends of each pipe section. Thread a loop of heavy-duty bungee cord through the screw eyes so it stretches across the rod blank, holding it snugly against the deck. The rod slides in from the side and the bungee holds it firm even in rough water.
Customization options:
| Feature | Option A | Option B |
|---|---|---|
| Rod angle | Horizontal (low profile) | 15-degree upward tilt |
| Bungee tension | Single loop | Double loop for heavier rods |
| Mount location | Behind cockpit | In front of cockpit |
Estimated cost: $6 to $10.
Build time: 25 minutes.
Garage and Home Storage Rod Holder DIY Projects
Garage rod storage is about long-term protection, organization, and maximizing wall or ceiling space. Rods stored horizontally on padded supports maintain their blank integrity far better than rods leaning upright in a corner.
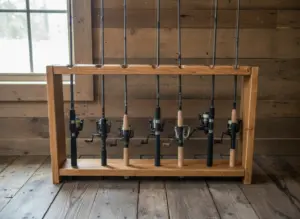
7. Wall-Mounted Wooden Rod Rack
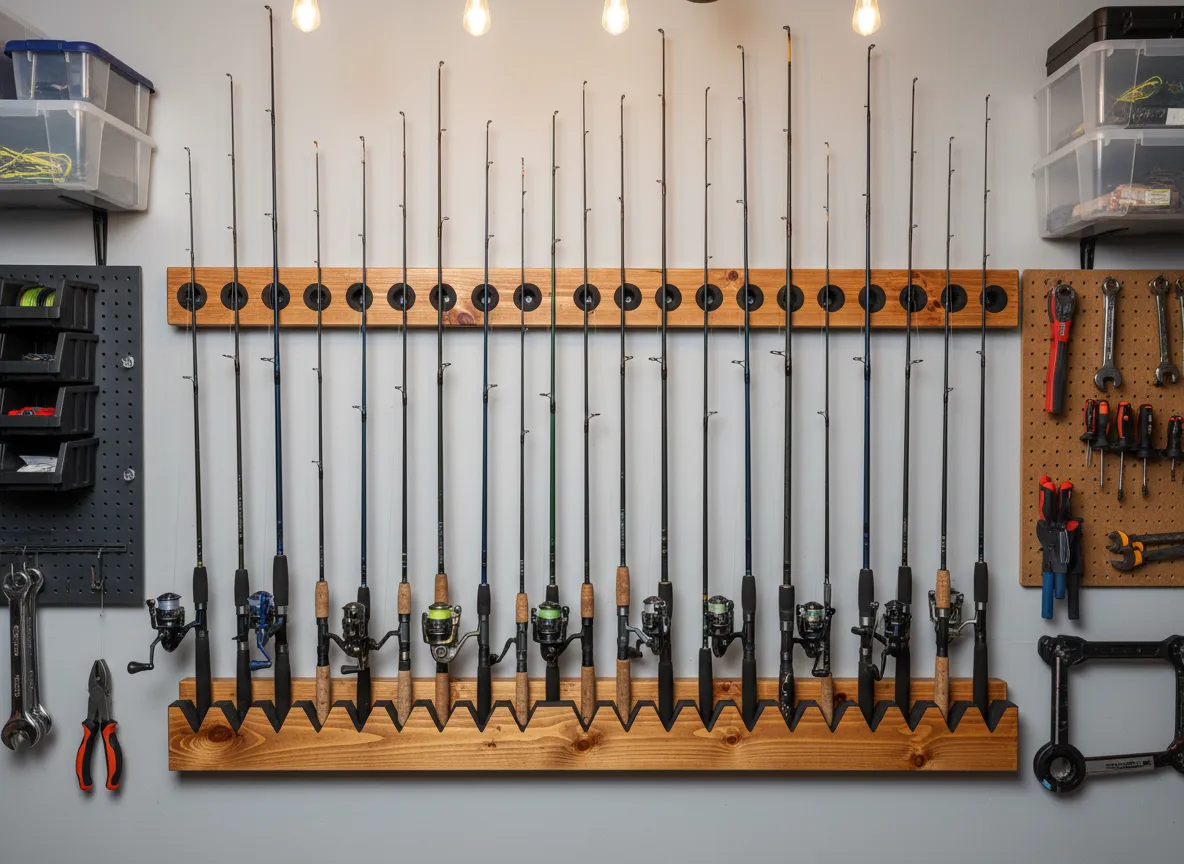
Materials needed: 1×4 or 1×6 pine or plywood board (48 inches long), 1-inch wooden dowels or PVC pipe sections, foam pipe insulation, wood screws, wall anchors, sandpaper, paint or stain (optional).
A wall-mounted rod rack is the gold standard for garage rod storage. It holds multiple rods horizontally, keeps them organized, and displays them like the valuable equipment they are.
How to build it:
Cut two 48-inch lengths of 1×4 board. These will be the top and bottom rails. On the top rail, drill 2-inch holes spaced 4 inches apart along the center line. These holes will cradle the rod tips. On the bottom rail, cut V-shaped notches at matching intervals to hold the rod butts. Line every hole and notch with foam pipe insulation cut into short sections and glued in place. Mount both rails to wall studs using wall anchors and screws, spacing them so the top rail holds the rod tip section and the bottom rail holds the handle. Slide rods in from the front.
Capacity: A 48-inch rail with holes spaced 4 inches apart holds up to 10 rods comfortably.
Estimated cost: $15 to $30 depending on lumber prices.
Build time: 1 to 2 hours.
8. Pool Noodle Ceiling-Mounted Rod Holder
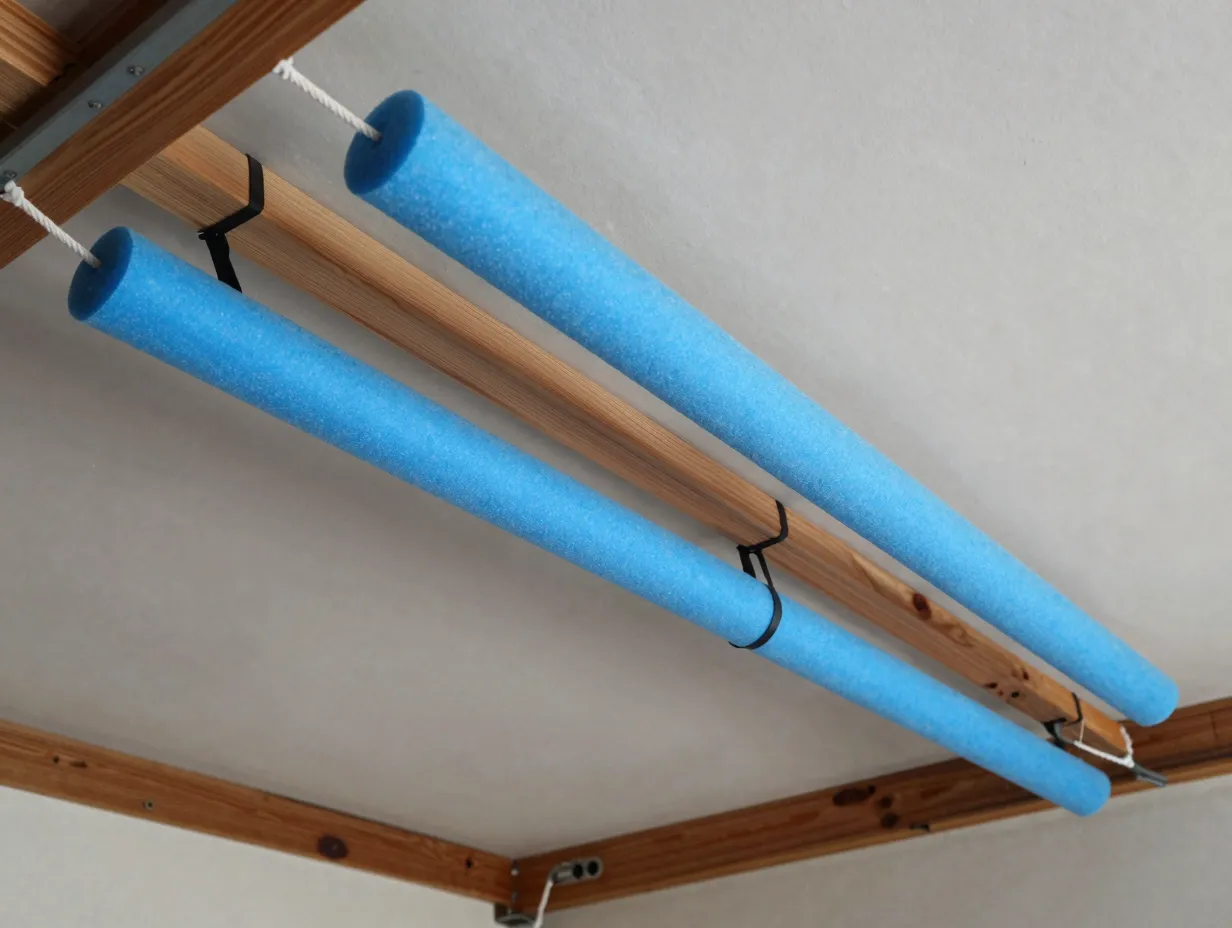
Materials needed: Two pool noodles, two 1×2 furring strips (48 inches each), zip ties or bungee cord, ceiling hooks or eye bolts, rope or chain.
This is the most budget-friendly garage rod storage solution in the entire list of 8 easy fishing pole holder DIY projects for shore, boat, and garage. Pool noodles cost roughly $1 each, and the entire build takes under an hour.
How to build it:
Attach a pool noodle lengthwise to each furring strip using zip ties spaced every 8 inches. Drill pilot holes through the furring strip and into the ceiling joists, or use heavy-duty ceiling hooks. Hang the two furring strips parallel to each other from the ceiling using rope or chain, spacing them about 36 inches apart. Lay rods horizontally across both noodles, with the foam cushioning the blank. The rods rest out of the way above head height, protected from foot traffic and accidental contact.
Why pool noodles work so well:
- Closed-cell foam does not absorb moisture.
- The soft surface prevents scratching of rod blanks and guide feet.
- Noodles can be cut to any length with scissors.
- Colors can be used to color-code storage zones by rod type.
Estimated cost: $5 to $12 total.
Build time: 30 to 45 minutes.
Materials Comparison: Choosing the Right Build for Your Situation
Before starting any of the 8 easy fishing pole holder DIY projects for shore, boat, and garage, it helps to compare the core materials side by side.
| Material | Best Use | Durability | Cost |
|---|---|---|---|
| PVC Pipe | Shore, boat, garage | Excellent (UV-resistant grade) | Very low |
| Pine/Plywood | Garage wall racks | Good (indoors only) | Low |
| Rebar/T-Post | Hard-ground shore fishing | Excellent | Low |
| Pool Noodle | Garage ceiling storage | Moderate (replace yearly) | Extremely low |
| Stainless Hardware | Saltwater boat mounts | Excellent | Moderate |
Safety and Legal Considerations
A few practical points apply to all rod holder builds regardless of location.
Shore fishing: Some public beaches and parks prohibit driving stakes into the ground. Always check local regulations before installing a permanent or semi-permanent holder on public land.
Boat mounting: Any holder that requires drilling into a hull or gunwale should be sealed with marine-grade sealant immediately. Unsealed holes allow water intrusion that causes structural rot and delamination over time.
Garage storage: Wall-mounted racks must be anchored into wall studs or use appropriate drywall anchors rated for the load. A rack loaded with 10 rods and pulling out of drywall can damage expensive equipment.
Rod weight limits: PVC pipe holders are rated for standard freshwater and light saltwater rods. Heavy deep-sea rods (over 30 ounces) may require reinforced holders made from thicker-walled pipe or aluminum.
Tips for Customizing Your DIY Rod Holder
Once the basic build is complete, customization adds function and longevity.
- Foam lining: Always line any hard surface that contacts the rod blank with closed-cell foam. This prevents scratches and dampens vibration.
- Color coding: Use spray paint or colored tape to mark holders by rod type (spinning, casting, fly) or by target species.
- Drainage holes: Drill a small hole at the bottom of any vertical holder to allow rainwater or spray to drain out.
- Angle adjustment: Most shore and boat holders perform better at a slight outward angle (10 to 20 degrees) rather than perfectly vertical. This keeps the rod tip clear of the holder edge and makes retrieval faster.
- Capacity scaling: All of the wooden and PVC rack designs can be extended by simply cutting longer base boards and adding more holes or notches at the same spacing.
Conclusion
The 8 easy fishing pole holder DIY projects for shore, boat, and garage covered in this guide prove that protecting expensive fishing equipment does not require expensive solutions. From a $0 forked branch on a riverbank to a polished wall-mounted wooden rack in a garage workshop, every project is achievable in a single afternoon with basic tools and common materials.
Actionable next steps:
- Identify the primary fishing location (shore, boat, or garage) and start with the project that matches that environment.
- Gather materials from a local hardware store or repurpose items already on hand before buying anything new.
- Build one holder first as a prototype, test it under real conditions, then refine the design before building multiple units.
- Add foam lining and drainage holes to every build as standard practice, not optional extras.
- Check local regulations before installing any ground-mounted holder on public land.
A well-organized rod storage system does more than protect gear. It shortens setup time, reduces pre-fishing stress, and puts the focus where it belongs: on the water.