8 Wilderness Survival Shelter Designs for Any Terrain
Every year, search-and-rescue teams in the United States conduct more than 3,000 operations for lost or stranded hikers, and hypothermia remains the leading cause of preventable wilderness death. In most of those cases, a well-built emergency shelter could have changed the outcome entirely. The 8 wilderness survival shelter designs for any terrain covered in this guide represent field-tested, practical solutions that work whether a person is stranded in a dense boreal forest, a desert canyon, an alpine snowfield, or a coastal marsh. Understanding how to build the right shelter for the right environment is not a luxury skill, it is a core survival competency.
Disclosure: This post contains affiliate links. As an Amazon Associate, we earn from qualifying purchases, and at no extra cost to you.
Key Takeaways
- Shelter is the most critical survival priority in most environments, outranking food and often water in urgency.
- The best shelter design depends on available materials, terrain type, temperature, and precipitation conditions.
- Natural materials, branches, leaves, bark, snow, and rock, can be combined to create insulating, wind-resistant structures without any tools.
- Building time and energy expenditure matter; a simple, fast shelter built quickly is almost always better than a complex one that takes hours.
- Practicing these builds before an emergency dramatically increases survival odds.
Why Shelter Selection Determines Survival Outcomes
Before examining the 8 wilderness survival shelter designs for any terrain, it is worth understanding why shelter choice matters so profoundly. The human body loses heat through conduction (contact with cold ground), convection (wind), radiation (body heat escaping into cold air), and evaporation (wet clothing). An effective shelter addresses as many of these heat-loss pathways as possible.
“The rule of threes in survival states that a person can survive three hours without shelter in a harsh environment, far less time than most people assume.”
Terrain dictates available materials. Climate dictates insulation requirements. Physical condition and available time dictate construction complexity. The eight designs below are organized from foundational to specialized, covering the broadest possible range of environments.
Key factors to assess before building:
- Ambient temperature and wind speed
- Available natural materials within 50 meters
- Proximity to natural hazards (flash flood zones, widow-makers, avalanche paths)
- Expected duration of stay
- Number of occupants
The 8 Wilderness Survival Shelter Designs for Any Terrain
1. The Lean-To
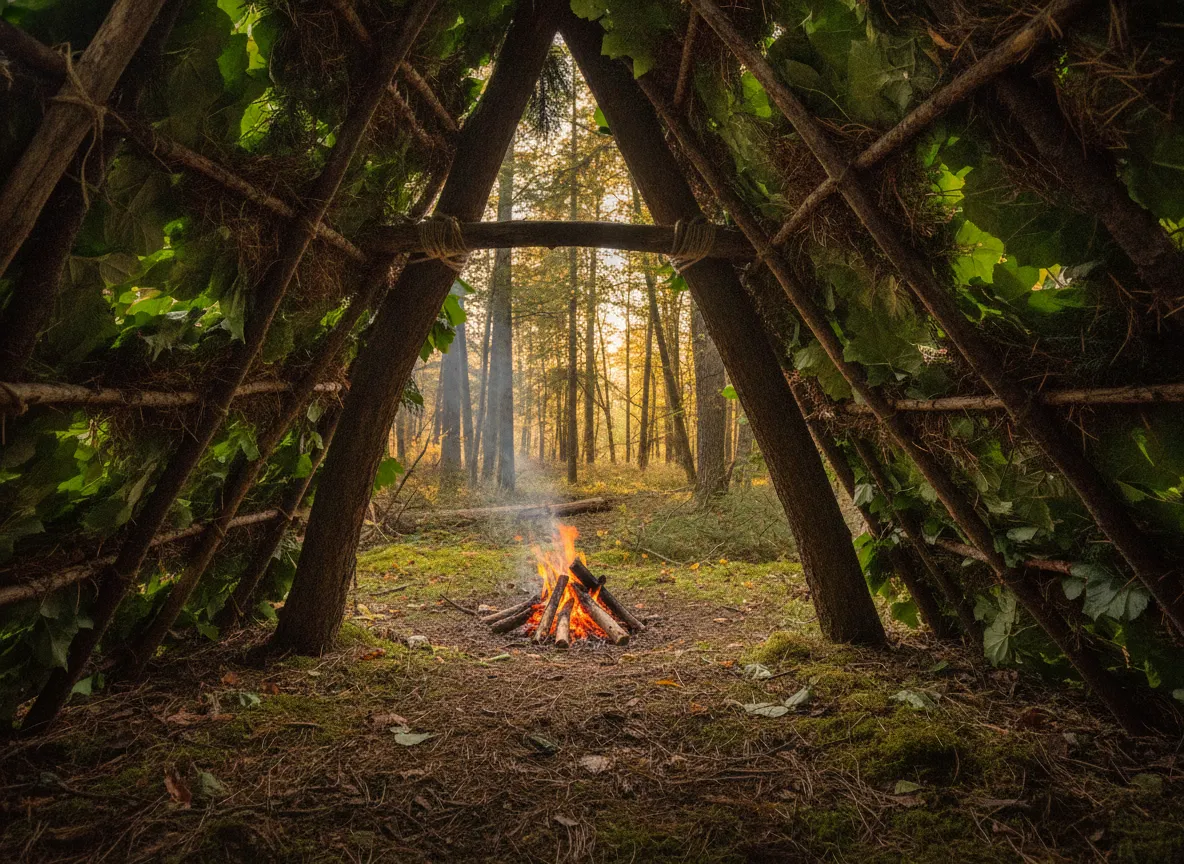
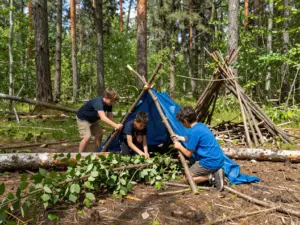
The lean-to is the most widely taught survival shelter for good reason: it is fast to build, requires minimal materials, and provides immediate wind and rain protection. It works best in temperate forests where fallen branches and standing trees are abundant.
Construction basics:
- Find two trees roughly 2 to 3 meters apart.
- Lash or wedge a horizontal ridgepole between them at chest height.
- Lean branches against the ridgepole at a 45-degree angle, working from one side.
- Layer leaves, bark, pine needles, or grass over the angled branches from bottom to top, like overlapping shingles.
- Add a debris floor at least 15 centimeters thick for ground insulation.
Best terrain: Temperate and boreal forests
Build time: 30 to 60 minutes
Limitation: Open on one side; requires a fire in front for warmth in cold conditions.
The lean-to’s open face is both its strength and weakness. It allows heat from a fire to reflect inward, but it offers no protection from wind on the open side. Always orient the closed back toward the prevailing wind.
2. The Debris Hut
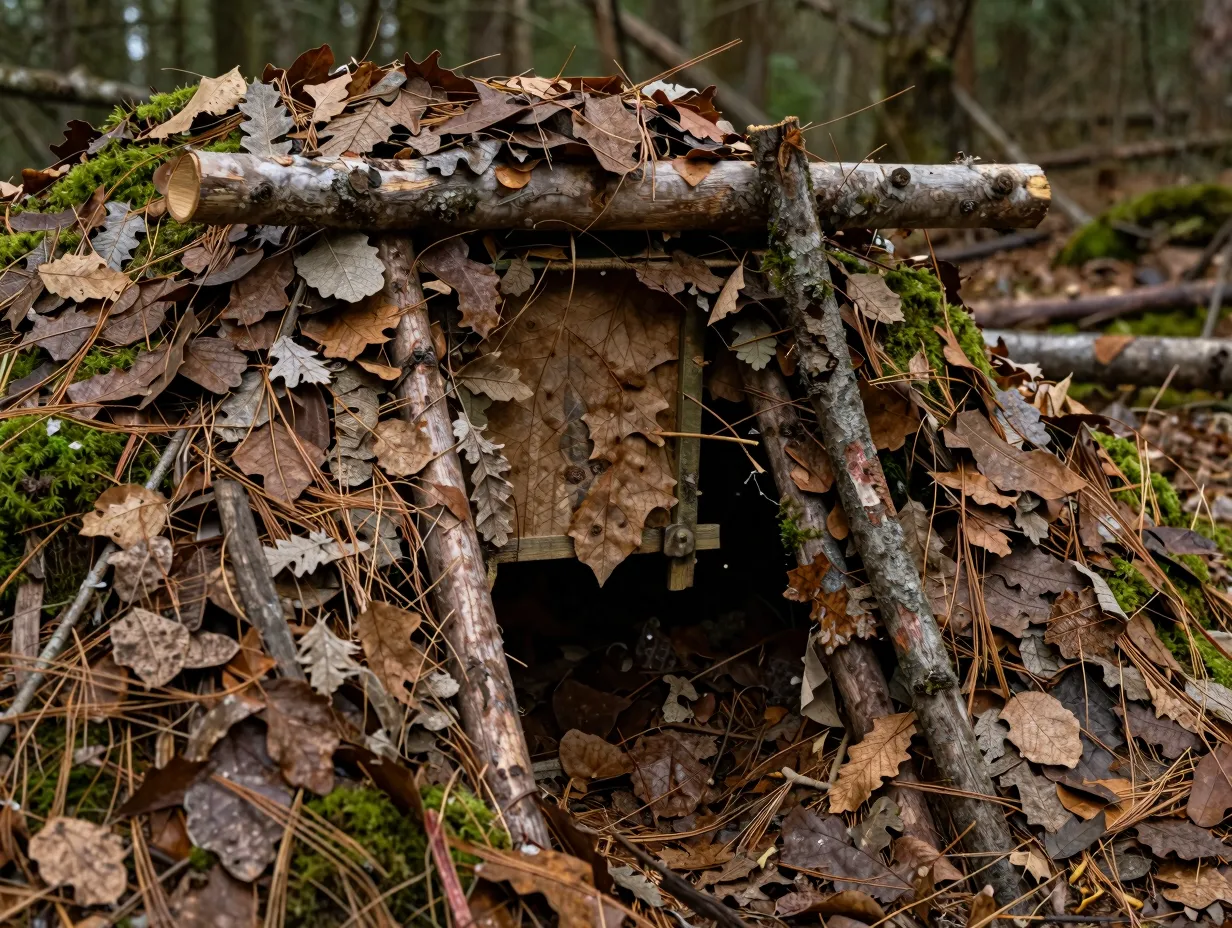
The debris hut is arguably the most thermally efficient natural shelter a person can build without tools. It functions like a sleeping bag made of forest material, trapping body heat within a tight cocoon of insulating debris.
Construction basics:
- Find or create a ridgepole roughly 2.5 to 3 meters long, propped at one end on a forked stick or stump about knee height.
- Lean branches along both sides of the ridgepole to form a ribbed frame.
- Pile leaves, pine needles, dry grass, and bark over the frame to a depth of at least 60 centimeters, far more than most beginners expect.
- Fill the interior with loose leaves for bedding.
- Create a door plug from a bundle of leaves stuffed into a bag or jacket.
Best terrain: Temperate forests with abundant leaf litter
Build time: 1 to 3 hours
Limitation: Cramped interior; not suitable for groups larger than two.
“A debris hut with 60 centimeters of leaf cover can maintain an interior temperature above freezing even when outside temperatures drop well below zero Celsius.”
The debris hut demands significant energy investment, so it is best built in the afternoon before fatigue sets in, not as a last-minute emergency measure.
3. The Snow Trench
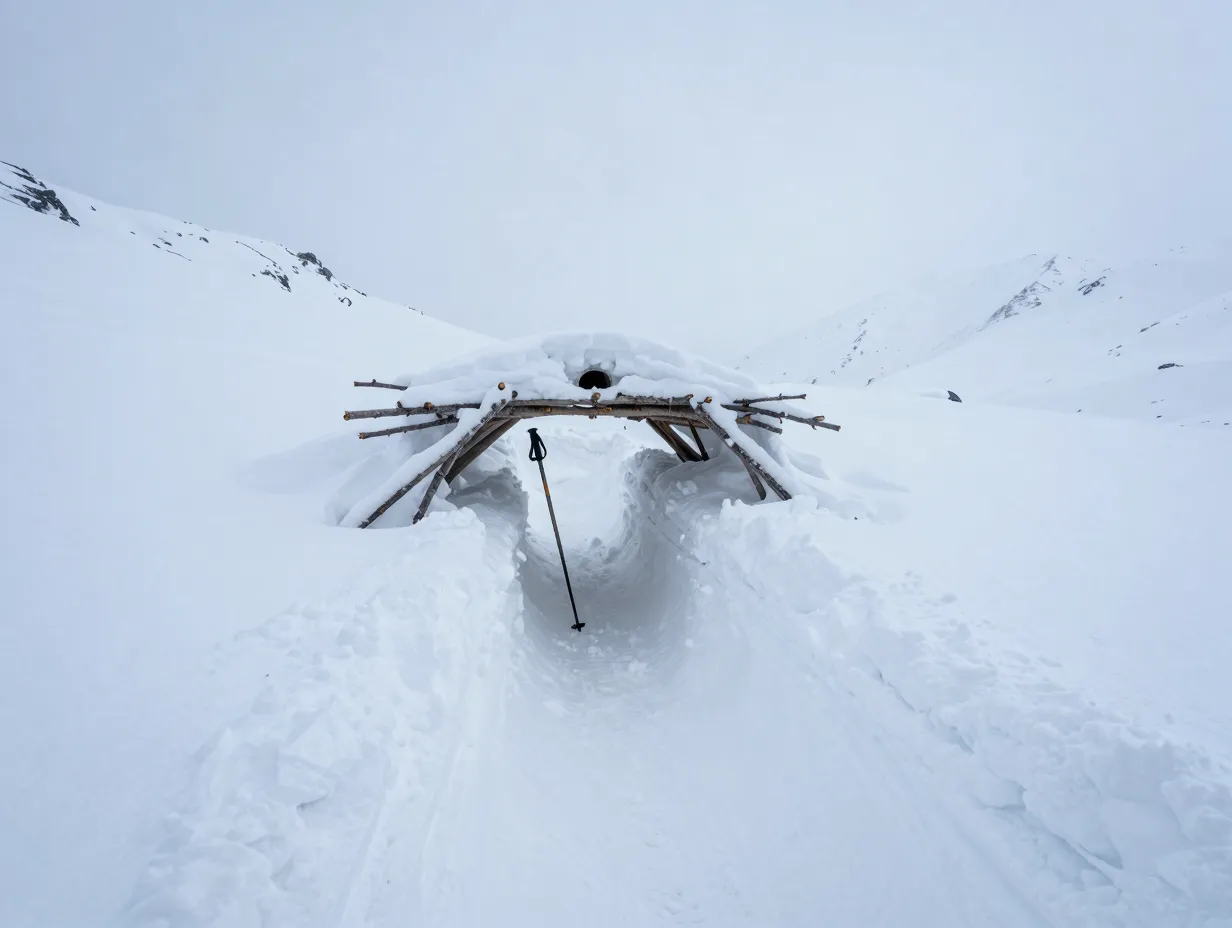
In alpine or arctic environments, snow is not just an obstacle, it is a building material. A snow trench is the fastest cold-weather shelter possible, exploiting snow’s surprisingly effective insulating properties.
Construction basics:
- Dig a trench just wide enough for the body and long enough to lie flat, roughly 60 centimeters wide and 180 centimeters long.
- Deepen the trench to at least 60 centimeters below the snow surface.
- Bridge the top with branches, skis, a tarp, or packed snow blocks.
- Cover the roof with additional snow for insulation.
- Line the floor with a sleeping pad, pack, or pine boughs.
Best terrain: Open snowfields, alpine zones, arctic tundra
Build time: 15 to 45 minutes
Limitation: Risk of collapse if snow is wet and heavy; requires ventilation hole to prevent carbon dioxide buildup.
Always poke a ventilation hole in the roof with a ski pole or stick. Mark the shelter’s location with a visible pole or branch so rescuers, and the occupant, can locate it.
4. The Quinzhee
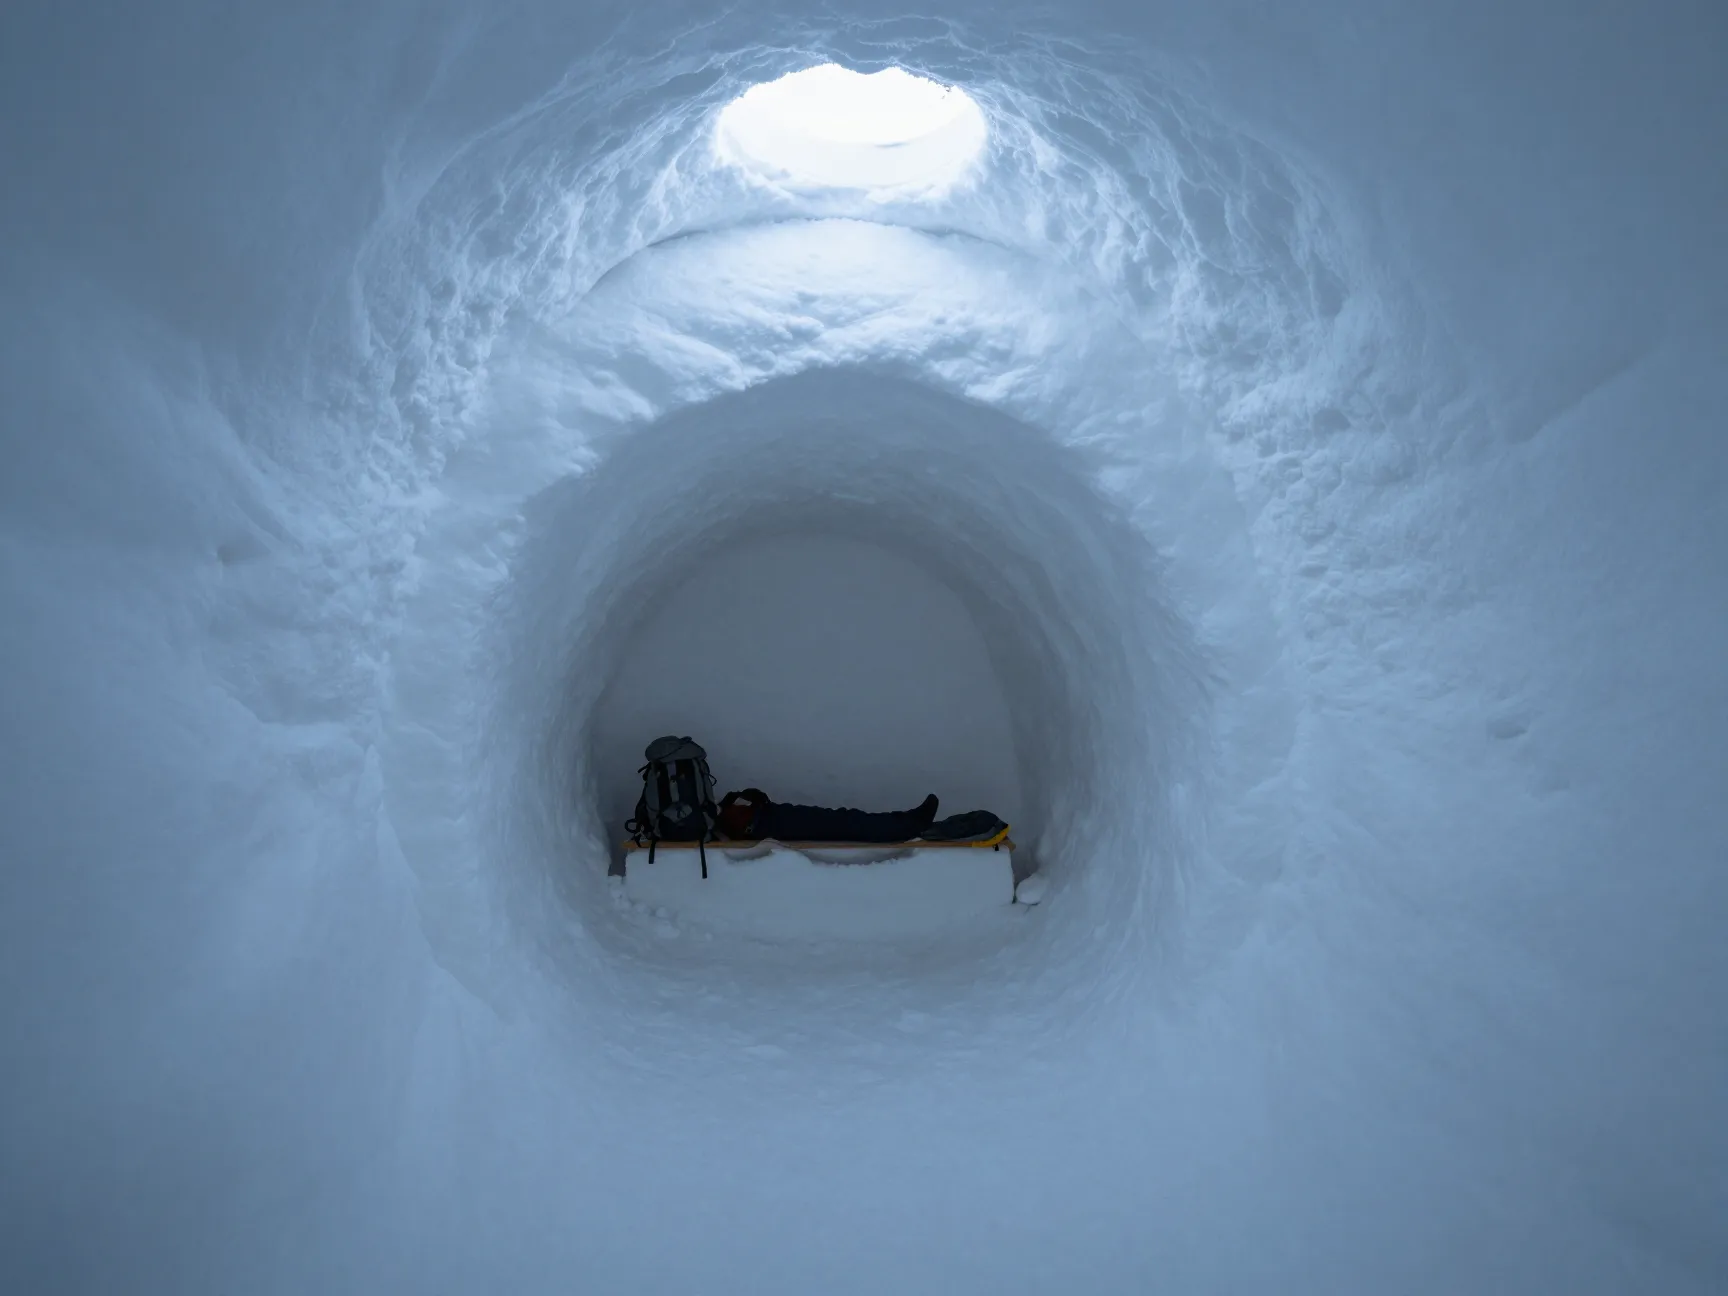
Where the snow trench is fast and minimal, the quinzhee is the cold-weather shelter of choice when more space and longer occupancy are needed. Unlike an igloo, which requires specific compacted snow blocks, a quinzhee can be built from any type of snow.
Construction basics:
- Pile snow into a mound roughly 2 meters high and 3 meters in diameter.
- Allow the mound to sinter (harden through crystal bonding) for at least two hours.
- Insert sticks roughly 20 centimeters long all around the mound as thickness guides.
- Hollow out the interior from a low entrance, stopping excavation when the sticks are reached to maintain consistent wall thickness.
- Poke a ventilation hole through the roof.
Best terrain: Snowy forests, alpine zones, any area with sufficient snow depth
Build time: 3 to 5 hours including sintering time
Limitation: Time-intensive; sintering cannot be rushed.
| Feature | Quinzhee | Igloo |
|---|---|---|
| Snow Type Required | Any snow | Compactable wind-packed snow |
| Skill Level | Beginner to intermediate | Intermediate to advanced |
| Build Time | 3 to 5 hours | 2 to 4 hours (with skill) |
| Group Capacity | 2 to 4 people | 2 to 6 people |
5. The Desert Rock Overhang Shelter
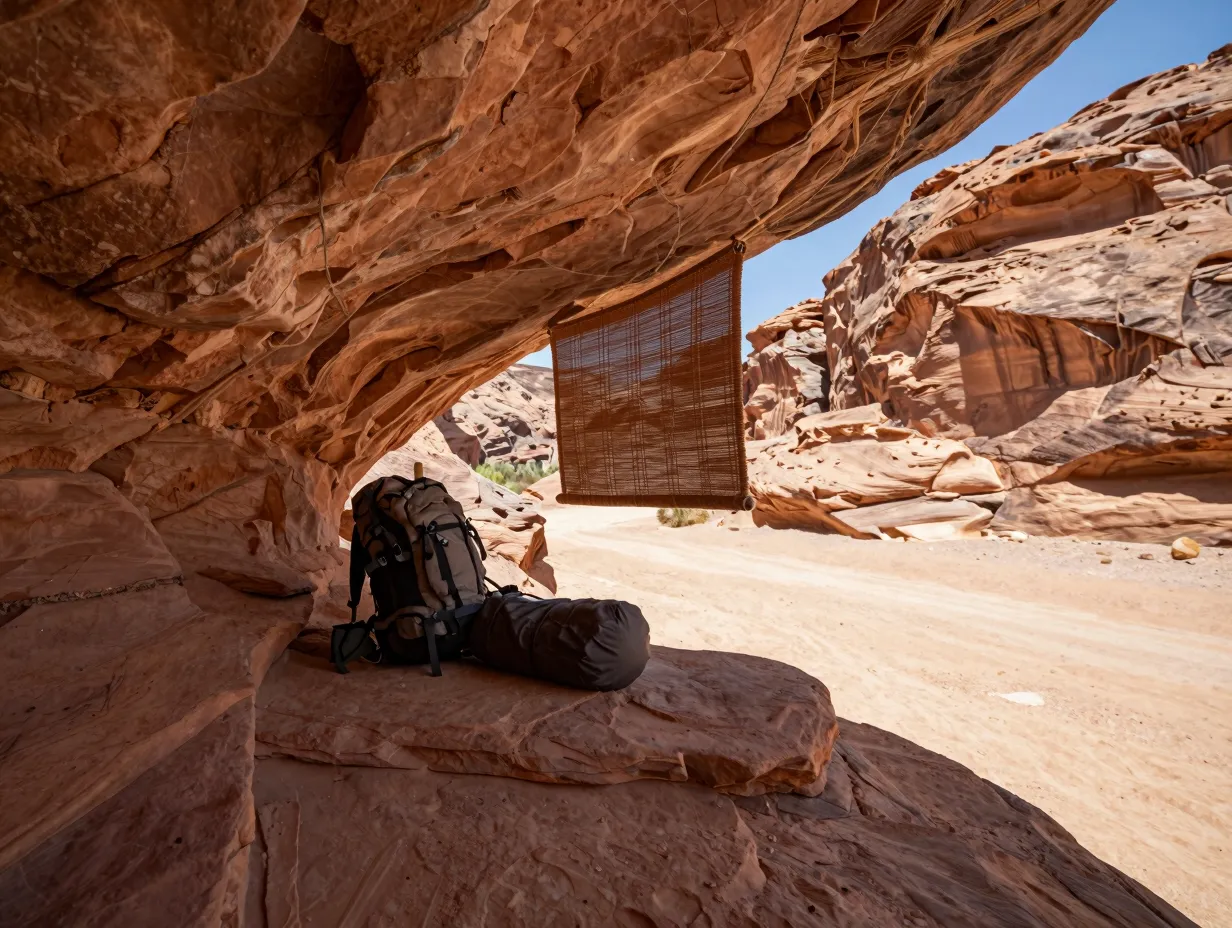
Desert survival presents the opposite challenge from cold-weather environments. The primary threats are solar radiation, dehydration, and extreme temperature swings between day and night. In arid terrain, natural rock formations become invaluable shelter resources.
Construction basics:
- Locate a rock overhang, cliff face, or boulder cluster that provides shade from the midday sun (south-facing in the Northern Hemisphere offers morning and evening shade; north-facing offers all-day shade).
- Assess the overhang for loose rock, nesting animals (especially venomous species), and flood channels.
- Enhance the shelter by hanging a tarp, poncho, or woven brush screen across the open face to block reflected heat and wind.
- Elevate the sleeping area on rocks or a pack frame to avoid ground contact with scorching sand.
Best terrain: Desert canyons, arid scrublands, rocky plateaus
Build time: 10 to 30 minutes (locating is the primary task)
Limitation: Fixed locations; may require significant travel to find a suitable overhang.
Desert shelter priorities differ from cold-weather priorities:
- Shade from direct sun is more urgent than wind protection during daylight hours.
- Insulation from hot ground is as important as insulation from cold ground at night.
- Ventilation prevents dangerous heat buildup inside enclosed spaces.
6. The Tarp A-Frame
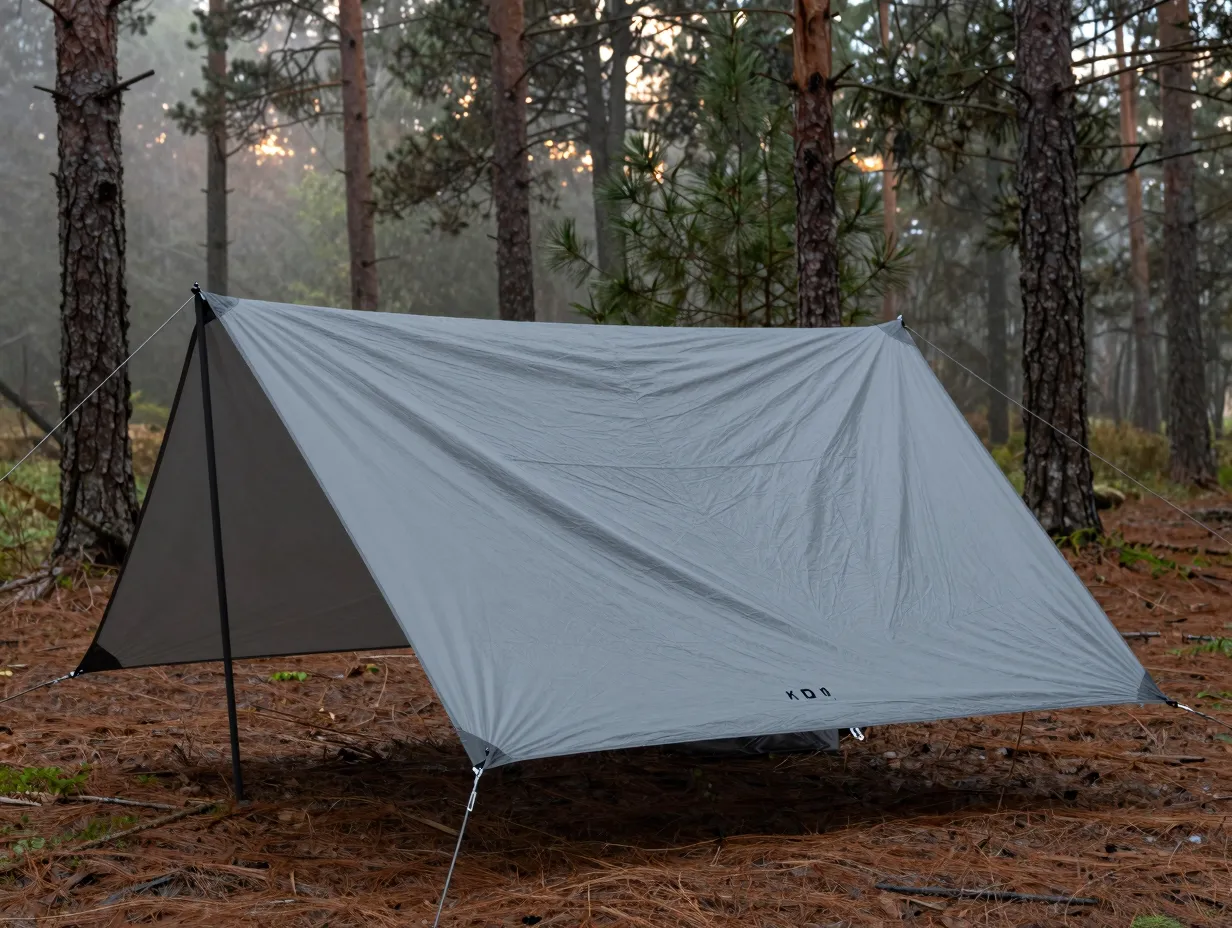
When a tarp, emergency blanket, or large sheet of plastic is available, the A-frame configuration is one of the most versatile and weather-resistant shelters possible. It bridges the gap between improvised natural shelters and modern lightweight gear.
Construction basics:
- Run a ridgeline cord between two trees or poles at roughly waist height.
- Drape the tarp symmetrically over the ridgeline with equal coverage on both sides.
- Stake or weight the lower edges to the ground, angling them outward to shed rain.
- Adjust the pitch angle: a steeper pitch (closer to 60 degrees) sheds rain better; a shallower pitch (45 degrees) retains more heat.
- Close one end with a tarp fold or additional material in cold or windy conditions.
Best terrain: Any terrain where trees or poles are available for anchor points
Build time: 5 to 20 minutes
Limitation: Requires a tarp or equivalent material; not a pure natural-material shelter.
“A single 3-by-3-meter silnylon tarp weighing under 400 grams can provide shelter for two people in rain, wind, and temperatures near freezing, making it one of the highest-value items in any survival kit.”
The A-frame tarp shelter is the preferred choice for experienced backpackers in 2026 precisely because it is fast, lightweight, and adaptable to almost any anchor configuration.
7. The Wickiup (Tipi-Style Frame Shelter)
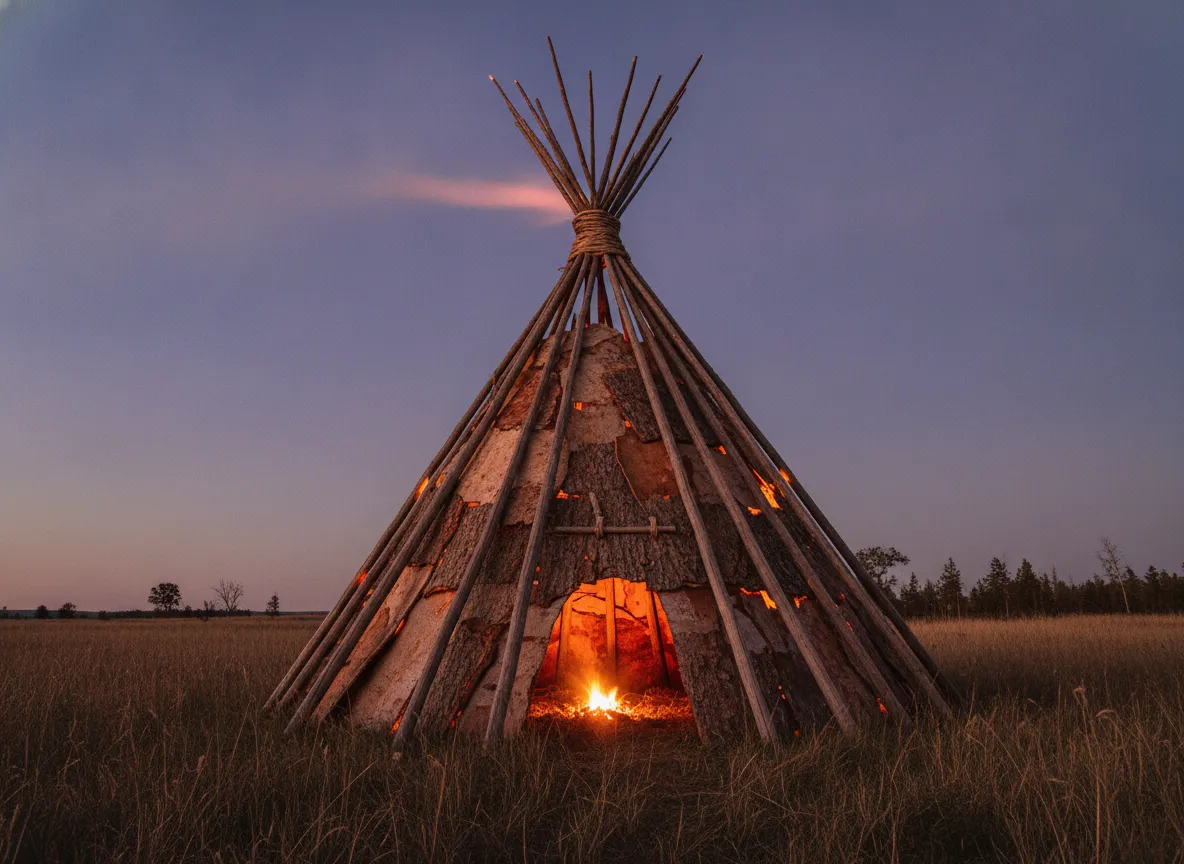
The wickiup is a conical frame shelter derived from Indigenous building traditions across North America. It excels in open terrain where lean-to construction is impractical and where a central fire inside the shelter is desirable for warmth and cooking.
Construction basics:
- Gather 12 to 20 straight poles, each roughly 3 to 4 meters long.
- Lash three poles together near the top to form a tripod, then stand them upright.
- Lean remaining poles around the tripod frame at a consistent angle, spacing them evenly.
- Cover the frame with bark slabs, large leaves, hides, or a tarp, working from the bottom upward and overlapping each layer.
- Leave a smoke hole at the apex and a low entrance on the downwind side.
Best terrain: Open grasslands, sparse forests, mixed terrain
Build time: 2 to 4 hours
Limitation: Requires many straight poles; labor-intensive; not ideal for solo builders under time pressure.
The wickiup’s conical shape is structurally self-reinforcing, additional covering material actually strengthens rather than strains the frame. A well-built wickiup can withstand significant wind loads and, with a small interior fire, maintain comfortable temperatures even in freezing conditions.
8. The Swamp or Elevated Platform Shelter
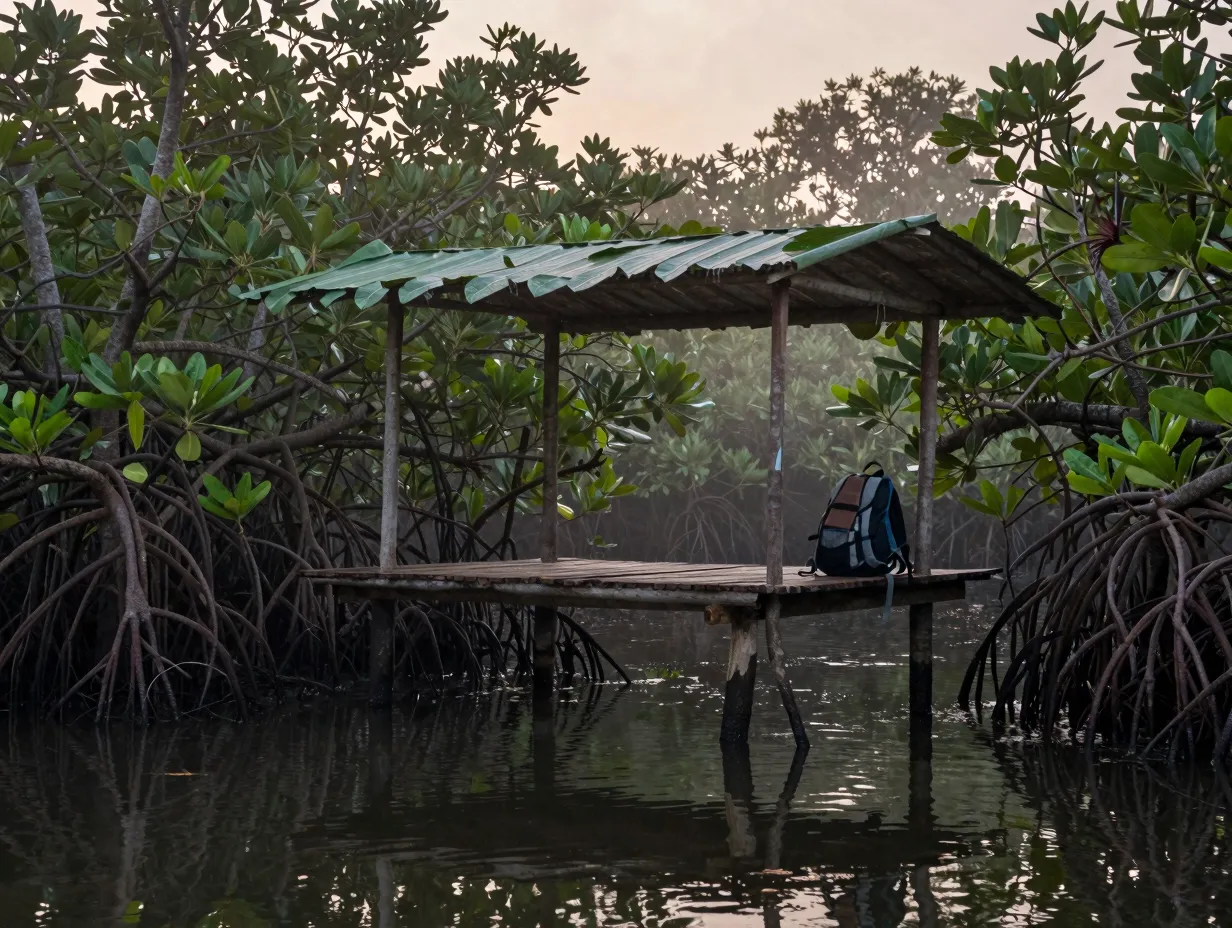
Wetland, jungle, and coastal environments present a unique set of hazards: standing water, insects, reptiles, flooding, and extreme humidity. Ground-level shelters in these environments are often impractical or dangerous. The elevated platform shelter addresses all of these challenges simultaneously.
Construction basics:
- Select four living trees or sturdy poles arranged in a rough rectangle, spaced roughly 2 meters by 1.5 meters.
- Lash horizontal crossbeams between the supports at a height of at least 60 centimeters above the ground (higher in flood-prone areas).
- Lay a platform of straight branches or bamboo across the crossbeams, lashing them tightly.
- Build a lean-to or A-frame roof structure above the platform using the same trees as upper anchor points.
- Add a debris or tarp floor layer over the platform for insulation and comfort.
Best terrain: Swamps, mangroves, tropical jungles, coastal flood plains
Build time: 2 to 4 hours
Limitation: Requires lashing cordage (natural or synthetic); structurally demanding.
Elevated shelter advantages in wetland environments:
- Eliminates ground contact with saturated soil and standing water
- Reduces exposure to ground-dwelling insects, snakes, and scorpions
- Improves airflow, reducing humidity and insect pressure
- Positions the occupant above shallow flood levels
Applying the 8 Wilderness Survival Shelter Designs for Any Terrain
Knowing how to build each of these structures is only half the skill. The other half is rapid terrain assessment, matching the right design to the available environment in real time, often under stress and fatigue.
Terrain-to-shelter quick reference:
| Terrain Type | Primary Shelter Choice | Backup Option |
|---|---|---|
| Temperate forest | Debris hut | Lean-to |
| Alpine / snowfield | Quinzhee | Snow trench |
| Desert / arid | Rock overhang | Tarp A-frame |
| Open grassland | Wickiup | Tarp A-frame |
| Wetland / jungle | Elevated platform | Tarp A-frame |
Common Mistakes That Reduce Shelter Effectiveness
Even experienced outdoors people make predictable errors under stress. Awareness of these mistakes is the first step toward avoiding them.
Underestimating insulation thickness. The most common debris hut failure is insufficient leaf cover. Most beginners pile roughly 20 centimeters of debris; the minimum effective depth is 60 centimeters, and 90 centimeters is preferable in sub-zero conditions.
Choosing location over quality. A shelter in the wrong location, at the bottom of a drainage channel, under a dead tree, or in an exposed ridgeline, can be more dangerous than no shelter at all. Always assess hazards before committing to a build site.
Building too large. A shelter that is too spacious cannot be warmed by body heat alone. Interior volume should be kept just large enough to turn over comfortably. Every extra cubic meter of air space requires additional body heat to warm.
Neglecting ground insulation. Conductive heat loss through contact with cold ground is often greater than heat loss through the walls. A minimum of 15 centimeters of insulating material beneath the body is essential; more is better.
Skipping ventilation in snow shelters. Carbon dioxide accumulation in sealed snow shelters is a genuine risk. A ventilation hole the diameter of a ski pole is sufficient and potentially life-saving.
Prioritizing Speed vs. Quality
In a genuine survival emergency, the calculus between shelter quality and build speed shifts dramatically based on conditions.
When speed is paramount:
- Temperature is dropping rapidly
- Wet clothing is already causing heat loss
- Daylight is limited to less than one hour
- Physical exhaustion is setting in
In these conditions, a snow trench, a simple lean-to, or even a tarp draped over branches is the correct choice. An imperfect shelter built in 20 minutes outperforms a perfect shelter that takes three hours.
When quality is worth the investment:
- Temperature is stable and mild
- Adequate daylight remains
- The stay is expected to last more than one night
- Energy reserves are sufficient
Under these conditions, investing time in a well-insulated debris hut or quinzhee pays dividends across multiple nights.
Essential Skills That Complement These Shelter Designs
The 8 wilderness survival shelter designs for any terrain are more effective when combined with a small set of supporting skills.
Natural cordage making. Many of these shelters benefit from lashing. Inner bark from basswood, cedar, or willow, twisted into cordage, provides strong natural rope without any gear.
Fire craft near shelters. A lean-to or wickiup paired with a small reflector fire dramatically extends the warmth range of either structure. Positioning the fire correctly, close enough to radiate heat inward but far enough to prevent ignition, is a learnable skill.
Site reading. The ability to identify natural windbreaks, south-facing slopes (warmer in winter in the Northern Hemisphere), dry ground, and safe overhead clearance reduces build time and improves shelter performance.
Knot knowledge. A square lashing, a ridgeline trucker’s hitch, and a basic clove hitch cover the vast majority of shelter-building needs. These three knots take less than an hour to learn and a lifetime to master.
Conclusion
The 8 wilderness survival shelter designs for any terrain outlined in this guide, the lean-to, debris hut, snow trench, quinzhee, desert rock overhang, tarp A-frame, wickiup, and elevated platform, collectively cover virtually every environment a person is likely to encounter in the wild. No single design works everywhere, but a working knowledge of all eight ensures that terrain and conditions never leave a stranded person without options.
Actionable next steps for 2026:
- Select the terrain type most relevant to planned outdoor activities and practice building that shelter design before the next trip.
- Time the build under realistic conditions, not in a backyard on a sunny afternoon, but in the field with limited tools.
- Sleep in the completed shelter for at least one night to identify weaknesses in insulation, waterproofing, and comfort.
- Add a lightweight tarp to every pack as a universal backup shelter option regardless of primary shelter strategy.
- Take a wilderness first aid or survival skills course that includes hands-on shelter construction to reinforce these techniques under qualified instruction.
Survival shelter knowledge is perishable. Practicing these builds regularly, not just reading about them, is the only way to ensure the skill is available when it matters most.