9 Big Game Fishing Tips for Tackling Marlin, Tuna, and Swordfish
Only about 3% of offshore anglers ever successfully land a billfish on their first attempt, a statistic that reveals just how demanding, technical, and rewarding big game fishing truly is. Whether the target is a 500-pound blue marlin, a 200-pound yellowfin tuna, or a deep-water broadbill swordfish, the margin between a hookup and a heartbreak is razor-thin. These 9 Big Game Fishing Tips for Tackling Marlin, Tuna, and Swordfish are designed to close that gap, giving offshore anglers the strategic foundation needed to compete at the highest level of saltwater sport fishing.
Disclosure: This post contains affiliate links. As an Amazon Associate, we earn from qualifying purchases, and at no extra cost to you.
From dialing in trolling speeds to building a disciplined fighting technique, every detail matters when targeting pelagic giants. The tips below draw on proven offshore methodology, species-specific behavior, and the kind of hard-won knowledge that separates consistent producers from occasional luck stories.
Key Takeaways
- Trolling speed must be matched precisely to the target species and technique, ranging from 4 knots for swordfish to 10+ knots for wahoo and aggressive marlin presentations.
- A structured trolling spread with defined positions, shotgun, riggers, and flat lines, dramatically increases hookup rates by mimicking a natural bait school.
- Tackle selection, drag settings, and fighting technique must be calibrated before leaving the dock, not improvised mid-fight.
- Reading the water, temperature breaks, color changes, and bait concentrations, is as important as any piece of gear.
- Preparation, crew communication, and post-strike discipline determine whether a big fish is landed or lost.
Understanding the Fundamentals of Big Game Fishing
Before applying the 9 Big Game Fishing Tips for Tackling Marlin, Tuna, and Swordfish in practice, it helps to understand what separates offshore pelagic fishing from every other form of angling. These fish are fast, powerful, and built for open ocean survival. Blue marlin can exceed 1,000 pounds and reach burst speeds of 68 mph. Yellowfin tuna are relentless fighters that use their body mass to grind down even experienced anglers. Broadbill swordfish patrol depths of 1,000 to 2,000 feet during daylight hours, requiring specialized deep-drop techniques.
The common thread across all three species is that success demands preparation, precision, and patience. Big game fishing is not a passive activity, it is a coordinated effort between the captain, crew, and angler [1].
The 9 Big Game Fishing Tips for Tackling Marlin, Tuna, and Swordfish
1. Match Trolling Speed to the Target Species
Trolling speed is one of the most consequential variables in offshore fishing, yet it is frequently overlooked by newer anglers. The correct speed depends on the species being targeted, the type of lure or bait being used, and current sea conditions [2].
| Target Species | Recommended Trolling Speed |
|---|---|
| Blue Marlin (lures) | 7 to 10 knots |
| Yellowfin Tuna | 6 to 8 knots |
| Swordfish (deep-drop) | 1 to 3 knots |
| Wahoo | 10 to 14 knots |
| Sailfish (live bait) | 4 to 6 knots |
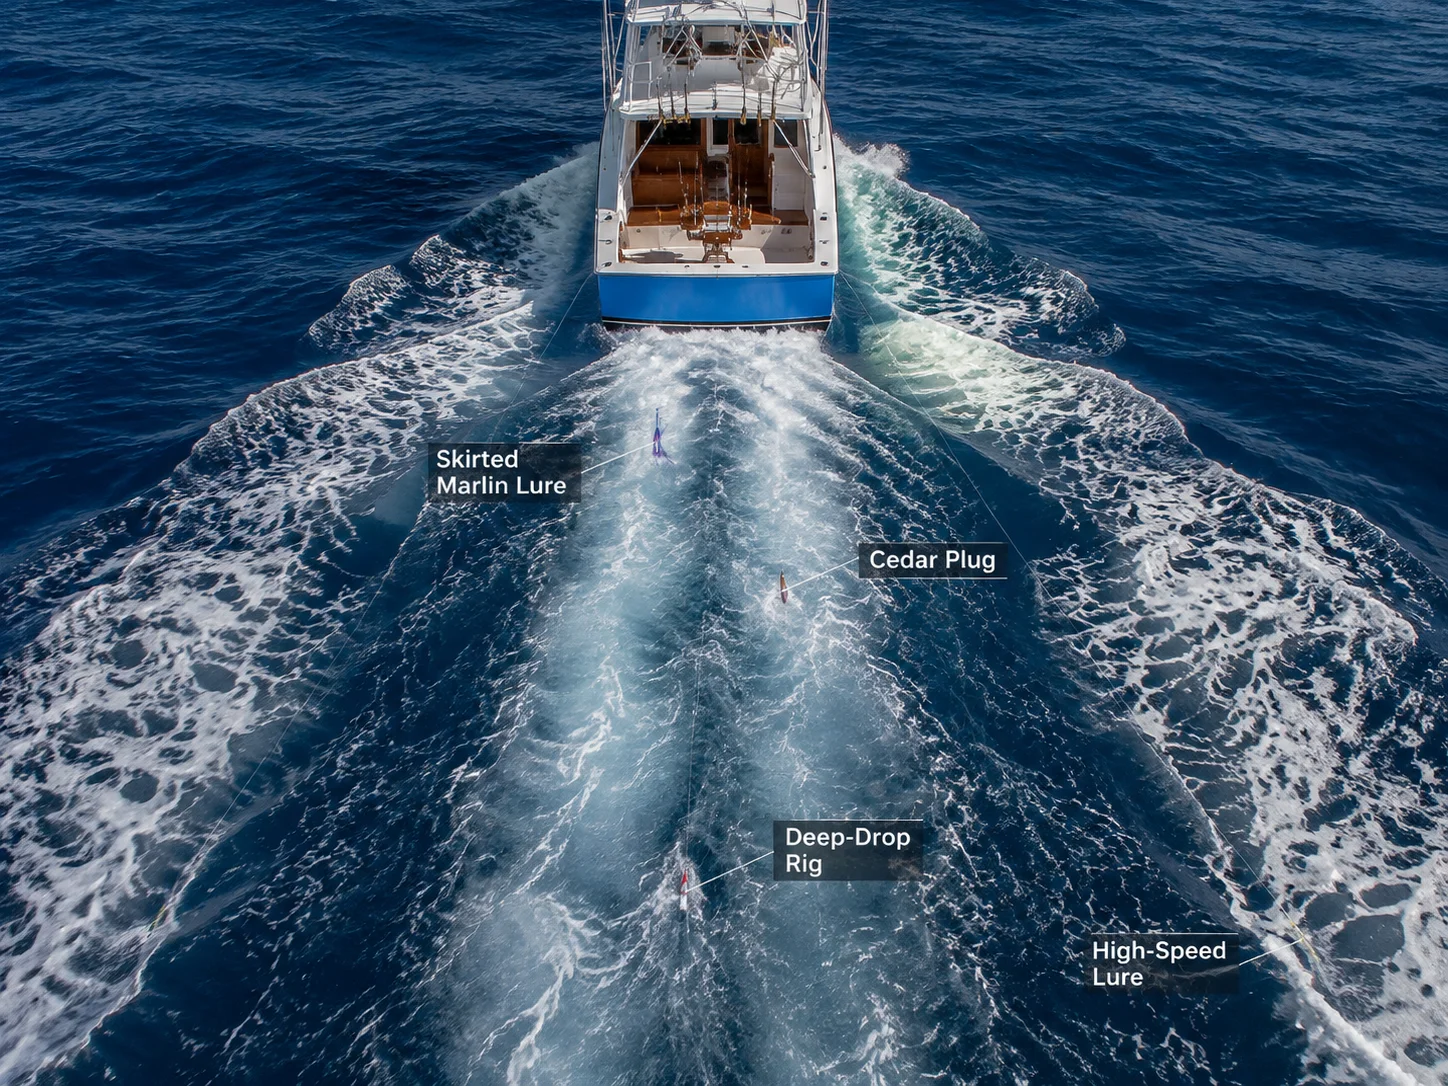
For blue marlin using skirted lures, a speed range of 7 to 10 knots creates the aggressive surface action that triggers strikes. Yellowfin tuna respond well to speeds between 6 and 8 knots, particularly when trolling cedar plugs or feather jigs. Swordfish targeted during daylight deep-drop sessions require much slower speeds, often just enough to maintain bait depth and action [8].
The boat’s wake also plays a role. A well-tuned hull running at the right speed produces a clean, symmetrical wake that positions lures in the most productive zones of the spread [4].
2. Build a Structured Trolling Spread
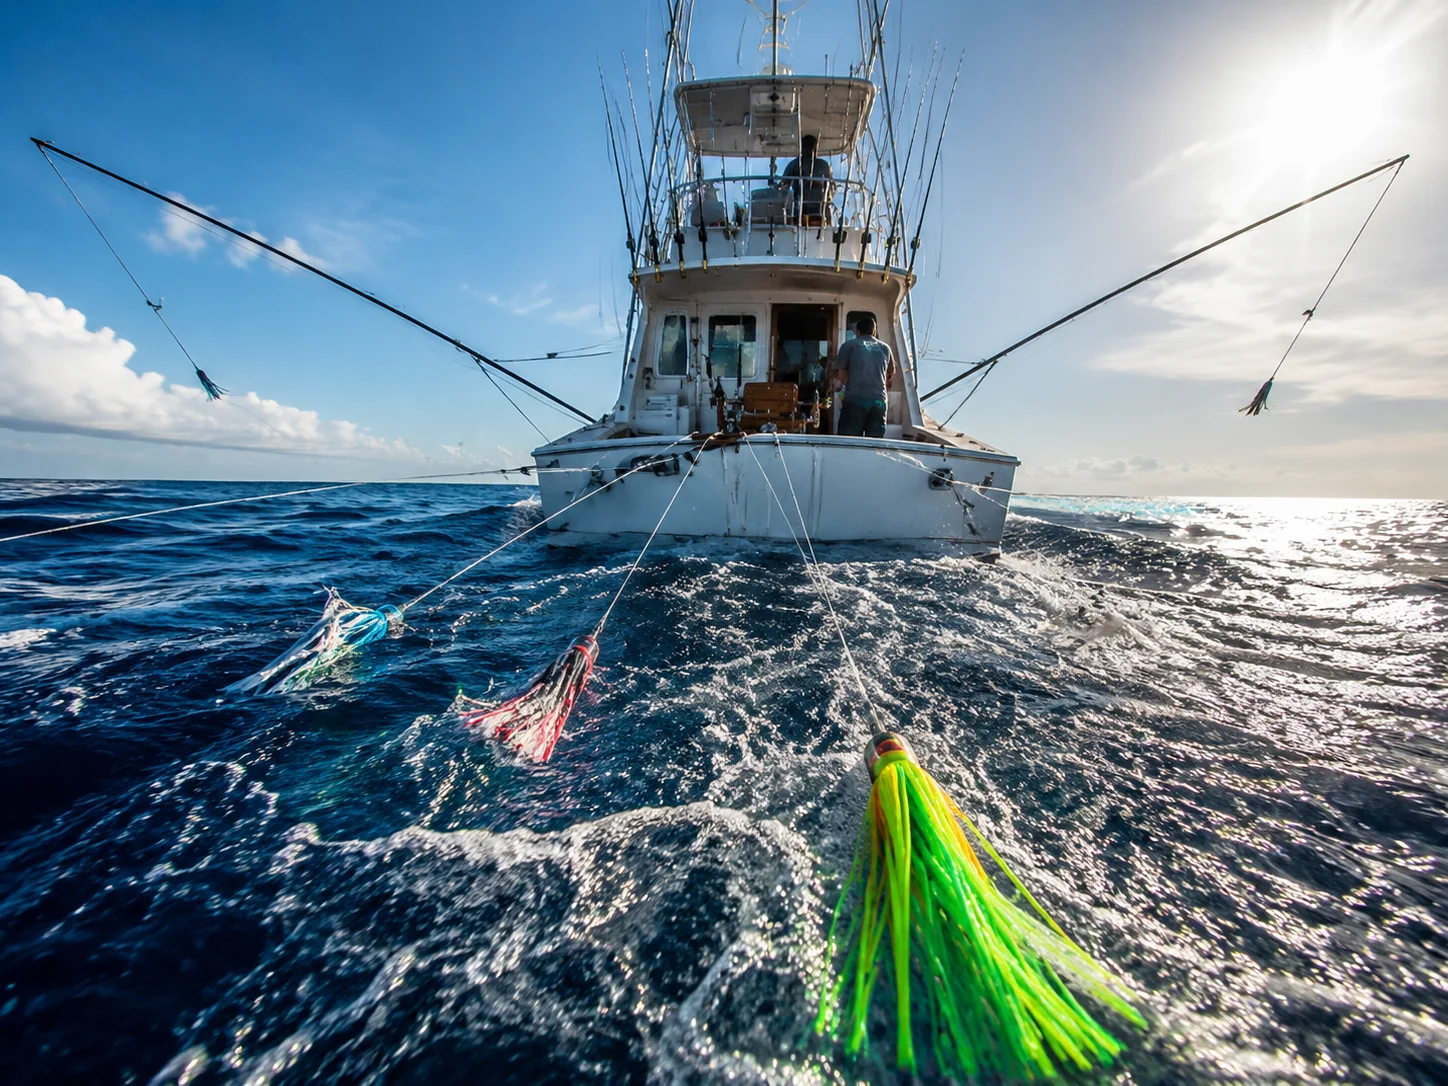
A random arrangement of lines is one of the fastest ways to reduce catch rates offshore. A structured trolling spread mimics the behavior of a bait school fleeing a predator, which is precisely what triggers aggressive strikes from marlin, tuna, and swordfish [4].
The standard offshore spread uses five to seven positions:
- Shotgun line: Deployed furthest back, 100 to 150 feet behind the prop wash, targeting fish that follow the boat from a distance.
- Long rigger lines: Set 80 to 100 feet back on the port and starboard outriggers, working the edges of the spread.
- Short rigger lines: Set 40 to 60 feet back, running closer to the prop wash.
- Flat lines: Deployed directly from the rod holders at 20 to 40 feet, positioned in the most turbulent part of the wake.
“A properly built trolling spread is not just about covering water, it is about creating a convincing illusion of fleeing baitfish that triggers a predatory response.”
Spacing between lines matters as much as their positions. Lines that cross or tangle eliminate productive zones and create dangerous situations during a double or triple hookup [4]. Experienced crews practice setting and clearing the spread before reaching the fishing grounds.
3. Select Species-Appropriate Tackle and Terminal Gear
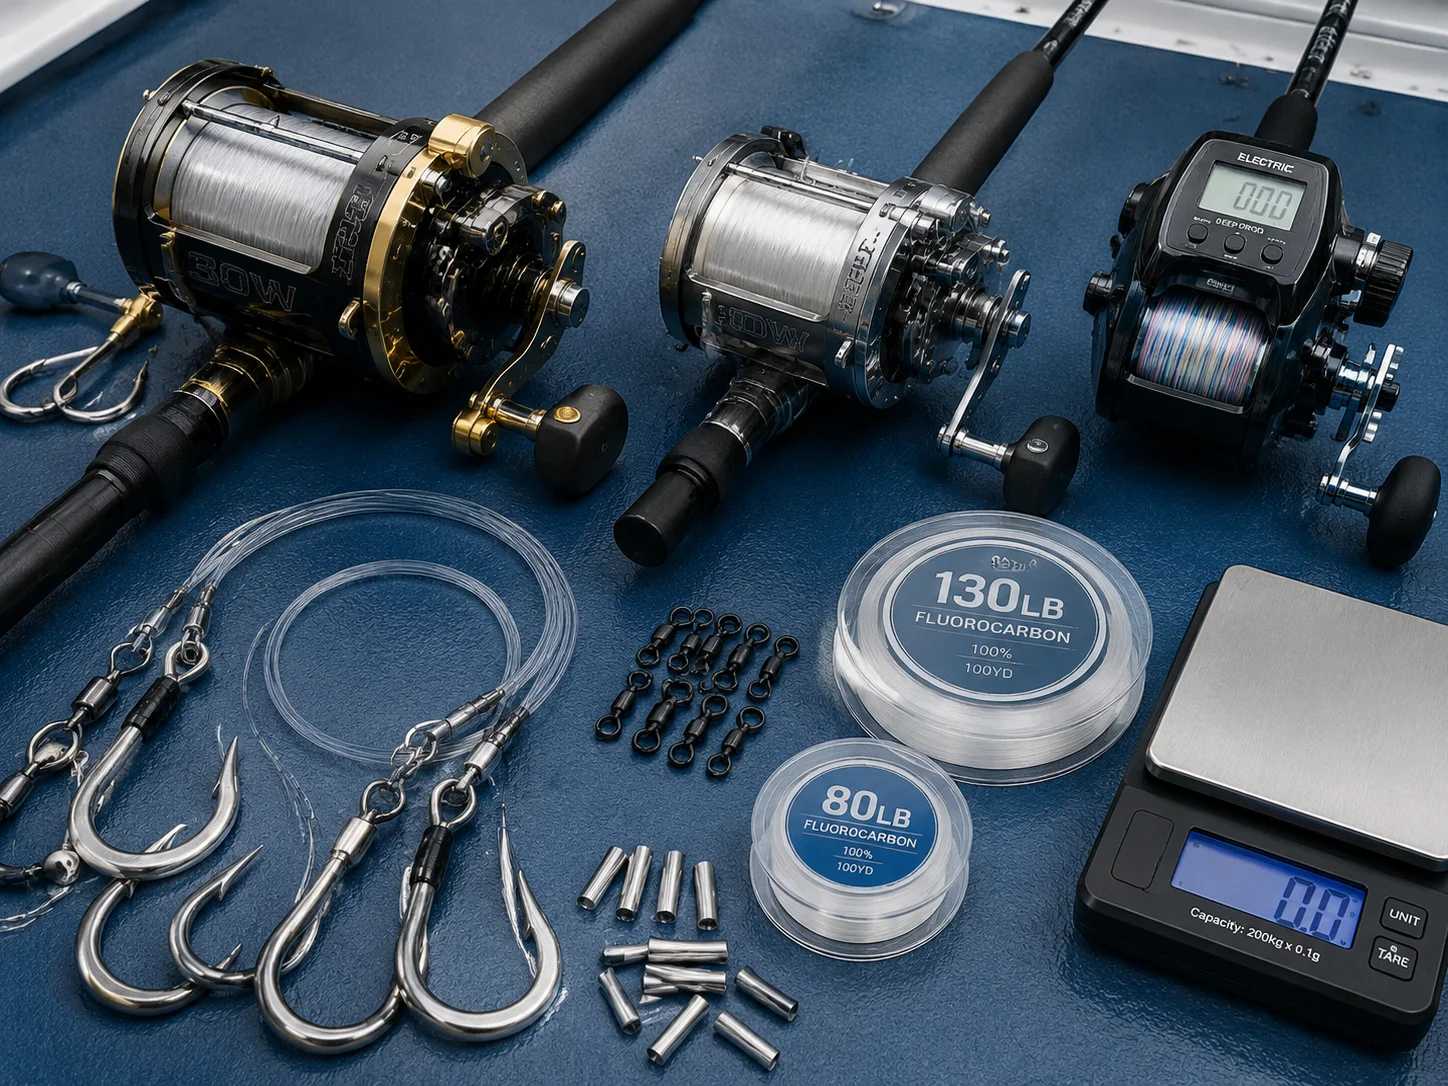
Using the wrong tackle for a target species is a common and costly mistake. A 50-pound class outfit that handles yellowfin tuna comfortably may be entirely inadequate for a 600-pound blue marlin on a long, open-water fight [1].
Recommended tackle classes by species:
- Blue Marlin: 80 to 130-pound class reels, 80 to 130-pound monofilament or braid, 300 to 400-pound fluorocarbon leader.
- Yellowfin Tuna: 50 to 80-pound class reels, 65 to 80-pound braid, 100 to 150-pound fluorocarbon leader.
- Swordfish (deep-drop): 80-pound class electric reels, 100-pound braid, 300-pound fluorocarbon leader, 10 to 16-ounce circle hooks.
Terminal gear quality cannot be compromised. Swivels, crimps, and hooks must be rated well above the breaking strength of the line. A single weak component in the leader system will fail under the sustained pressure of a big fish [1].
4. Read the Water Before Setting Lines
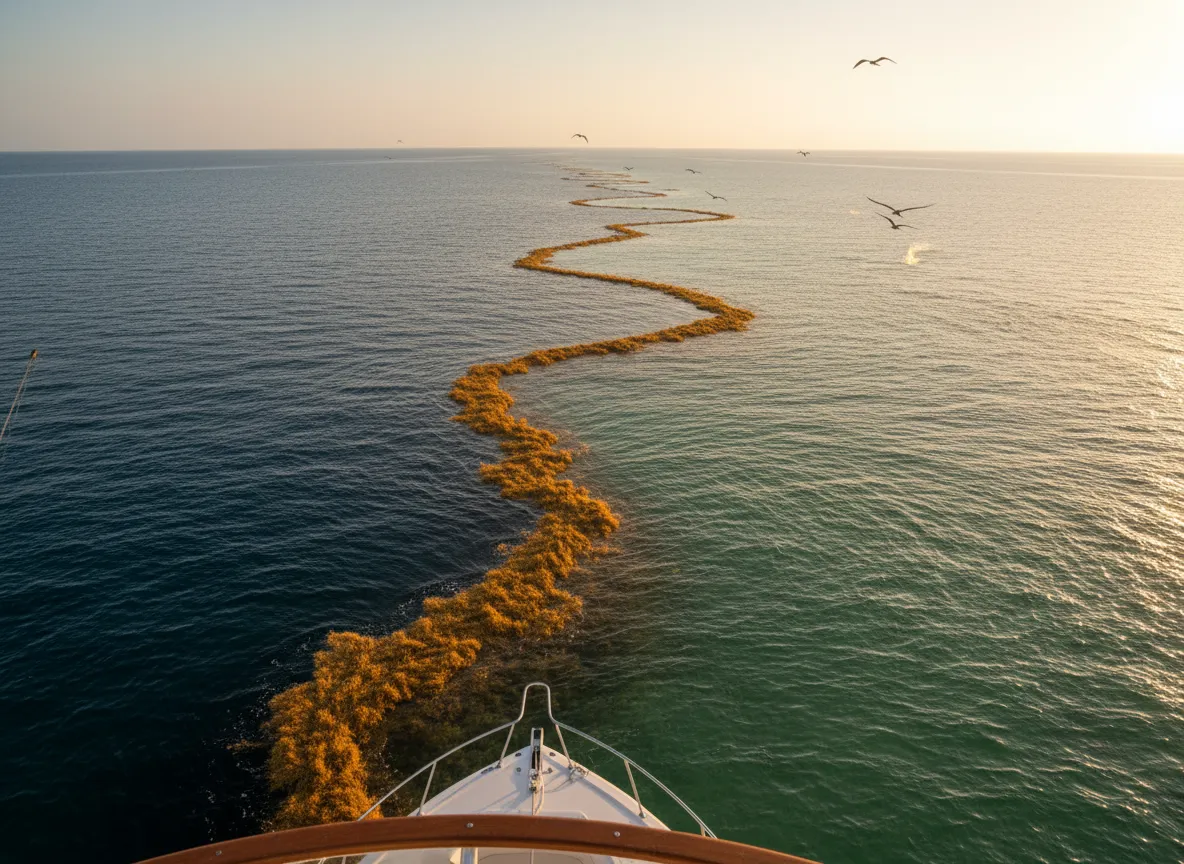
The most productive offshore anglers are students of the ocean. Water temperature, color changes, current edges, and bait concentrations all serve as reliable indicators of where pelagic fish are holding [6].
Key water-reading indicators:
- Temperature breaks: Marlin and tuna concentrate along the edges where warm and cold water masses meet. A 2 to 4 degree Fahrenheit temperature differential is often enough to hold large concentrations of baitfish and the predators that follow them.
- Color changes: The transition from blue to green water marks a current edge that attracts bait and gamefish alike.
- Floating debris and weedlines: Sargassum weed lines accumulate bait, juvenile fish, and eventually large predators. Trolling parallel to a weedline is consistently productive.
- Bird activity: Frigate birds and shearwaters feeding at the surface almost always indicate baitfish below, and gamefish beneath them.
Modern chartplotters with sea surface temperature overlays have made water reading more accessible than ever, but nothing replaces time on the water and the ability to interpret what the ocean is showing [6].
5. Set Drag Correctly Before Leaving the Dock
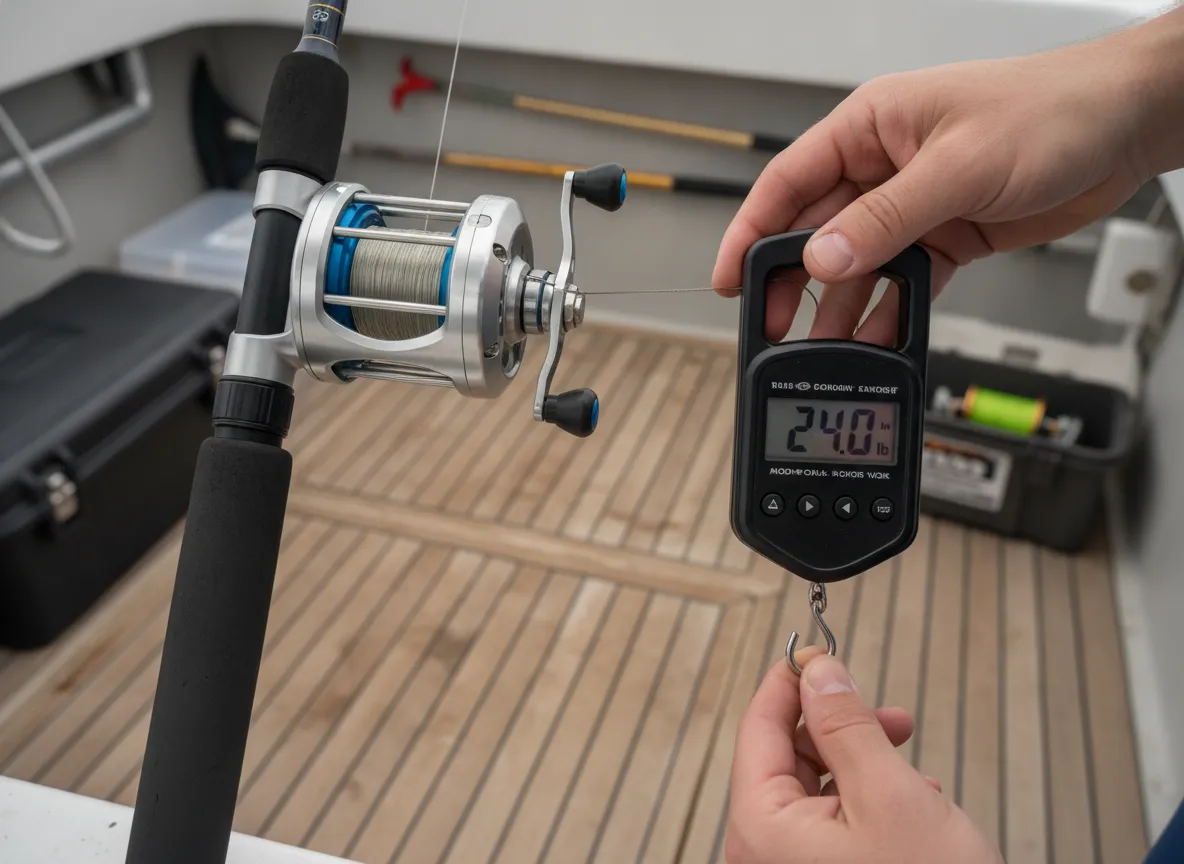
Drag settings are not something to adjust during the chaos of a strike. Every reel should be set to a fighting drag of approximately 30% of the line’s rated breaking strength before the boat leaves the dock [1].
For a reel loaded with 80-pound monofilament, that means a fighting drag of roughly 24 pounds measured at the rod tip with a scale. Strike drag, the setting used when a fish first takes the bait, should be set at approximately 15 to 20% of line strength to allow the hook to set without breaking off.
A simple drag-setting checklist:
- Load a digital scale onto the line at the rod tip.
- Set the reel to strike position and pull until the drag slips.
- Adjust until the scale reads 15 to 20% of line breaking strength.
- Advance to fighting drag and repeat at 25 to 30%.
- Mark both settings with a paint pen on the reel’s drag knob.
Consistent drag settings across all rods in the spread prevent the confusion that costs fish during multi-hookup situations [8].
6. Master the Art of Bait Rigging
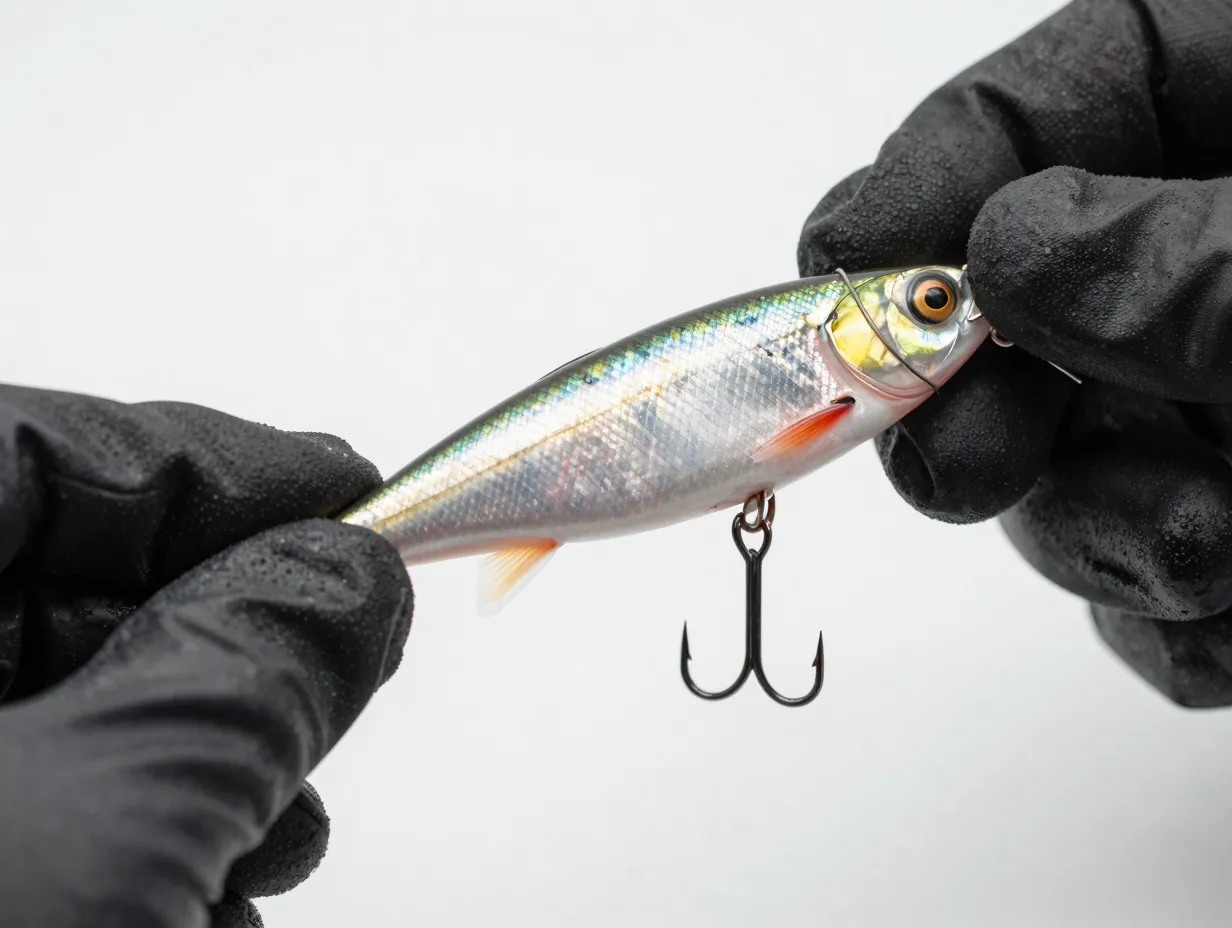
A perfectly rigged bait swims naturally, stays in the water at trolling speed, and presents the hook in a position that maximizes solid hookups. A poorly rigged bait spins, skips out of the water, or fails to hook fish cleanly [3].
For trolling with natural baits, ballyhoo, mackerel, and mullet being the most common, the hook must be positioned so the point exits just behind the bait’s anal fin. The bait’s bill or nose should be pin-rigged or wire-bridled to prevent it from blowing back at speed.
Skirted lures require a different approach. The hook must be sized to the lure head, with the point riding just at or slightly beyond the skirt’s trailing edge. A hook that rides too far back will miss short strikes; one that rides too shallow will pull free under pressure [3].
Rigging quality is one of the most reliable predictors of hookup-to-landing ratios in big game fishing. Crews that invest time in rigging consistently outperform those who rush the process [3].
7. Develop a Disciplined Fighting Technique
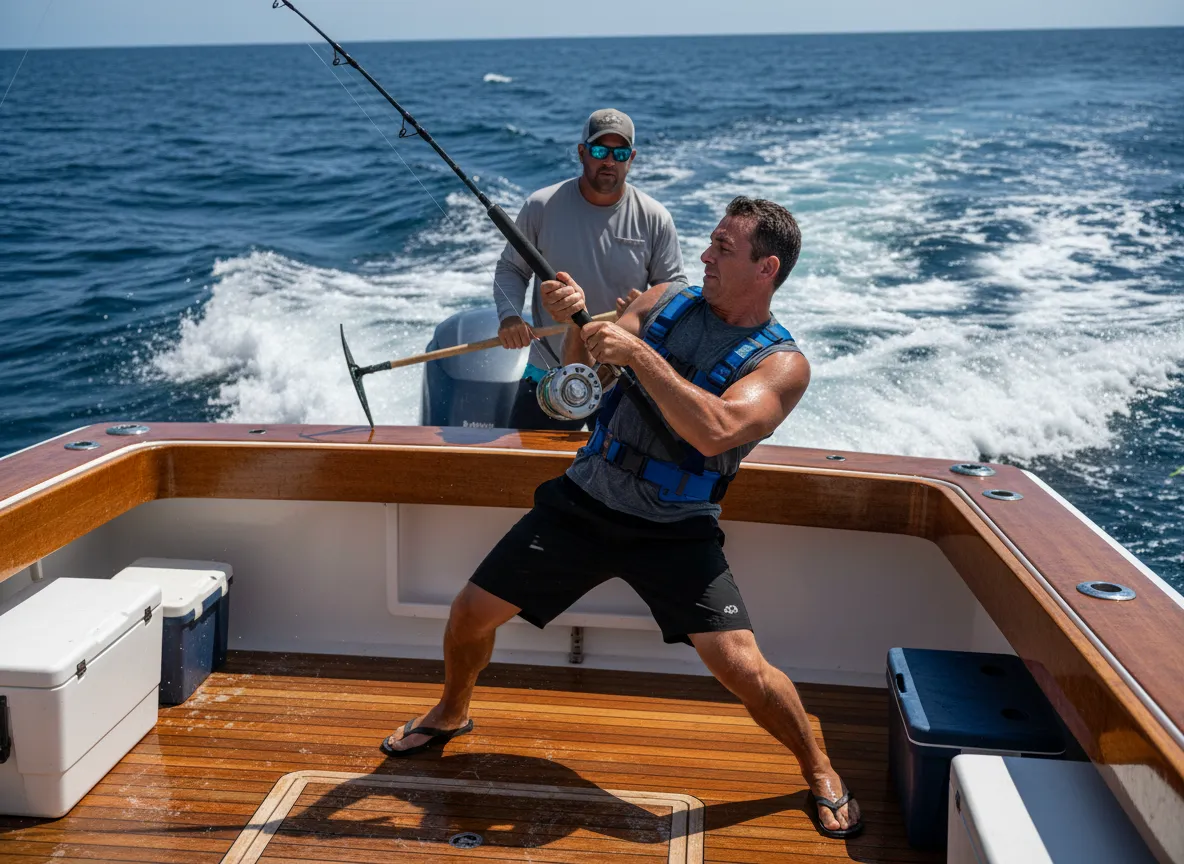
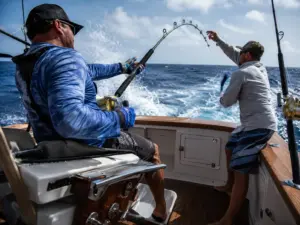
Landing a large pelagic fish is a physical and technical challenge that demands proper form. Poor fighting technique exhausts the angler, increases tackle failure risk, and extends fight times to the point where fish mortality rises significantly [1].
Core fighting principles:
- Pump and wind: Lower the rod tip while reeling, then lift smoothly. Never reel on the downstroke, it creates slack that allows hooks to shake free.
- Keep the rod angle between 45 and 90 degrees: A rod held too low loses leverage; one held too vertical risks snapping under a sudden surge.
- Use the harness correctly: A fighting harness transfers load from the arms to the lower back and hips, allowing the angler to sustain pressure for hours if necessary.
- Never give slack: Even a brief moment of slack line during a jump or head shake can dislodge the hook. Keep tension constant.
For tuna specifically, the “straight-down” technique, positioning the angler directly above the fish and applying maximum vertical pressure, is one of the most effective ways to break a tuna’s circular fighting pattern and bring it to the surface [6].
8. Target Swordfish with Deep-Drop Techniques
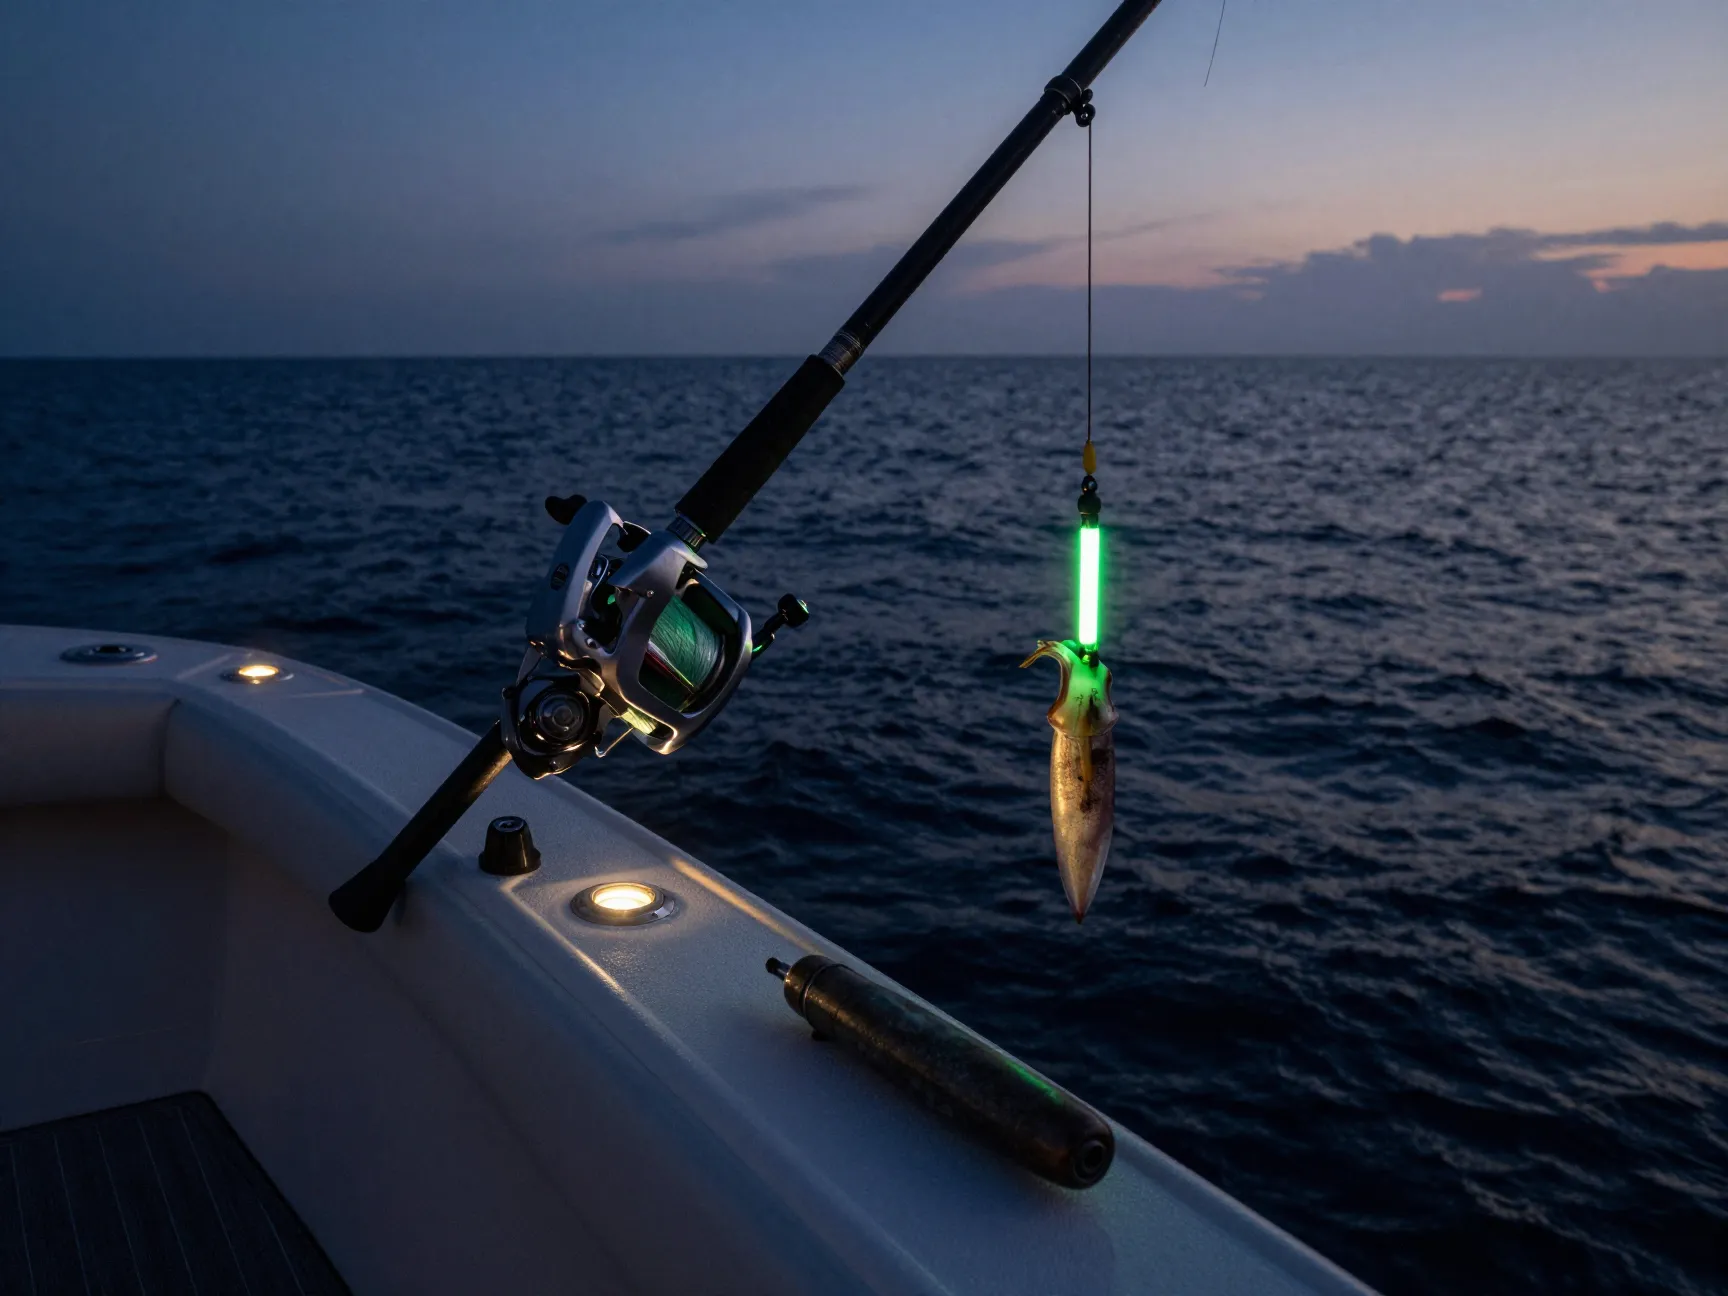
Swordfish occupy a unique position among the three target species covered in these 9 Big Game Fishing Tips for Tackling Marlin, Tuna, and Swordfish. Unlike marlin and tuna, which are primarily caught on the surface or in the upper water column, daytime swordfish hold at depths of 1,000 to 2,000 feet and require specialized deep-drop methodology [10].
Daytime swordfishing essentials:
- Electric reels: Manually retrieving 1,500 feet of 100-pound braid from depth is not practical. Electric reels rated for deep-drop work are standard equipment.
- Squid or rigged mackerel: Swordfish feed heavily on squid. A rigged squid or mackerel with a chemical light stick attached near the bait is the most productive presentation.
- Heavy weights: 3 to 8-pound lead weights are needed to reach target depth in the presence of current.
- Drift fishing: Rather than anchoring, most swordfishermen drift with the current, allowing the bait to cover ground naturally.
Nighttime swordfishing on the surface is also productive, as swordfish migrate to the upper water column after dark to feed on squid and small fish. Surface presentations with live bait or rigged squid under a balloon float are highly effective during these windows [10].
9. Prioritize Crew Communication and Safety
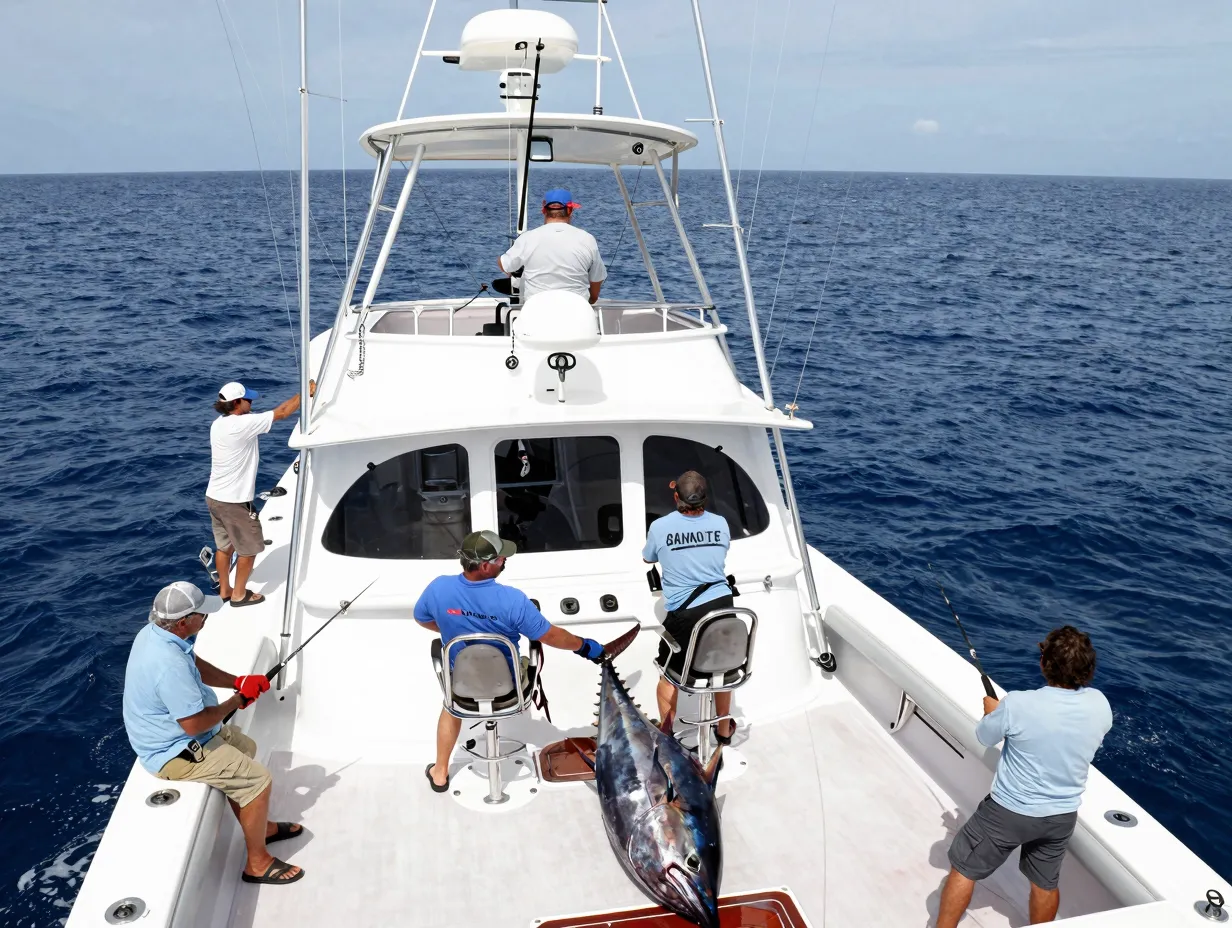
Big game fishing is a team sport. A single angler cannot manage a 600-pound marlin, clear the spread, operate the boat, and handle the leader wire simultaneously. Defined roles and clear communication between crew members are as important as any technical skill [1].
Standard crew roles during a hookup:
- Captain: Manages boat position, throttle, and direction relative to the fish.
- Wireman: Handles the leader wire during the final stages of the fight, responsible for the most dangerous moment of the entire process.
- Angler: Maintains pressure and follows the captain’s instructions on rod angle and body position.
- Deck crew: Clears the spread, prepares the gaff or release tools, and keeps the cockpit safe.
Safety considerations in the cockpit are non-negotiable. Loose line, flying gaffs, and exhausted crew members are the leading causes of serious injuries during big game fights. Every crew member should know where to stand, what to hold, and when to stay clear [1].
“The difference between a boat that consistently lands big fish and one that consistently loses them is almost never gear, it is crew discipline and communication.”
Advanced Strategies for Consistent Offshore Success
Applying these 9 Big Game Fishing Tips for Tackling Marlin, Tuna, and Swordfish consistently requires more than one-time knowledge. It demands a commitment to continuous learning, equipment maintenance, and honest post-trip analysis.
Post-trip review habits that improve results:
- Log water temperatures, GPS coordinates, and conditions for every productive area.
- Record which lure colors, sizes, and positions in the spread produced strikes.
- Note the time of day when strikes occurred relative to tide and moon phase.
- Review drag settings and terminal tackle for wear after every trip.
Tournament-level offshore anglers treat every trip as a data-gathering exercise. Over multiple seasons, this information builds a picture of patterns that dramatically improves catch rates [3].
Equipment maintenance is equally important. Reels should be serviced annually, leaders inspected before every trip, and hooks replaced at the first sign of corrosion or dulling. A sharp hook is the single cheapest upgrade available to any offshore angler [8].
Conclusion
The ocean does not reward the unprepared. Every one of the 9 Big Game Fishing Tips for Tackling Marlin, Tuna, and Swordfish covered in this guide addresses a real, documented failure point that costs anglers fish every season. From matching trolling speed to the target species and building a structured spread, to mastering fighting technique and maintaining crew discipline during a fight, the path to consistent offshore success is built on fundamentals executed with precision.
Actionable next steps for anglers at every level:
- Review current tackle and verify drag settings using a digital scale before the next offshore trip.
- Practice setting and clearing a structured five-line trolling spread in calm water before reaching the fishing grounds.
- Study sea surface temperature charts and learn to identify productive temperature breaks in the target fishing area.
- Assign and practice crew roles before the first hookup of the season, not during one.
- Begin logging trip data systematically to identify patterns over time.
Big game fishing demands respect for the fish, the ocean, and the craft. Anglers who commit to these principles will find that the margin between a missed opportunity and a successful release narrows dramatically with every trip offshore.
References
[1] Big Game Fishing Guide – https://proposedfish.com/big-game-fishing-guide/
[2] Trolling For Fish – https://www.go-saltwater-fishing.com/trolling-for-fish.html
[3] biggamefishingjournal – https://biggamefishingjournal.com/
[4] Six Patterns Successful Offshore Trolling – https://www.sportfishingmag.com/boats/boating-skills/six-patterns-successful-offshore-trolling/
[6] Offshore Fishing Video Lessons How To Catch Big Game 337 – https://inthespread.com/blog/offshore-fishing-video-lessons-how-to-catch-big-game-337
[8] Trolling Fishing Complete Guide To Techniques Equipment And Target Species – https://www.demonsunglasses.com/blogs/sport-fishing-blog/trolling-fishing-complete-guide-to-techniques-equipment-and-target-species
[10] Traina Altura – https://forecastx.app/en/enciclopedia/techniques/traina_altura/