8 Essential Steps for the Perfect Fishing Rod Setup and Rig
Only 38 percent of anglers who buy new fishing gear report feeling confident assembling their rod and rig correctly on the first attempt, and that uncertainty costs them fish. A poorly set up rod wastes money on lost tackle, breaks lines at critical moments, and turns a relaxing day on the water into a frustrating exercise in troubleshooting. Following the 8 essential steps for the perfect fishing rod setup and rig eliminates guesswork, builds repeatable skill, and puts more fish in the net from the very first cast.
Disclosure: This post contains affiliate links. As an Amazon Associate, we earn from qualifying purchases, and at no extra cost to you.
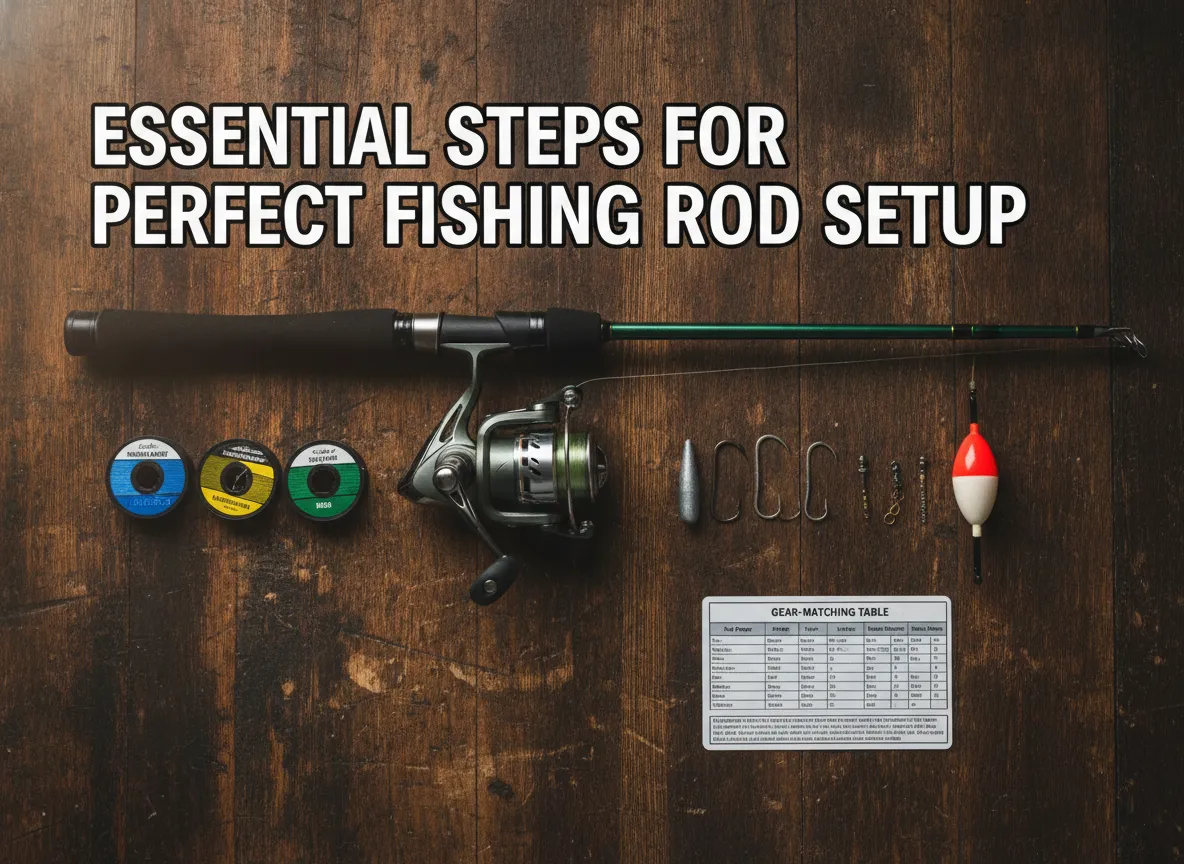
Whether targeting bass in a local reservoir, trout in a mountain stream, or redfish along a coastal flat, the fundamentals of rod assembly, line selection, and terminal tackle rigging remain consistent. This guide walks through each step in precise detail, covering the reasoning behind every decision so anglers understand not just what to do, but why it matters.
Key Takeaways
- Matching rod power and action to the target species is the single most impactful equipment decision before any line is spooled.
- Line type, diameter, and pound-test must align with both the rod’s specifications and the fishing environment to prevent break-offs and casting problems.
- Knot selection and tying technique directly determine whether a rig holds under pressure or fails at the worst possible moment.
- Terminal tackle choices, hook size, weight, and bait presentation, should be driven by species behavior and water conditions, not habit.
- A properly balanced rod-and-reel setup reduces fatigue, improves casting accuracy, and increases sensitivity to subtle strikes.
Why Getting Your Fishing Rod Setup Right Matters
Before diving into the 8 essential steps for the perfect fishing rod setup and rig, it helps to understand what is actually at stake. Fishing tackle is a system, not a collection of independent parts. Every component interacts with every other component. A rod with the wrong action paired with a reel loaded with the wrong line creates a cascade of problems: poor casting distance, reduced sensitivity, and increased stress on knots.
“The angler who understands their gear catches fish in conditions where others go home empty-handed.”
The difference between a beginner and an experienced angler often has less to do with secret spots or expensive lures and more to do with a properly assembled, well-matched outfit. Investing 20 minutes in a correct setup pays dividends across an entire fishing season.
The 8 Essential Steps for the Perfect Fishing Rod Setup and Rig
1. Choose the Right Rod for Your Target Species and Technique
Every rod setup begins with rod selection. Rods are rated by power (the force required to bend the rod) and action (where along the blank the rod bends). Getting both right for the intended technique is non-negotiable.
Rod Power Ratings:
| Power | Best Use |
|---|---|
| Ultra-light | Panfish, small trout, finesse techniques |
| Light | Trout, small bass, light lures |
| Medium | Bass, walleye, general freshwater |
| Medium-heavy | Bass, pike, inshore saltwater |
| Heavy | Large catfish, offshore, heavy jigging |
Rod Action:
- Fast action rods bend in the top third of the blank. They provide excellent sensitivity and quick hooksets, making them ideal for single-hook lures like jigs and worms.
- Moderate action rods bend through the middle half of the blank. They load more gradually, which helps with treble-hook lures like crankbaits where fish can throw the hook on a fast rod.
- Slow action rods bend throughout most of the blank, best suited for very light line and small fish.
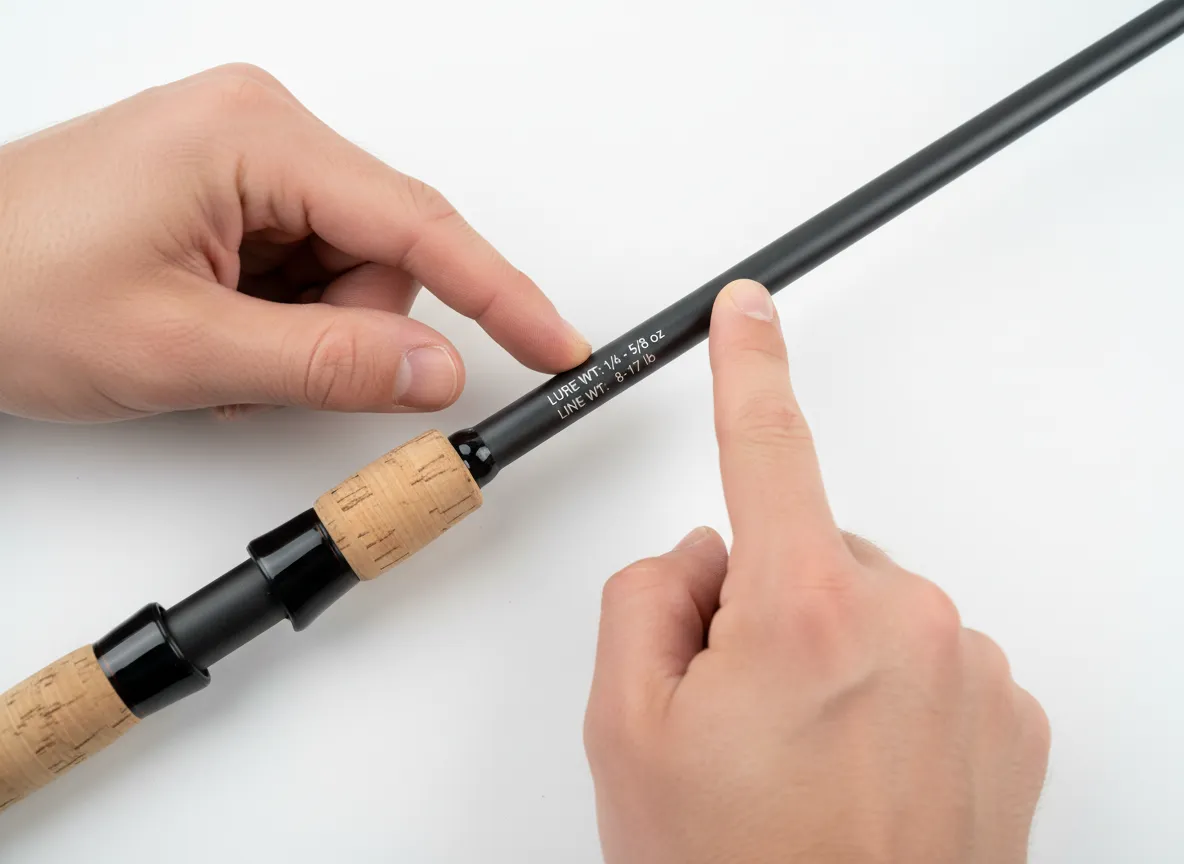
Key rule: Match rod power to lure weight range (printed on the rod blank) and rod action to the technique being used.
2. Select and Balance the Reel
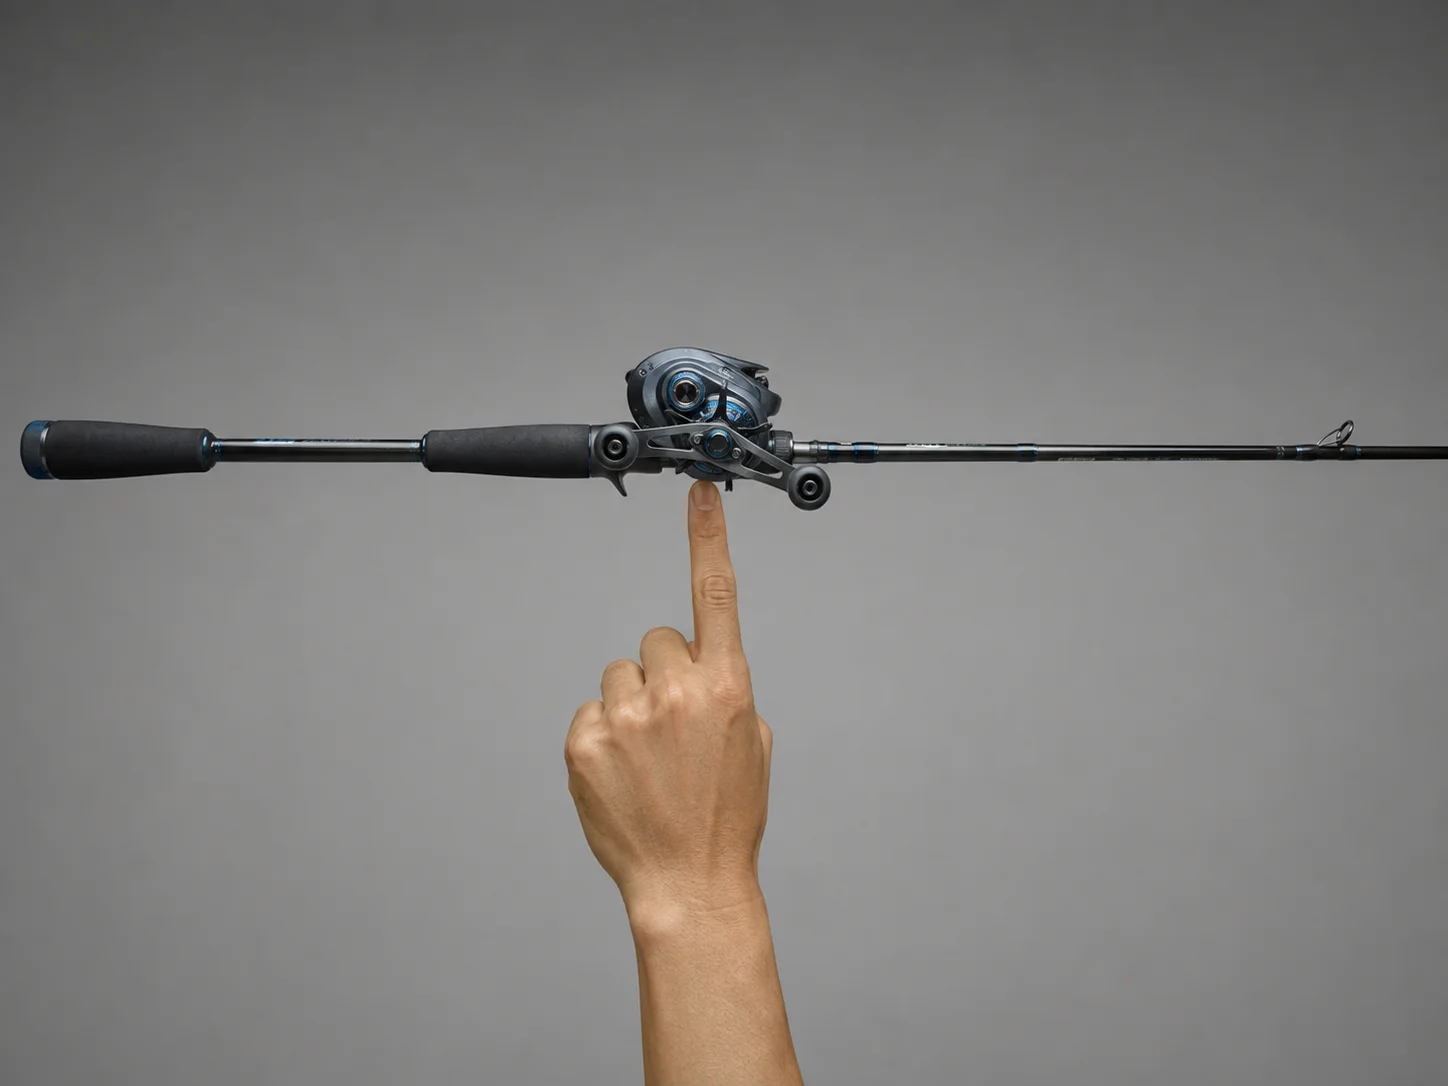
A rod without a properly matched reel is incomplete. The reel must balance the rod both physically and functionally.
Reel types and their applications:
- Spinning reels are the most versatile choice for beginners and experienced anglers alike. They handle light line well, cast small lures easily, and work on spinning rods.
- Baitcasting reels offer greater casting accuracy and line capacity, preferred for heavier lures and techniques like flipping, pitching, and topwater fishing.
- Spincast reels are beginner-friendly but limited in performance for serious applications.
Physical balance test: Hold the rod at the grip with the reel attached. The outfit should balance at or near the reel seat without tipping forward or backward. An unbalanced combo causes hand fatigue during long sessions.
Gear ratio matters: A 6.2:1 ratio reel retrieves line at a moderate pace, suitable for most techniques. A 7.5:1 or higher ratio is a fast reel ideal for burning reaction baits. A 5.1:1 is a slow-speed reel built for deep-diving crankbaits and large swimbaits.
3. Choose the Correct Fishing Line
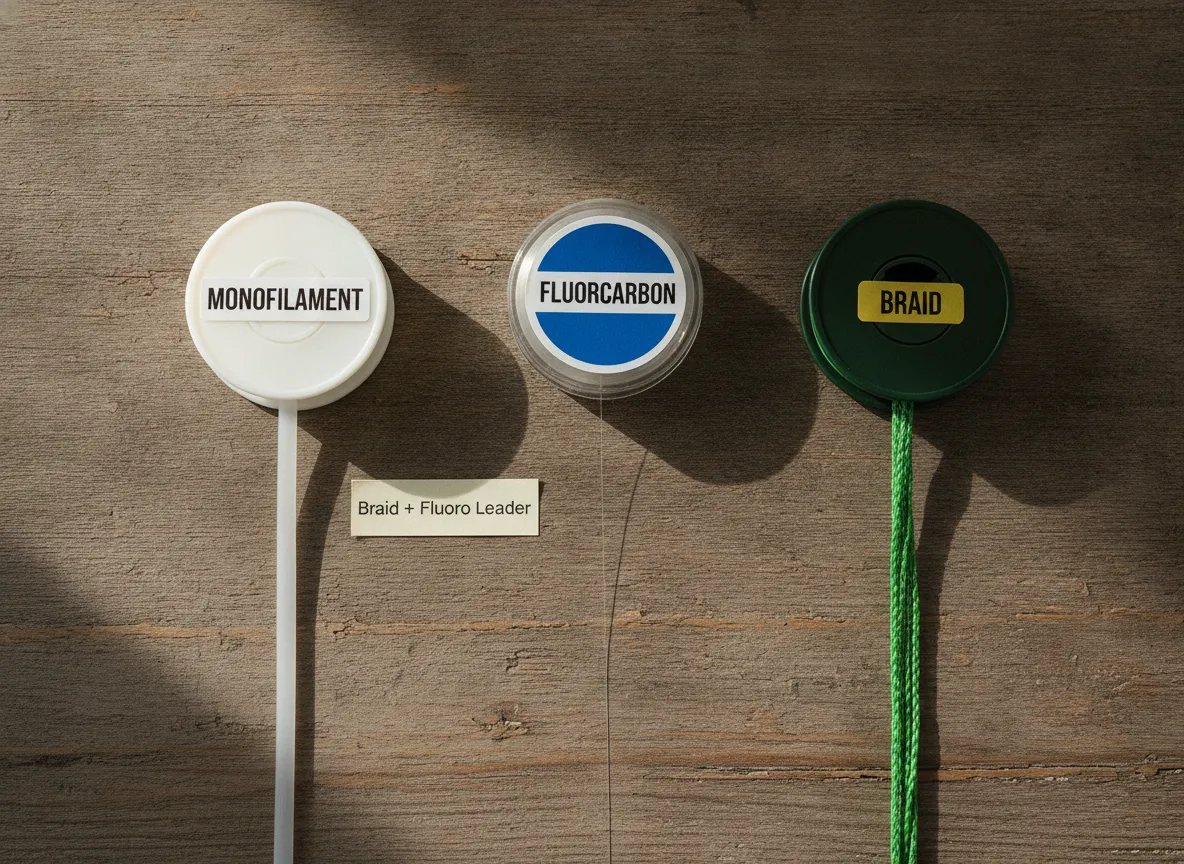
Line selection is where many anglers make costly mistakes. Three primary line types dominate the market, and each has a specific role in a complete fishing rod setup.
Monofilament (Mono)
- Stretches 15-30%, which absorbs shock and forgives hookset mistakes
- Floats, making it ideal for topwater presentations
- Affordable and easy to manage
- Weakens with UV exposure and should be replaced annually
Fluorocarbon (Fluoro)
- Nearly invisible underwater due to a refractive index close to water
- Sinks, making it excellent for bottom presentations
- Very low stretch for high sensitivity
- Best used as a main line on spinning setups or as a leader material
Braided Line (Braid)
- Zero stretch for maximum sensitivity and instant hooksets
- Extremely thin diameter for its pound-test, allowing longer casts and deeper presentations
- Highly visible, so a fluorocarbon leader is typically added
- Exceptional durability; does not degrade with UV exposure
Recommended line-to-technique pairings:
| Technique | Recommended Line |
|---|---|
| Topwater lures | Monofilament or braid |
| Jigs and soft plastics | Fluorocarbon or braid with fluoro leader |
| Crankbaits | Monofilament or fluorocarbon |
| Drop shot, finesse | Braid with fluorocarbon leader |
| Heavy cover | Heavy braid |
Line weight (pound-test): Always stay within the rod’s rated line range, printed on the blank near the handle. Exceeding this range strains the rod and reduces casting performance.
4. Spool the Reel Correctly
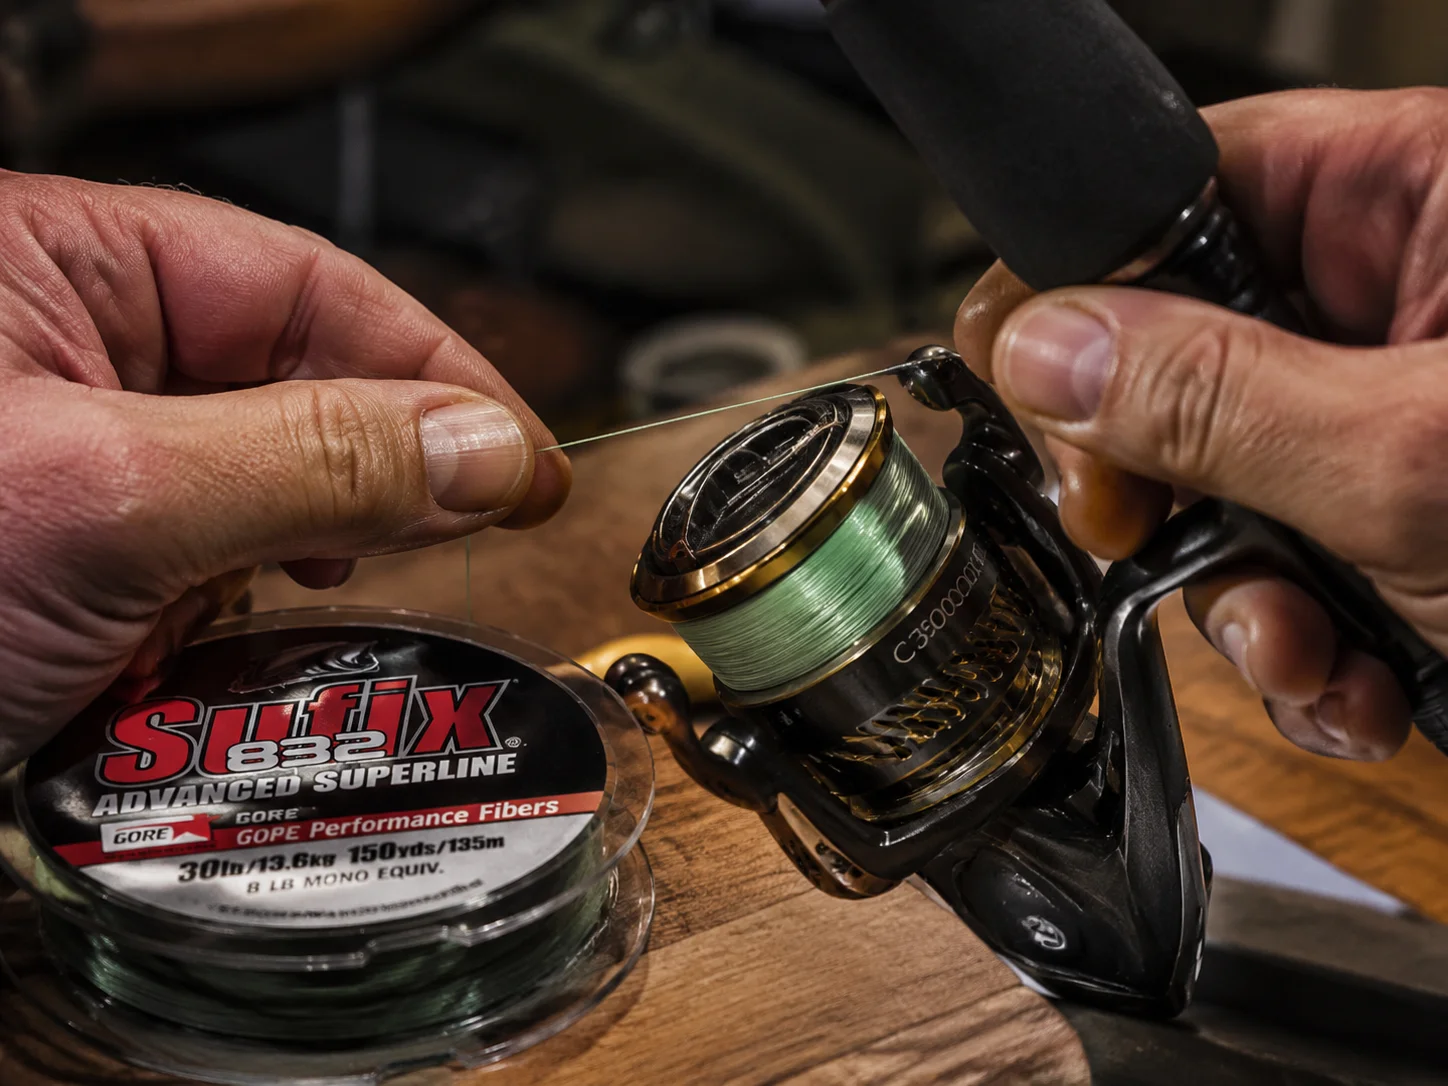
Improper spooling is responsible for a significant share of frustrating line problems, including line twist, wind knots, and poor casting distance. The spooling process requires attention to detail.
Steps to spool a spinning reel:
- Thread the line through all rod guides from tip to butt, then through the reel’s line roller.
- Tie the line to the spool using an arbor knot: loop the line around the spool, tie an overhand knot around the main line, then tie a second overhand knot in the tag end to act as a stopper. Cinch tight.
- Open the bail and hold the line spool flat (label facing up) on the floor. The line should come off the spool in the same rotational direction the reel spool turns when the bail is closed.
- Apply light pressure between thumb and forefinger while cranking. Fill the spool to within 1/8 inch of the spool lip, underfilling causes short casts; overfilling causes tangles.
Preventing line twist: If the line begins to loop or curl during spooling, flip the line spool over. The twist will immediately reverse direction. Continue spooling with the corrected orientation.
For baitcasting reels, the process is simpler because the spool rotates during retrieval, naturally aligning with the line spool. Feed line directly and fill to approximately 1/8 inch from the spool edge.
5. Attach a Leader (When Necessary)
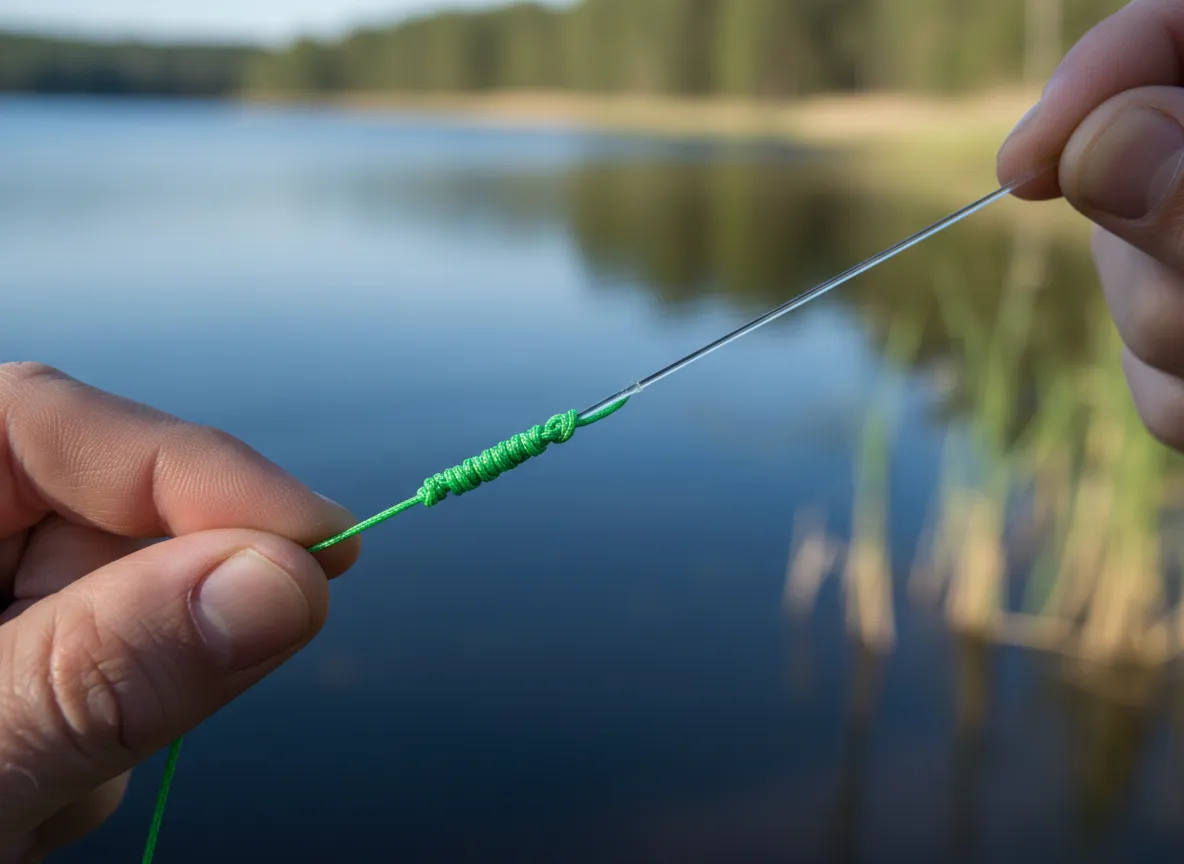
A leader is a short length of line, typically 12 to 36 inches, tied between the main line and the terminal tackle. Leaders serve several purposes depending on the situation.
Reasons to use a leader:
- Abrasion resistance: In rocky environments or around structure, a heavier fluorocarbon leader protects against line abrasion where the main line would otherwise be cut.
- Stealth: When using high-visibility braid as a main line, a clear fluorocarbon leader prevents fish from seeing the line near the bait.
- Shock absorption: In saltwater fishing, a short heavy monofilament leader absorbs the initial shock of a hard-striking fish.
- Toothy fish: A short wire leader prevents bite-offs from pike, muskie, and barracuda.
Connecting leader to main line:
The most reliable connections are the Double Uni Knot and the FG Knot. The FG Knot creates a slimmer connection that passes through rod guides more smoothly, making it the preferred choice for braid-to-fluorocarbon connections on spinning gear.
6. Select the Right Terminal Tackle
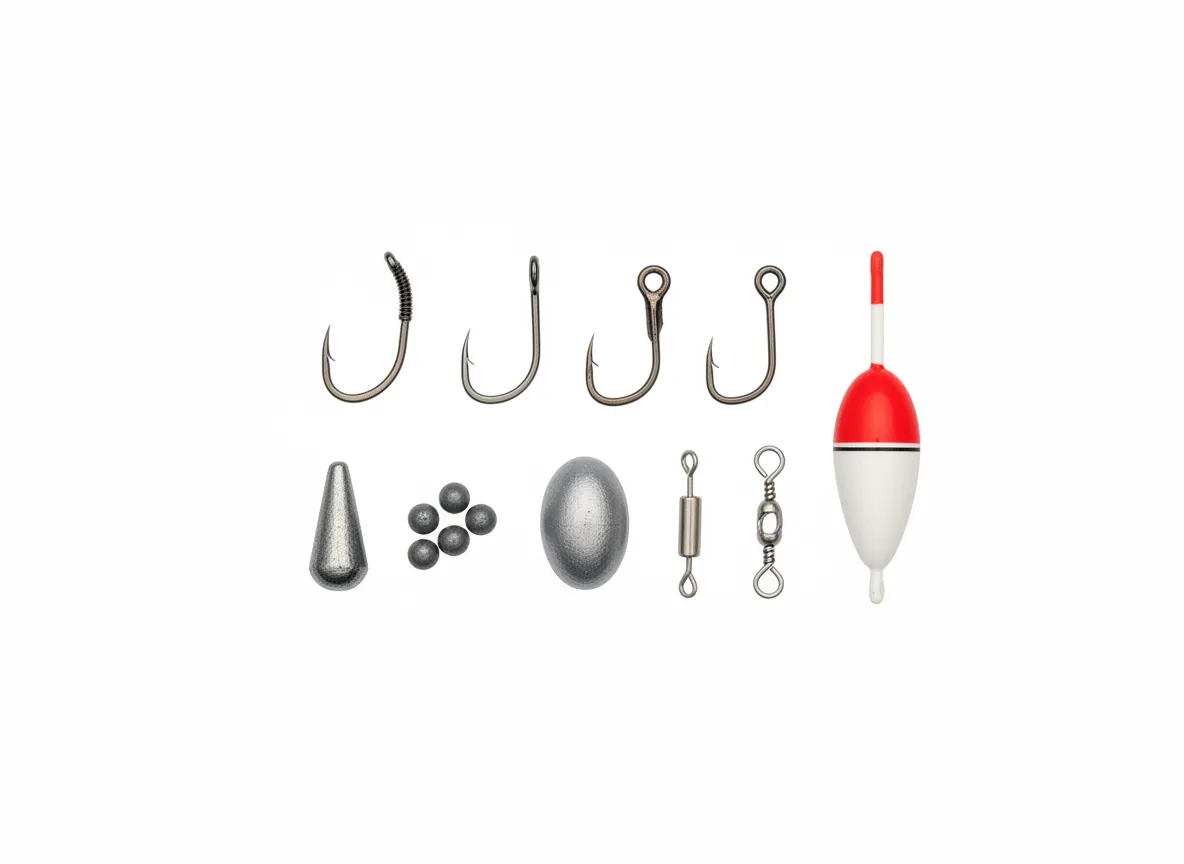
Terminal tackle, the hooks, weights, swivels, and floats at the business end of the rig, must be chosen with the target species, water depth, current, and presentation style in mind.
Hooks:
Hook size is counterintuitive: smaller numbers indicate larger hooks in the standard range (sizes 1 through 32), while an “aught” system (1/0, 2/0, 3/0, etc.) increases in size as the number increases. Match hook size to bait size, not fish size. A large hook on a small bait produces unnatural presentation and reduces strikes.
Hook styles and applications:
| Hook Style | Best Application |
|---|---|
| Offset worm hook | Soft plastic worms, creature baits |
| EWG (Extra Wide Gap) | Bulky soft plastics, beaver-style baits |
| Aberdeen hook | Live minnows, light wire for panfish |
| Circle hook | Live bait, catch-and-release, bottom rigs |
| Treble hook | Crankbaits, topwater lures |
Weights and sinkers:
- Split shot: Pinched onto the line above the hook for subtle depth control in light presentations.
- Bullet weight: Threaded onto the line before the hook for Texas-rigged soft plastics; allows weedless presentations in heavy cover.
- Drop shot weight: Attached at the tag end of the line below the hook in a drop shot rig.
- Egg sinker: Slides freely on the line for Carolina rigs and live-bait bottom fishing.
Swivels: Use barrel swivels to prevent line twist when using spinners or live bait that rotates. Avoid oversized swivels, which can spook fish in clear water.
Floats/Bobbers: A slip float allows the bait to suspend at a precise depth and is far more sensitive than a fixed clip-on bobber. Set the float stop at the desired depth before threading the float onto the line.
7. Tie Strong, Reliable Knots
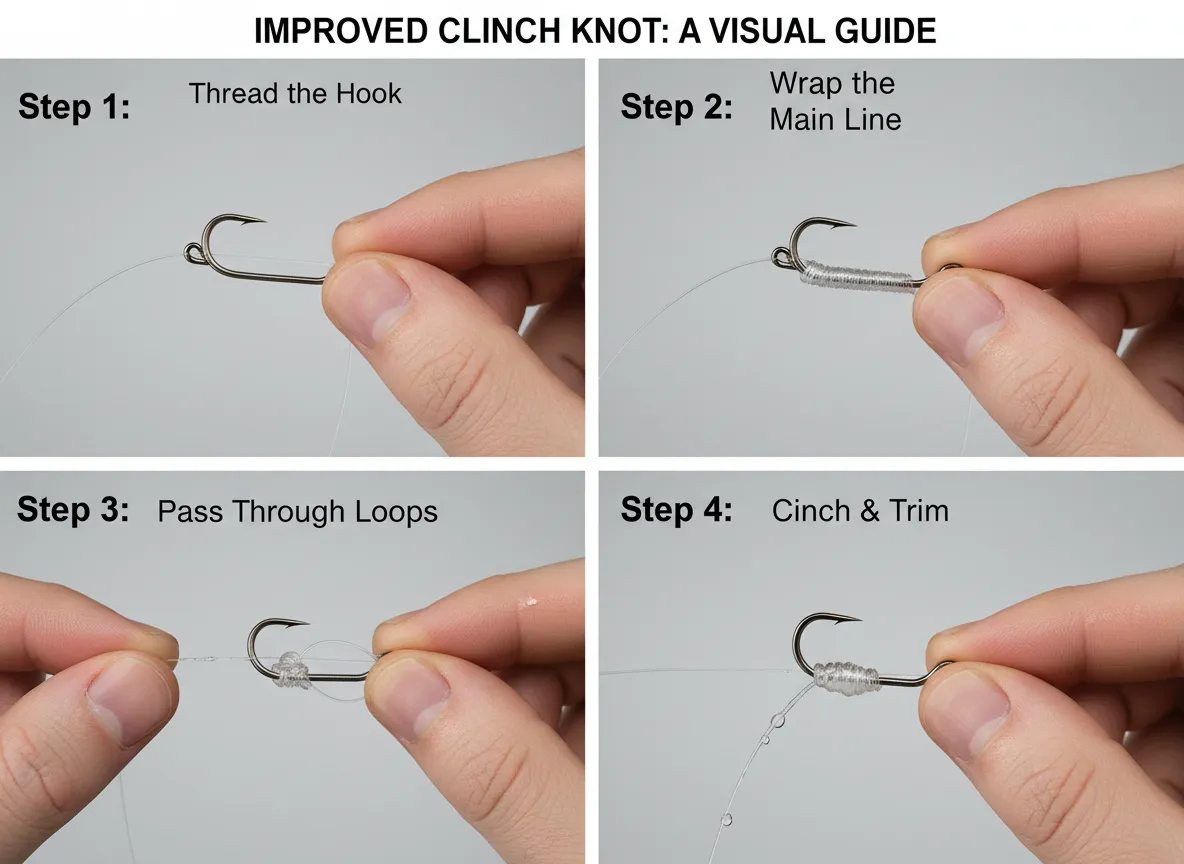
No element of the 8 essential steps for the perfect fishing rod setup and rig is more directly responsible for lost fish than knot failure. A knot is the weakest link in any rig, and a poorly tied knot can reduce line strength by 30 to 50 percent.
The most important fishing knots every angler should master:
Improved Clinch Knot, The standard for attaching hooks, lures, and swivels to monofilament or fluorocarbon.
- Thread 6 inches of line through the hook eye.
- Wrap the tag end around the main line 5-7 times.
- Pass the tag end through the small loop near the eye, then through the large loop just created.
- Wet the knot and pull tight. Trim the tag end.
Palomar Knot, Stronger than the improved clinch on braided line; also excellent for fluorocarbon.
- Double 6 inches of line and pass the loop through the hook eye.
- Tie a loose overhand knot with the doubled line.
- Pass the hook through the loop.
- Wet and cinch tight. Trim.
Uni Knot, Versatile; used for attaching line to hooks, joining two lines, and attaching line to the reel spool.
Knot strength tips:
- Always wet the knot before cinching to reduce friction heat that weakens line.
- Pull the knot tight with steady, even pressure rather than a sharp jerk.
- Test every knot with a firm pull before casting.
- Retie after catching a fish or after any snag that stressed the line.
8. Adjust Drag, Check the Rig, and Make a Test Cast
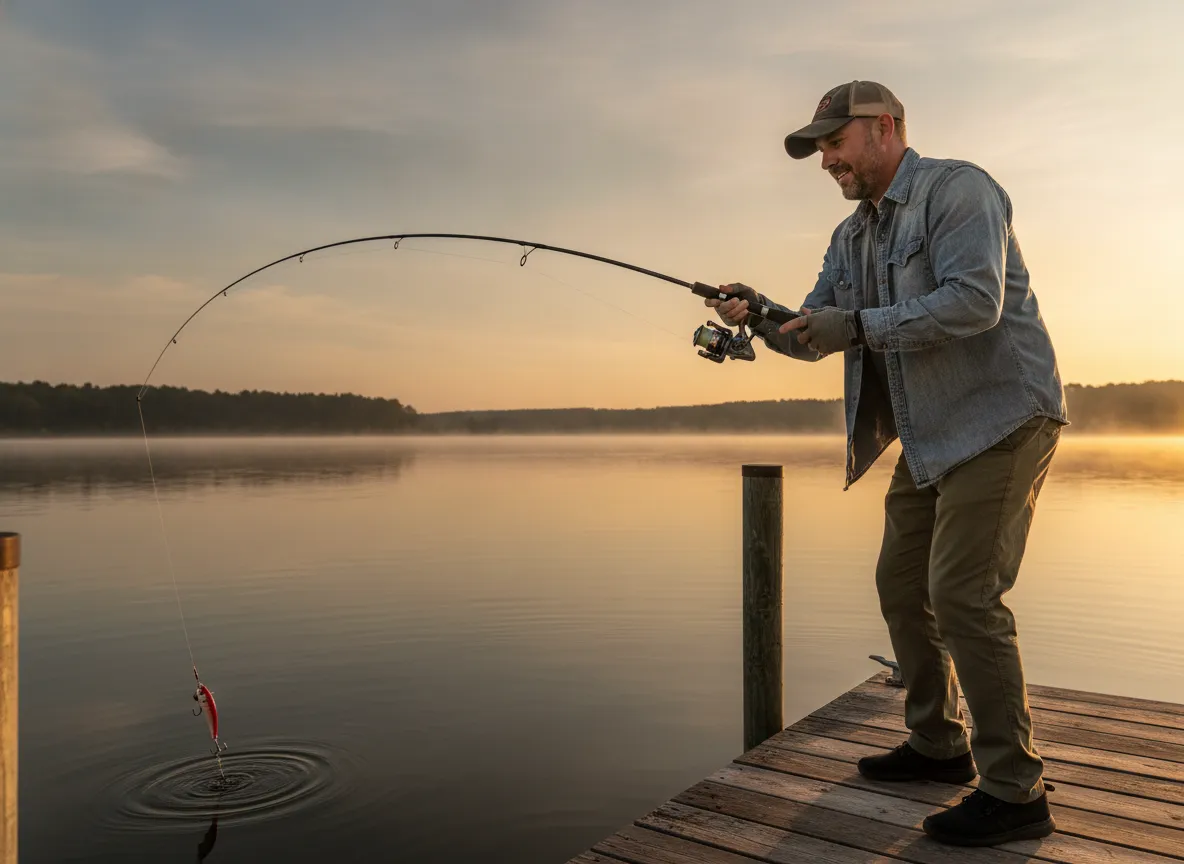
The final step before fishing is a systematic check of the entire setup. Skipping this step is how anglers lose their first fish of the day to a preventable equipment failure.
Setting the drag:
The drag system allows line to release under pressure rather than breaking. A general rule: set the drag to approximately one-third of the line’s rated breaking strength. For 12-pound test line, set drag so it releases at roughly 4 pounds of pressure.
To set drag without a scale: pull line from the reel by hand. It should release with firm, steady resistance, not freely, and not so tight that the rod doubles over before line releases.
Pre-cast checklist:
- All rod guides are aligned in a straight line from reel to tip.
- Line runs through every guide without skipping any.
- The knot at the hook or lure is seated correctly with no gaps or loops.
- The hook point is sharp (drag it lightly across a fingernail, it should catch, not slide).
- The lure or bait is attached straight, not canted to one side (a crooked lure will spin and twist the line).
- The reel bail (on spinning reels) opens and closes smoothly.
The test cast:
Make the first cast a short, controlled flip to a nearby target. Watch the line for any signs of twist, watch the lure action in the water, and confirm the drag engages properly. Adjust as needed before making a full-distance cast.
Common Mistakes to Avoid in Fishing Rod Setup
Even experienced anglers fall into recurring setup errors. Awareness of these mistakes accelerates improvement.
Overfilling or underfilling the reel spool. Both cause problems. Overfilling creates line spillage and tangles; underfilling reduces casting distance significantly.
Using line that exceeds the rod’s rating. Heavy line on a light rod reduces casting performance and can damage the blank under load.
Neglecting to wet knots before cinching. Dry friction during knot tightening creates microscopic damage in the line that weakens the connection.
Using dull hooks. A dull hook fails to penetrate on the hookset. Check sharpness before every session and replace hooks that drag across a fingernail without catching.
Mismatching reel size to rod. A large, heavy reel on a light rod unbalances the outfit and reduces sensitivity. Reel size should complement rod weight.
Skipping the leader in clear water. In highly pressured fisheries with clear water, a visible main line near the bait dramatically reduces strikes. A fluorocarbon leader is inexpensive insurance.
Quick Reference: Matching Gear to Common Fishing Scenarios
| Target Species | Rod Power/Action | Line Type | Key Terminal Tackle |
|---|---|---|---|
| Largemouth Bass | Medium-heavy / Fast | Braid + fluoro leader | Offset hook, bullet weight |
| Rainbow Trout | Light / Moderate | 4-6 lb mono or fluoro | Small hooks, split shot |
| Walleye | Medium / Fast | Braid + fluoro leader | Jig head, live bait hook |
| Redfish (Inshore) | Medium-heavy / Moderate-fast | 20-30 lb braid + fluoro | Circle hook, egg sinker |
| Panfish / Bluegill | Ultra-light / Moderate | 4 lb mono | Small Aberdeen hook, slip float |
Conclusion
Mastering the 8 essential steps for the perfect fishing rod setup and rig is not a one-time event, it is a repeatable process that becomes second nature with practice. Each step builds on the one before it: the right rod informs the reel choice, the reel choice guides the line selection, the line selection determines the knot, and the knot connects to terminal tackle that must suit the target species and conditions.
Actionable next steps for anglers at every level:
- Audit the current tackle box. Check line age (replace monofilament older than 12 months), inspect hook points for sharpness, and verify that rod-and-reel combinations are properly matched.
- Practice the Improved Clinch Knot and Palomar Knot until both can be tied correctly in low light without looking, conditions that frequently occur on early-morning fishing trips.
- Before the next fishing session, run through the pre-cast checklist in Step 8. Catching a setup error at home is far less costly than discovering it when a trophy fish is on the line.
- Experiment with one new rig or technique per outing. Systematic experimentation, grounded in a solid setup foundation, is how anglers expand their skills and consistently find fish across changing seasons and conditions.
A well-assembled rod and rig is not just equipment, it is confidence. Walk to the water knowing the gear is ready, and the focus shifts entirely to reading the water and presenting the bait where fish are feeding.